GAMEIN5D - Bigger Inside
  • HOME
  • PROJECTS BLOG
  • GAMEIN5D 101
  • Kick starter
  • CONTACT
  • HOME
  • PROJECTS BLOG
  • GAMEIN5D 101
  • Kick starter
  • CONTACT

The projects

(GAMEIN5D in action)

Scale Model World

12/11/2016

0 Comments

 
An awesome day at IPMS2016 which seemed even bigger, busier and better than last year. Just a quick thank you to everyone who dropped by my stand to say hello. It was so nice to meet you all and thanks for all the positive comments and feedback. Here's my two "helpers".
Picture
A special thank you to the very nice people at RetroKit who were very nice to me as a total newbie to the convention scene. I'll be back tomorrow, looking forward to it!
0 Comments

Textures revisited

6/11/2016

0 Comments

 
Following on from a conversation on the fine scale modeller forum, I was ordered a tub of the vallejo grey sand texture. It looks like good stuff but at £8 a pop I couldn't use it on the scale of things I'm building at the moment. So ... I tried to recreate a similar thing myself and made a video of it.
I hope you like it, I'll be using the stuff myself on a build soon.
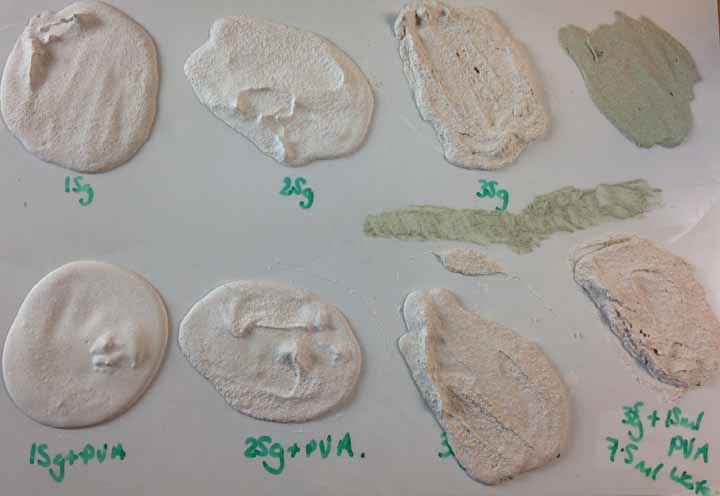
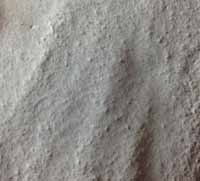
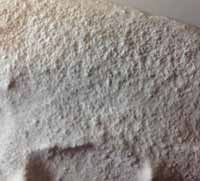
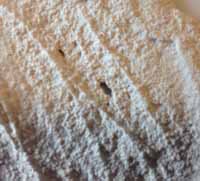
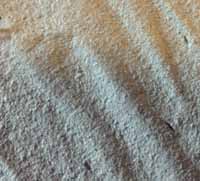
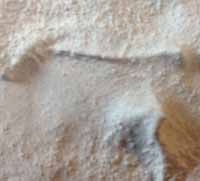
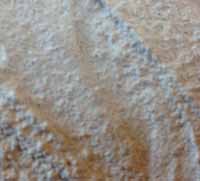
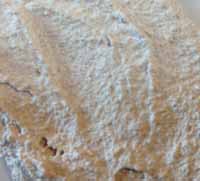
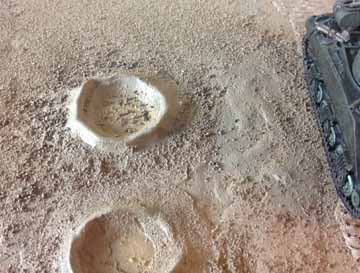
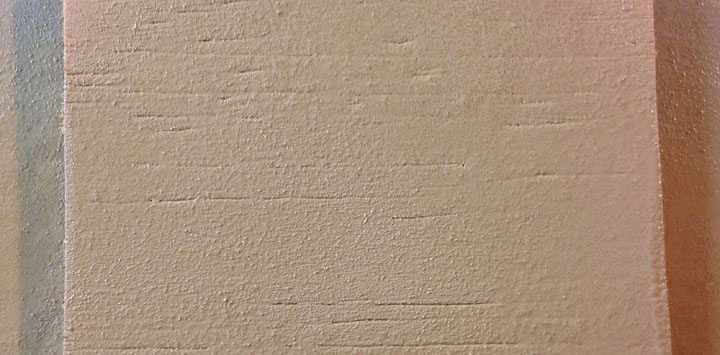
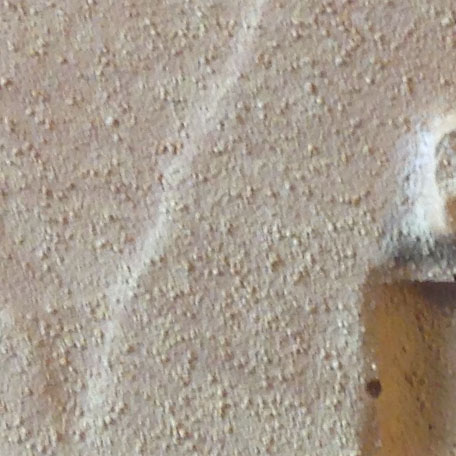
In the spirit of completion and fairness I should say that the Vallejo earth texture was fully dry by the next morning and gave a really nice finish. It's a bit spongy when fully dry but otherwise the texture (see below) if very good.
The final recipe was:
20g plaster of paris
10g water
15 - 35g of fine sand
2.5ml of pva glue

That said, as long as you have enough water to get the plaster going I suspect most mixes will work.
Picture
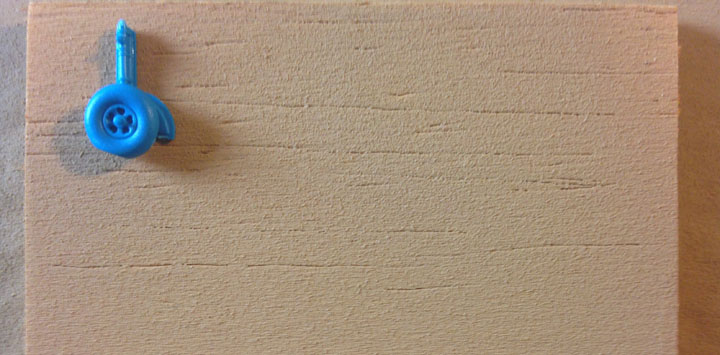
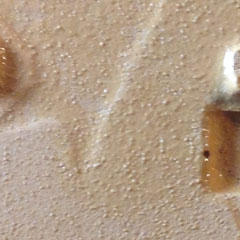
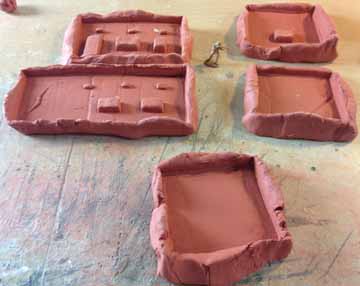
All of the plaster-based mixes dried within about 45 minutes, even the last one which had a lot more pva in it. I took some close-up pictures (below) so you can see the difference between them. Personally I think I could find a use for all of these depending on what I was trying to make and at what scale - and it was some geeky fun getting it done too - always a good thing.
0 Comments

Desert diorama - building an extension

30/10/2016

0 Comments

 
According to my boys, my North African diorama needed to be bigger so they can have "bigger battles" on it - which is odd, because I haven't let them near it yet - clearly they have plans. Also, I need more stuff to show at IPMS2016 which has hoved into view like a great white at a beach party. So time for a (hopefully) quick build of an extension board. 
I used two GAMEIN5D boards and this time I used the A shape. The main reason for that being that's what I have ready. Here are the two boards side by side. It's the same size as North Africa 2 (720mm by 540mm), so the whole North African board will be 1080mm by 720mm, which is big enough.
Picture
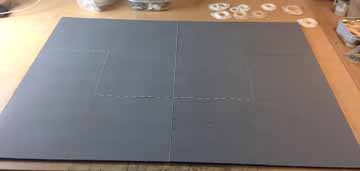
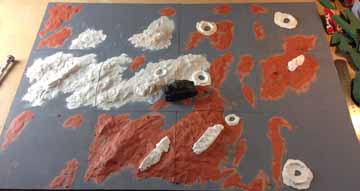
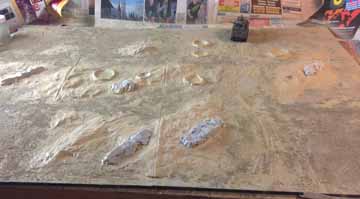
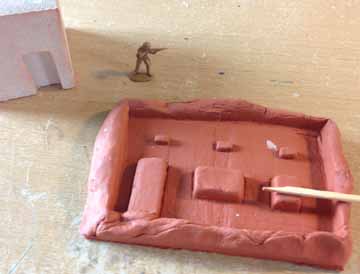
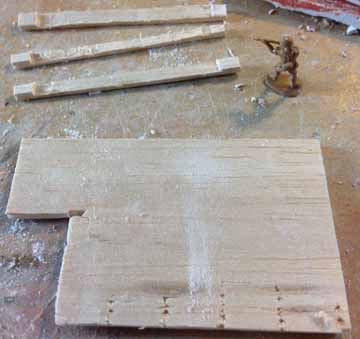
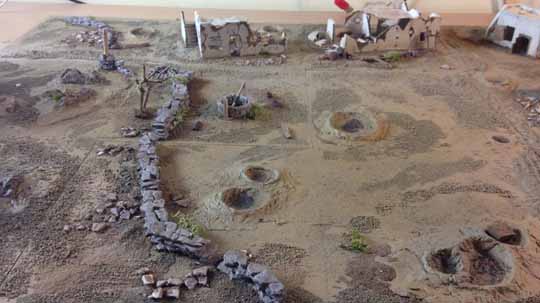
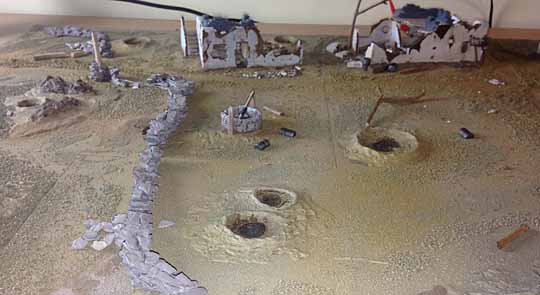
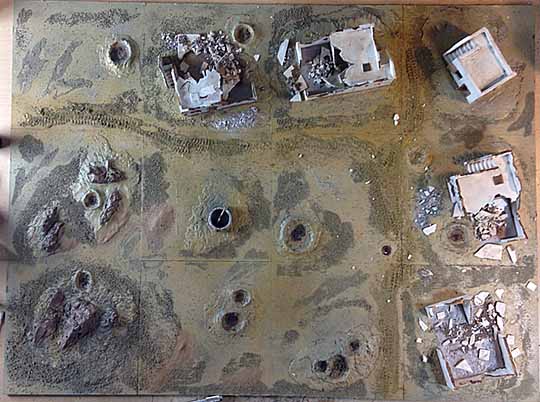
As you can see at the top, I've got some craters ready already. Still working on the crater obsession.
Picture
So here's the board a frenetic half an hour later. Sometimes I procrastinate too much and never get started. Here I think it's fair to say I didn't have that problem, infact some procrastination at this point would possibly have saved me a whole lot of time.
The clay dried, the clay shrank and the boards curled up like a ticklish hedgehog. However, if we gloss over the lost days with the boards clamped and weighted down and the self recrimination we can skip to this, which is an improvement, try not to notice the big gaps.
Picture
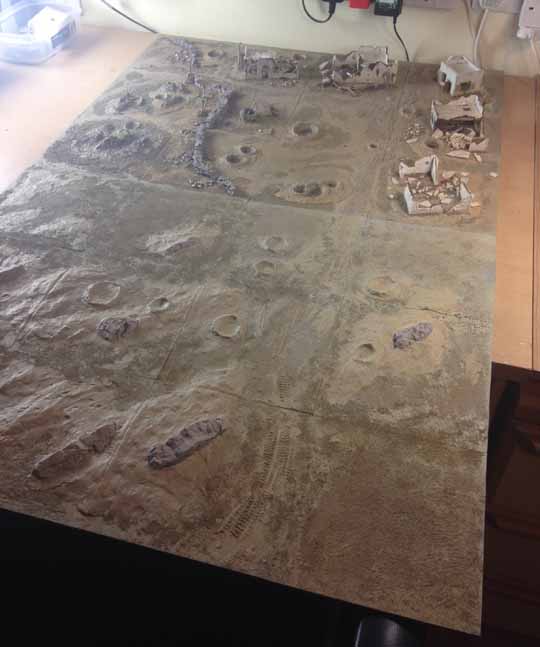
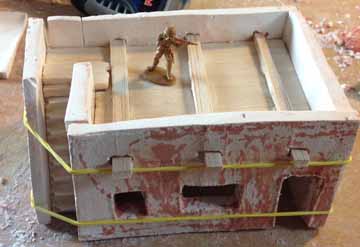
Next time I'll make the terrain units and let them dry before putting them on the board. As you can see I've got some colour down, matt khaki camo paint from Halfords.
Picture
Next I used green stuff to work on the gaps, lots of filling and sanding to get the fit right again. I also got some layers of different ballasts and sand down with pva to build up the surface, Then a few layers of a mix of vallejo iraqi sand and stone grey. Starting to try and match the other board's colour. Speaking of the other board ....
 I'm going to need a bigger ... desk. Here are the two boards together.

Colours close to matching here, this board is definitely a gaming base so I won't go mad with the ornamentation but the textures and the colours still need some work at this stage.

The rocky outcrops got some coats of dheneb stone and stone grey with some very thin washes (watered down with the brush water) of agrax earthshade.

I also wanted to break up the look of the craters a bit - too smooth looking.
Picture
Picture
Here I've just sprinkled some ballast that I mixed with paint and sand and allowed to dry. Once dry I break it up. Sprinkled around the craters, trying to work away from the craters gives an impression (I hope) of debris from the explosion.

If I think it looks ok I pva it down before I forgot about it, sigh, and blow the stuff all over the board.

​So this is where it's at now. For now it's done. I'll finish the buildings, build some walls and get those finished before I return to this and probably add some vegetation and faff with colour some more.
Picture
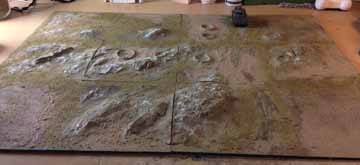
I'll finish this post with an aerial view - haven't done one for a while.
Picture
0 Comments

Textured paint

29/10/2016

0 Comments

 
Here's something that didn't exist when I first started making models - textured paint. I found this is in Halfords while getting some primer and after all the PVA and sand work I've done this sounded interesting.
Just to start with I thought I'd see how it looked when sprayed on a few different surfaces. 
Picture
Plaster
WOOD
cardboard
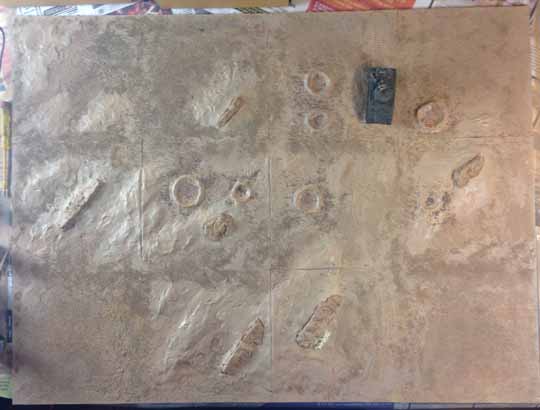
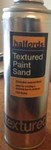
The pictures above were taken seconds after spraying. First impressions are OK, it's basically paint with sand in it (not sure what I was expecting). It sprayed OK, smells awful. The sand particles are very fine and you don't get a really high density of sand particles after one coat. The can recommends several light coats and 10 - 15 minutes between coats.
In the interest of fairness, I also re-coated after the first coat was dry, just to see how much difference it might make. The results are down below. A definite improvement, I think.
Picture
The picture on the left is a close up of the texture on the building after one coat and two coats on the right.

Can anyone name the kit the bluewheel comes from?
Picture
In summary - it's ok, a bit interesting. I do like the texture but even after this one experiment the can is definitely lighter - so I don't think it'll go that far, especially if several coats are needed. I think I'll try it on my current project which is an extension to my previous North African board. I can see it working well over an already based and sanded and probably primed terrain. I think it might also add interest to buildings.

Of course, Halfords sells car paints, this was in the car paint section - none of this explains why you would spray this stuff on your car?
0 Comments

1:72 scale desert buildings

29/10/2016

0 Comments

 
This post is about how I build some of the buildings in my North African dioramas. Which I suspect is a pretty low tech, low skill method - but it suits my "do it and see how bad it ends up" approach to most things.
So ... I got this little resin building off ebay ages ago - and I was a little underwhelmed. But it only cost £3 so no real worries there.
Picture
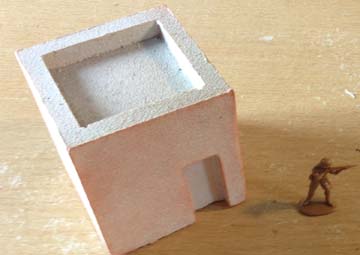
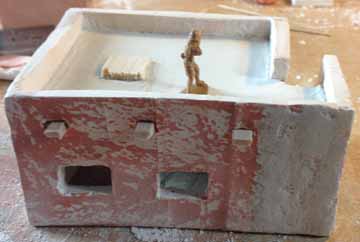
Also, it's a decent size for 1:72 and gave me a nice feel for the proportions, it also had a nice texture on the outside, but that said, it's a pretty boring building.
Picture
This is a blob of modelling clay, rolled out flat and then I've pressed the resin building into the clay to make a mold. I've done this 3 times, overlapping to make a wider building. Then I added rectangle of clay for windows, and some small rectangles for wooden beams to support the ceiling. ​I trimmed a matchstick to make a little tool and just pushed it gently into the clay around the doors and windows to suggest a frame. This is the front of the building.

I then repeated the process several times, to make a back, two sides and an outer wall as this building will have a little staircase going on to the roof. That's why the rear wall is a lot wider - needs room for the staircase. Not much measuring here (which I regret later) but it's more fun to crack-on and do it by eye. That's what I told myself anyway. 
​Next the plaster - great fun - although the damn stuff starts setting really quickly.
Picture
Picture
I drop the molds from a small height a few times to level the plaster. I make sure it's as level as possible, otherwise it's hours of sanding down the backs, and the plaster cracking, or sanding my fingers.
I use plaster of paris, because it's cheap. I keep looking at the hydrocal and thinking "can it really be 5 times better". So far and going with with no - cheap and cheerful.
They took about an hour to dry enough so that they'll come out of the molds. Also, in that time the modelling clay can be reused for another mold (but probably only one more).
Here they are straight out of the mold - looking awful. A bit of clean up with sand paper is now needed, looking for straight sides. The stairs came from a spare I'd made from an
Picture
Amera Plastics molding of the Airfix desert outpost in 1:72. I've used their molds already to make some of the buildings in a previous piece. Now I sanded the edges, and the backs, and my fingers (just a little).
Picture
Picture
Soon they were looking a bit better and with the nice straight, sanded edges it was time for a bit of dry fitting. If only I'd measured stuff! The next hour or so wasn't so good but we'll skip over the 1000 times the thing fell over, or I cracked a bit off, or a large piece broke or I dived in and cut it down too much and had to stick bits back on. 
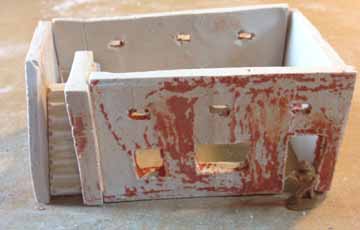
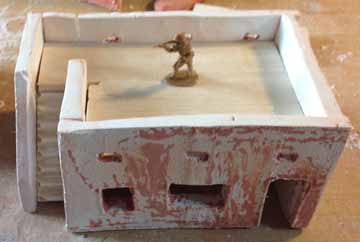
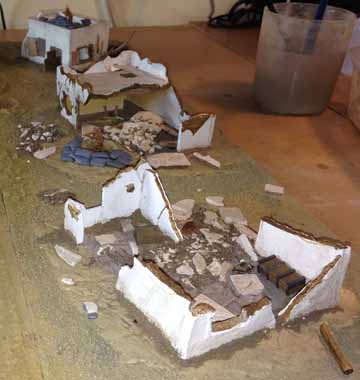
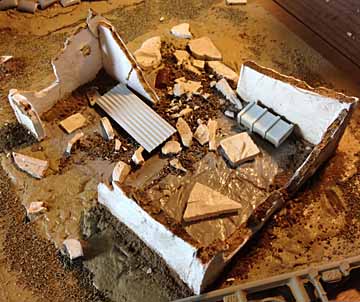
Let's imagine instead; that it all went swimmingly, you can imagine some music playing quietly in the back ground if you like. The whole thing collapsed about 1 second after I took this photo. So I took the hint and just glued some of the pieces together.
Super glue works quite well on plaster, which has always surprised me. Not as good as on fingers, but pretty good.

So, onto the roof. I cut out a rough roof shape and then trimmed it down until it fitted pretty well. This is just 3mm balsa wood which is so easy to cut. Here it is fitted into place. I also made some beams.
Picture
Picture
Here's the roof fitted into position, there's a lot of white tack inside holding it all together. As you can see the holes for the beams are above the level of the roof - genius - did I have a good reason for not measuring anything?
So, I thought what if I just use the wooden roof as a base and pour over plaster to give a plaster roof instead? So here's the beams (above the roof they're "supporting"), I also needed an extra step and a support for where the wooden hatch is going to be.
Picture
Picture
Then I glued the the beams to the roof, put the front and back walls on and glued the rest together. Some elastic bands held it all in place (wish I'd thought of them earlier).

Then I left it to dry properly and settle down, plus I'd been working on it for hours and was going slightly crazy. Back away from the small building - let it go.
****  brief interlude while I went of and did stuff like being a parent and housework  ****
Plaster time! I'd have liked a photo of the plaster going in but I only have two hands and for some reason the plaster sets like a ... well, a really, really inconvenient fast thing. Which is a nightmare if you mess up.

I didn't mix quite enough plaster though so you can see the beams but I was well chuffed with this - it looks like a proper house and everything.
Picture
Here's the view from the back after I'd added a little extra plaster - I made this thinner so it would run better, it still set fine. I also did some 1:72 scale plastering around any cracks and joins both inside and out. My 1:72 scale plastering is just as bad as my real plastering - but is easier to sand neat.
Picture
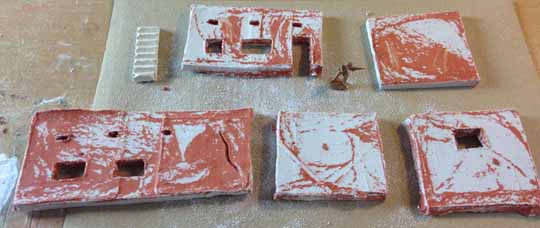
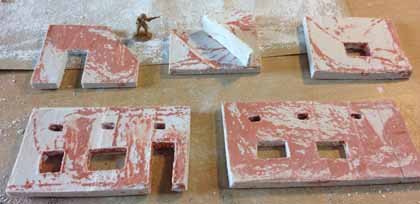
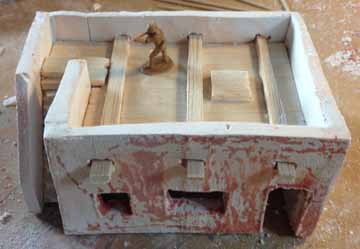
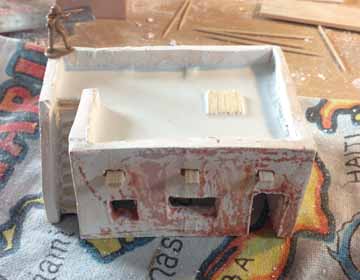
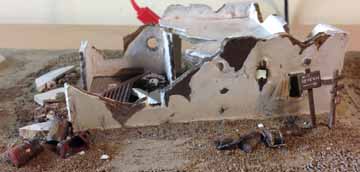
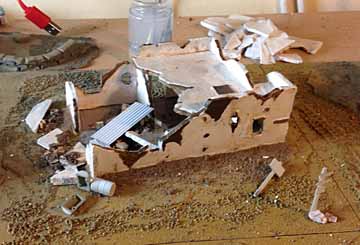
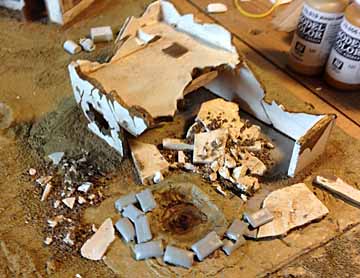
And that was mostly that. I faffed around a bit plastering and sanding bits I wasn't happy with but really it just needed time to dry properly. While the memory of all my mistakes was still fresh I did another one using the same molds but didn't cut too much off this time so it's a bit bigger, for the second one I tried putting a few bullet holes in the walls, I'm not convinced. When they were both dry I primed them, then they had a coat of white, vallejo off-white and then some very thin wash coats. They're not finished but they'll get more attention later, if they're well behaved, and if/when they get put into a project. Here's some photos of them both. I hope you like them, they were fun to build and the second one didn't take more than a few hours and a few more grey hairs.
0 Comments

Airfix Sherman

25/10/2016

0 Comments

 
He's had a cameo in a few shots, but I wanted to share some shots of my Airfix Sherman. I think this was the first model I made that I actually thought was OK, when I started getting back into making models. Unfortunately, I snapped of the aerial yesterday and now I've lost it. I'll need to stretch some sprue and make another. 
Picture
Picture
This kit is actually from the BattleFront set, but I don't suppose it's much different from the boxed kit. The Figure is actually one of the figures from the set, I heated the arms and added a machine gun from another figure. It's my first attempt at modifying a figure - I suspect that's pretty obvious.
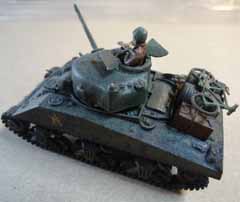
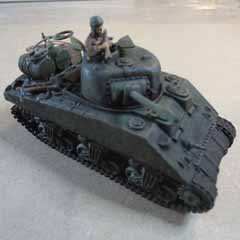
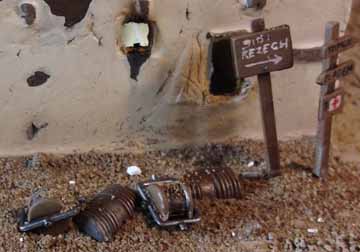
The barrels, bike and other equipment all came from the BattleFront set as well, the "rope" is just some cotton twine I use when fletching arrows. I've just subscribed to Fine Scale Modeler - and I might be brave and upload some pictures there - but a lot of the stuff on there is amazing. Hopefully the bigger boys won't pick on me.
Picture
Picture
0 Comments

A Time lapse Diorama video

23/10/2016

0 Comments

 
For better or worse I have uploaded my first ever video to youtube. Shame about the weird "glitch of blackness" which I'll try and fix. I'm also working on an extension to this board to make an even bigger gaming area. I've done a fair bit so the next few posts will be catching up with where I am with that.
If they video doesn't work for some reason you can always go to my youtube channel, with it's laughably small content of ... 1 video. Although I suspect one or more of my sons creations will appear on there before too long.
0 Comments

The First GAMEIN5D - North Africa 1

14/10/2016

0 Comments

 
I should probably have made this my first post, but I never got around to sorting the photos out. This also contains a lot of stuff that I did ages ago, when I was even worse at modelling than know (I know, hard to believe but true). And the boys have been trashing it for ages.
When I was little I had a great collection of soldiers, mostly Airfix, but my favourites were the Matchbox 8th Army and the Afrika Korps. I remember buying the Afrika Korps box from Masham steam fair, some time in the early 80s I guess. I was well chuffed, but also just slightly confused as to why anyone would name soldiers after dead bodies.
Picture
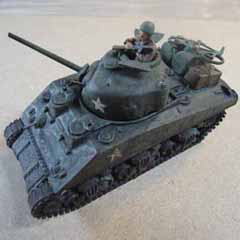
My other favourite set was the Desert Combat Pack, an awesome Christmas present. I played with that for endless hours. When my own kids were old enough, I gave them my old collection (like I had a choice, they also got all my Matchbox cars). Coincidentally, around this time Airfix had reissued the 1:32 desert outpost and I thought it would make a great present to make it and build a gaming board around it. There were several other toy-related issues at the time too.
  1. Toy soldiers everywhere.
  2. Rubbish plastic toy boxes.
  3. It's so much more fun to play on a proper game board.
  4. Gaming boards at 1:32 would be quite big - we have no space.
  5. Nostalgia overload.
So I set about making a gaming board that would hold all the soliders and fold up nice and neatly into a toy box that wouldn't fall apart - hence the GAMEIN5D began.

Below are some pictures of the original version, which has been played to death with since it was first made.
Up until this point I was slowly getting back into making models. Something I'd done a lot as a kid and a teenager. Then not so much until middle age hoved into view.
I'd done a few planes and was trying to get better at everything so this project really made me learn quite fast - least-ways I made a lot of mistakes, which is almost like learning.
As you can see, I still have the original Panzer and armoured car, and one pill box. I also did complete the desert outpost and the 1:32 airfix strong point (not exactly deserty but the boys don't mind) I'll try and add some photos of those later too.
This project came with some serious baggage though. I loved those Matchbox troops and finally persuaded my parents to let me paint them. My Dad made models too so I set to work with his enamels ...
Many tears later, and a desperate (and sadly futile) ​attempt to get the hideous paint job removed, this Airfix soldier is a 30 years+ example of how bad I was at painting models as a kid. ​Worst of all, I'd ruined (to my mind) two of my beloved Matchbox soldiers.
Picture
Picture
So it was so pleasing to be able to have another go after all those years. And here they are. Now you might have a point if you say these are still rubbish, but my inner ten year old will
Picture
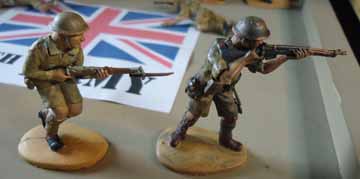
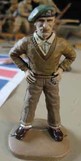
still be jumping up and down with joy. I do still think the guy on the left looks like he needs a wee though. And I painted Monty. He's not wearing thick white socks, that's white tack as he's currently in the repairs box, snapped off at the ankles.
Here are the rest of the gang. Tried to do at least one of each from the Airfix and Matchbox sets. I've also added a photo of the DAK soldiers too, as you can see, they are still not painted. Another addition to the Dad list of incomplete jobs and reasons for guilt.
Here are a few photos of the buildings, a little brick building and a weird bit of vegetation. It's all a bit ropey as I was even more of a novice then, than now but I had great fun doing all of this and my son absolutely loved it. He's played with it for hours. He even plays with them the same way I did, 35 years ago. ​
And that was the first GAMEIN5D, a gaming board that folds up into a box. It solved all the problems I was trying to solve, and scratched the nostalgia itch. But it totally got me back into making models - and trying to get much better at it.
0 Comments

Final post on this one (I promise)

9/10/2016

0 Comments

 
I've took, what I hope, are some better photos, and some photos of the whole thing folding away. That's the point of the GAMEIN5D idea, you can build something quite big, with quite a lot of vertical relief (buildings in this case) and it all folds up in a nice, stackable box. I should really put a nice design on the outside of the boxes, maybe for SMW. If you've read this whole diorama post, thanks for your time, and patience.
First some more photos of the details. Not much point in hiding the imperfections, but magnification is not always kind. I hope you notice I even went so far as to hang one of the kids sheets in the background. That's classy that is. And I couldn't face moving all the accumulated junk from my desk.
Finally here's the whole thing disappearing into some nice small boxes. Now I've got space to make even more.
0 Comments

It's a diorama Jim and something scary

7/10/2016

0 Comments

 
I'm calling it done, although I'll almost certainly keep faffing with it. And once the boys get hold of it, I'll be repairing it - a lot.  
Here's a few shots of the detail. I know what's out there and how amazing some the work you all can produce is, but for me, I'm quite pleased with how this turned out.
The thing with the close ups and slide show format though, is that I can't help but think of this as "diorama porn" and imagine some Barry White  in the back-ground.
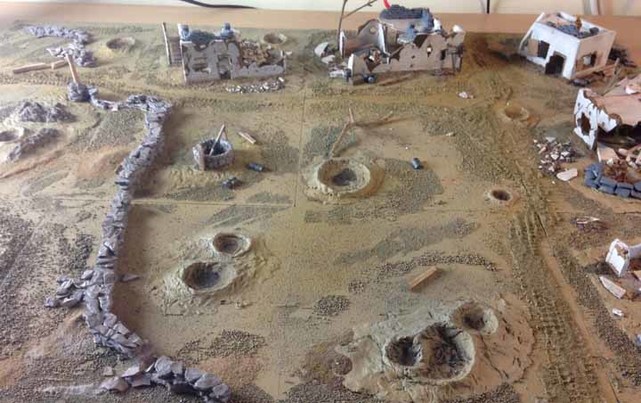
The "something scary" is that I've got a stall at Scale Model World in Telford in November. I'll be showing off the GAMEIN5D idea, trying to promote my Kick Starter, and using this model (plus some others) as an example of what you can do. Please come and say hi. I suppose I should show it all folding up - that is after all the main point of the GAMEIN5D boards. First one final aerial shot, I think I'm finally getting the hang of them. I'm going to try and take some better final shots for one last post on this.
Picture
0 Comments

A bit of greenery

2/10/2016

1 Comment

 
Right from the start, I wanted a very arid look this this but I thought it needed a little vegetation. The bits of privet make pretty good trees, gluing bits of green lichen to them is a nightmare though. Superglue was useless - how can the damn stuff stick fingers do efficiently but won't stick anything else. I ended up using tiny amounts of contact cement and a cocktail stick. 
Picture
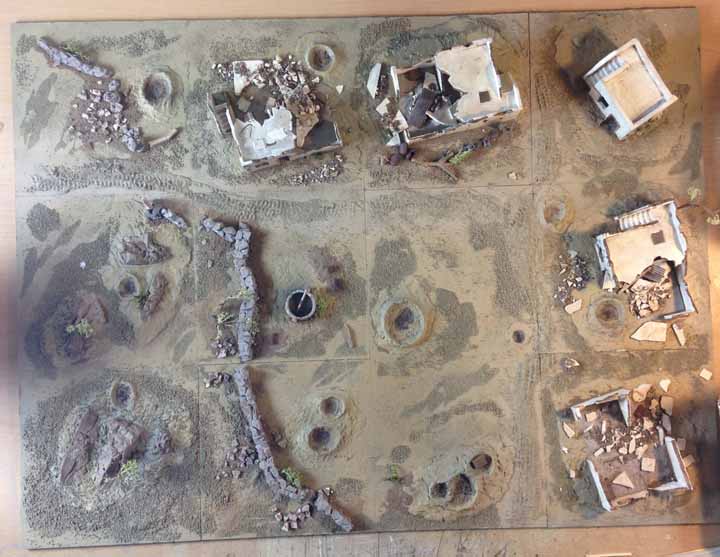
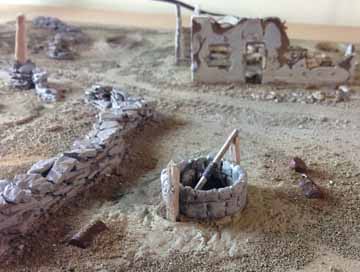
I used a small drill to go into the base around rocks or other places I thought a tree could take root. I also put a few tiny fragments of lichen around the bases of the buildings and around the well. I tired to keep everything to the right of objects to give a sense of consistency - almost like a prevailing wind - I guess. 
I also think I'm finally happy with the overall colour. I think I'm ready to call this. It's been fun but it's probably time to ease back on the obsession.
Picture
1 Comment

Where the devil is

1/10/2016

0 Comments

 
Details! I've glued that wall down in sections and added rubble next to the lower sections and gaps (rubble + ruin, as before). I tried to have some sense of narrative in that wall sections near craters were broken or at least damaged. The walls had some washes of brush water and agrax earthshade as well as some nuln oil carefully applied to cracks and along the sides.
I'm continuing to paint the small items, boxes, bits of timber etc. On the right here you can just make out the legs of an upturned, broken table, inside the building, it's sitting on a yellow "rug" made from a piece of patterned tissue. It seemed important at the time...
​
I wish the photo below had come out better, I was quite pleased with the little signs.
Picture
Picture
Picture
Picture
After reading around a but about Operation Crusader and having a look around North Africa on google maps, I've settled on somewhere south of Tobruk. Hence the signs pointing to Sidi Rezegh and El Adem.
Picture
The well's now finished too, except for a bit of vegetation perhaps. The barrels were painted bolt gun metal before two different rust pigments and a dark wash.

And I'm still working on the colour of the whole board, still got that weird greenish-orange, but it is slowly surrendering to multiple layers of very thin wash. I figure that way I can't do anything too catastrophic.
Picture
Picture
Nearly there, just a few more details, keep working on the colour and I'm almost done.
0 Comments

Walls are hard

30/9/2016

0 Comments

 
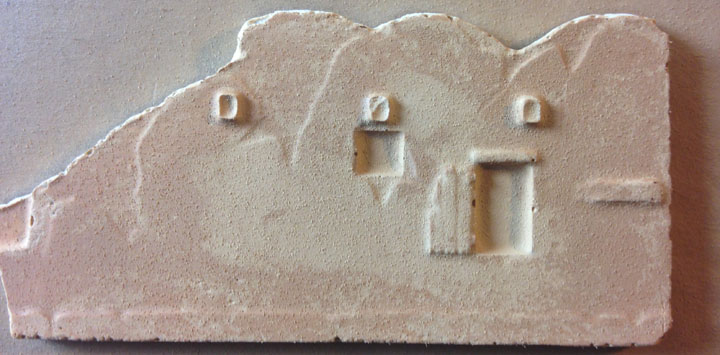
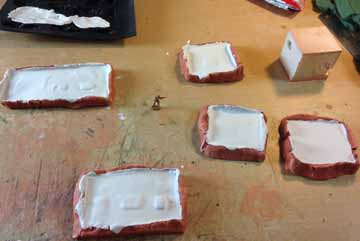
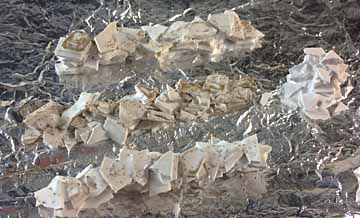
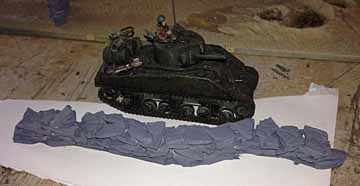
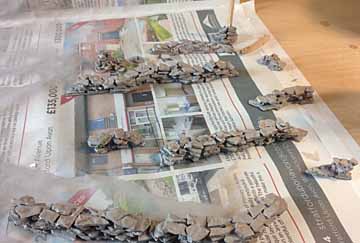
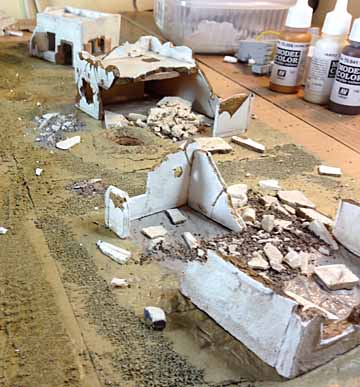
I think I will start at the end on this post. Below is the complete wall sections that I decided I needed. They are the end result of much failed experimentation and possibly the invention of some new swear words. The walls are not stuck down yet, just put in about the right place. I've no idea how everyone else builds walls but this is how I did it.
Picture
Fairly decisive failure to begin with - too much glue too early. Actually, this is well down the list of failures but pictures of me getting cross with Italeri's wall sections or getting covered in glue probably don't make for great blog posts (I may be wrong, I believe I have established my lack of expertise in these matters).
Picture
Picture
But I kept trying, there was something quite compulsive about trying to build a dry stone wall in miniature.
In the end; the method I settled on was the following. I don't for a second suggest anyone else should try this - there must be a better way. Or something on the TV.
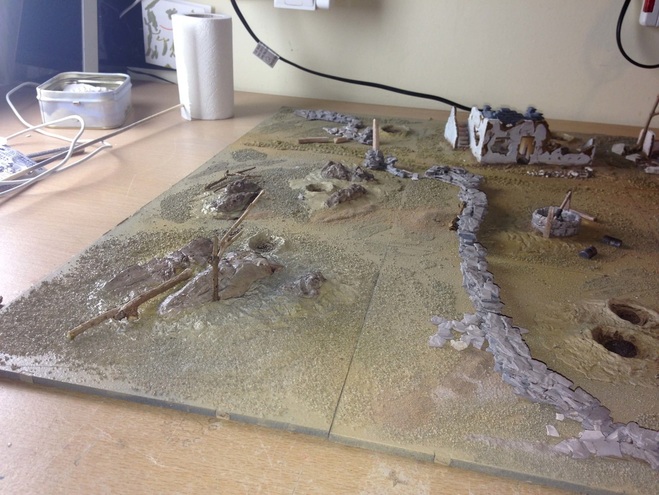
First I spread out a plaster mix about 2mm thick across a decent sized piece of kitchen foil. Once it's was dry I bashed it up, while it was tempting to unleash all that middle-aged angst and immolate it, I tried to be careful. I wanted pieces between 5 - 10mm. The foil puts a nice texture on one side which I put on top. Then the "fun" bit. I built small sections of wall on pieces of flat foil, and tried to make the pieces overlap. Like I said, quite fun really, which probably says far too much about me. And it amused my wife, who I suspect, after deciding it wasn't quite the final straw, filed it in the "future grounds for divorce" folder. 
On the last layer of wall I tried to use smaller pieces and lay them side-by -side to it looked like the wall was in two courses.
​Once the wall was built I dripped watered down PVA all over it. Again using a long needle nozzle to make sure every surface was wetted with glue. Once dry the foil peels off the bottom (mostly) and the walls are fairly robust.
Picture
Picture
I built various sections, different lengths and heights as I want some parts to be falling down. I also built some wall end sections which I want to put posts into. They got a spray with grey primer first and then I hand painted them with Golem Smeg. But they'll need more painting.
Then I plonked them on the base and took the photo. In between waiting for paint and plaster to dry I've also carried on painting the minor items, you can see some barrels, etc. on the big photo at the top too. And the privet's out of the oven, nicely dried out.
0 Comments

Minding the gaps and details

26/9/2016

0 Comments

 
Much like me, if I stay in place too long, buildings in the desert accumulate a good build up of rubbish around the edges. Also a bit of stuff around the bases of the buildings will allow the hiding of any remaining gaps, or anything else I don't like the look of. I applied a PVA + water solution (40/60ish) along the edges of the buildings with a needle nozzle so it doesn't slosh everywhere.
Picture
Picture
Then I sprinkled the remains of the finer bits of of ballast and sand left over from the rubble-isation (I can event words if I want to). It helped to blow gently towards the buildings so that the material built up in the right places. Then just repeat, I tried to use slightly finer particles towards the end. I think it worked better above, but not so good on the left. On the left I used too coarse a material - not for the first time.
Once dry, I wash over several times with the brush water, sometimes taking a bit out and darkening it if I run out of patience with how long it's taking. I've also started thinking about a few minor pieces, road signs, barrels and boxes, minor trash left lying around.
The sand bags are living dangerously. Little pieces of evil that are a nightmare to trim, don't stack and were clearly created with the sole purpose of making life difficult.
Picture
I've seen some awesome sand-bags created by other modelers, but for me they are definitely a work in progress. Also, I think the whole thing needs walls. Maybe walls will be easier than sand-bags.
0 Comments

I can see the pub from here

25/9/2016

1 Comment

 
Well, maybe not the pub, but possibly the end of this project. On a side note, I have actually been to the pub from the XXXX advert, it's in Oz, it's very cool and has (well had 14 years ago) a car from Mad Max 2 parked outside. I spent two weeks out there once (field work, not in the pub) and brought my wife (then fiancee) a stubby (beer bottle) holder, themed shot glass and a fridge magnet back as gifts (from a major silver mining region). And she still married me, bless her.
I took the plunge and glued the buildings down. They've had various washes with Agrax Earthshade over the browns and in some of the cracks and several washes of the water from the brush pot which sounds terrible but gives a really good dusty/dirty look to the surfaces with the same pigments I've used for the base and the buildings. So they look a little better.
I'm still working on the surface colours too but now I've got the buildings down it will force me to be more careful and think about whether I need to keep adding colour. Or I'll be here forever.
Picture
Also, any surfaces I think are too shiny or uniform have had a few wash coats to "knock back" the shine and produce some variation.
So, this "aerial" shot, again produced in partnership with being too short and teaching your children some new swear words because you didn't know they were in ear-shot, shows where I am now 
I'm still not happy with the surface colour in places, too orangey/green and the buildings need to be "blended in" to their surroundings. That means (for me) adding textures to the edges of the buildings so there are no gaps and they look like dust and sand has accumulated around the edges.
Picture
I also need to start thinking about finishing up with accessories, some sparse vegetation, scrubby trees, some discarded equipment and a couple of road signs I think. For the trees I've got some bits of privet drying out in the oven, that's not a phrase I've used before, it'd make a great euphemism for something - "I'm just drying out me privet in the oven".
1 Comment
<<Previous
Forward>>
    Picture

    Hello, I'm Jon. 

    I'm very much a learner model maker, especially dioramas, gaming surfaces, models and toy boxes for me and my children.

    I also invented the GAMEIN5D base boarding system which I'm trying to develop into something more.

    Archives

    March 2019
    January 2019
    December 2018
    April 2018
    January 2017
    December 2016
    November 2016
    October 2016
    September 2016
    August 2016

    Categories

    All
    28mm Lava Terrain
    28mm Ruined Abbey
    Bases For Miniatures
    Dioramas
    Etc.
    Hello
    North Africa 1
    North Africa 2
    Paint
    Tanks
    Tools
    Z230 Redoubt

    RSS Feed

Powered by Create your own unique website with customizable templates.