GAMEIN5D - Bigger Inside
  • HOME
  • PROJECTS BLOG
  • GAMEIN5D 101
  • Kick starter
  • CONTACT
  • HOME
  • PROJECTS BLOG
  • GAMEIN5D 101
  • Kick starter
  • CONTACT

The projects

(GAMEIN5D in action)

Z230 Redoubt - modifying and painting

5/1/2019

1 Comment

 
Right ... this is an attempt at a [quick] guide to how I modified and painted the Z230 Redoubt from Amera Plastic Mouldings that I used in my Lava Terrain . In this post most of  the pictures are in galleries, and you can hover over some pictures for a bit more information.
Here's the Redoubt after it has been trimmed  - this is best done with a large, sharp pair of scissors as the plastic is quite strong. As you can see in the images (right) the redoubt looks great "as is" with some battle damage but I wanted the damage to be a bit more severe and I wanted there to be more of it. I also wanted to remove the doors.
The next step was to attack the model, I used a combination of scissors, an exacto knife and a small drill to remove all the damaged areas and enlarge them. I also added many more shell and bullet holes, the latter in a strafing pattern across the model. Finally I cut cracks and removed corners from anywhere where the model was going to sit on cracks in the terrain.

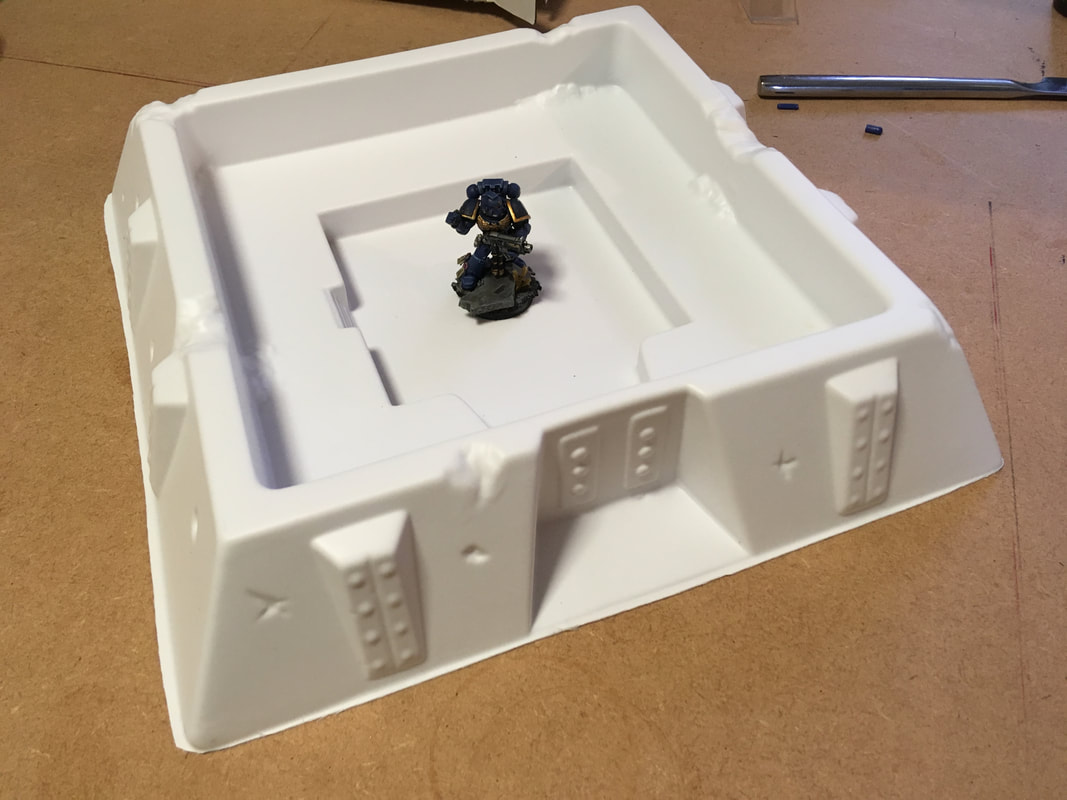
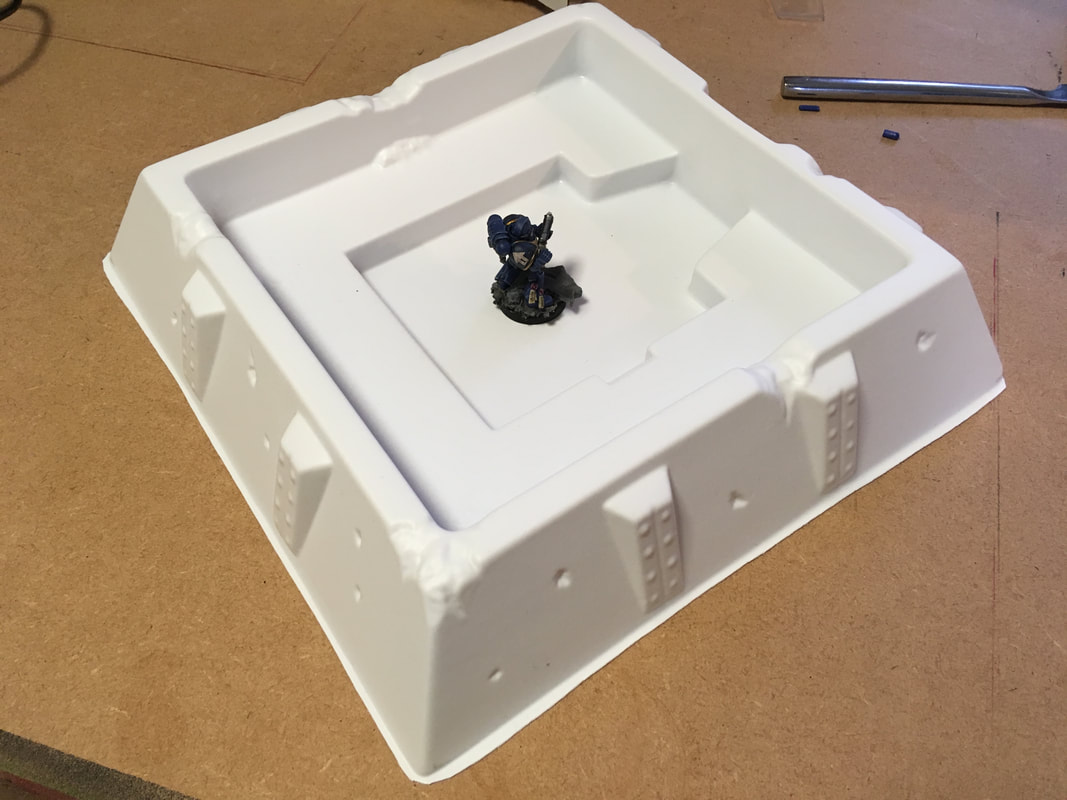
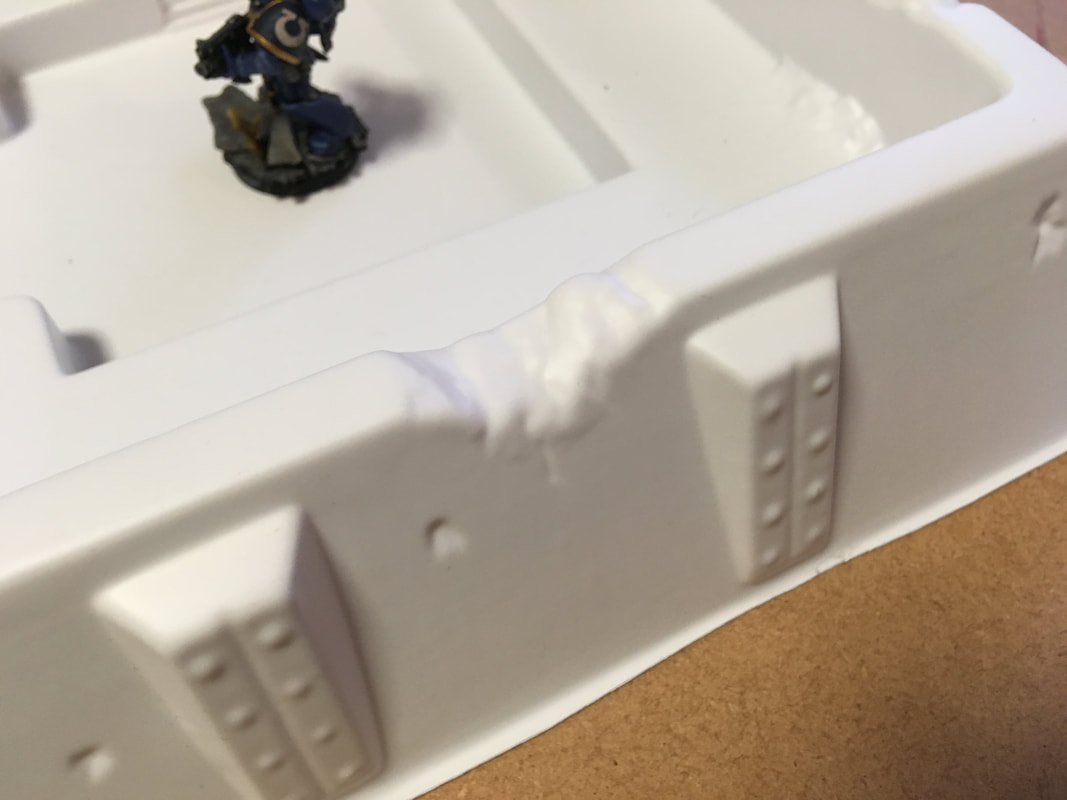
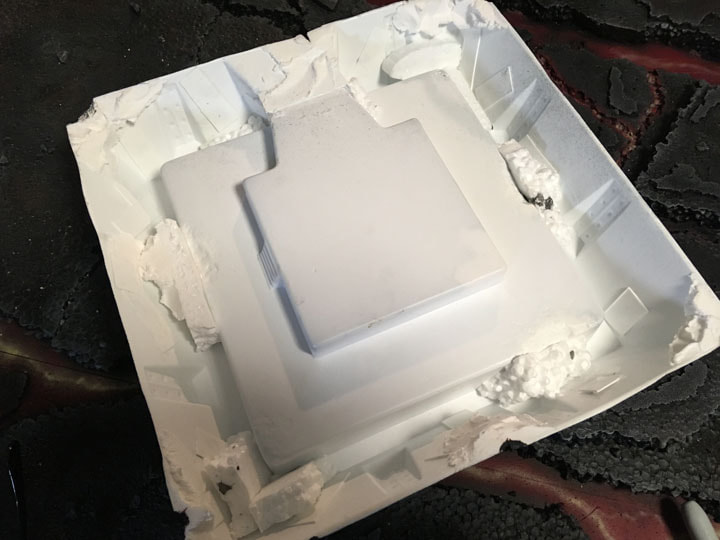
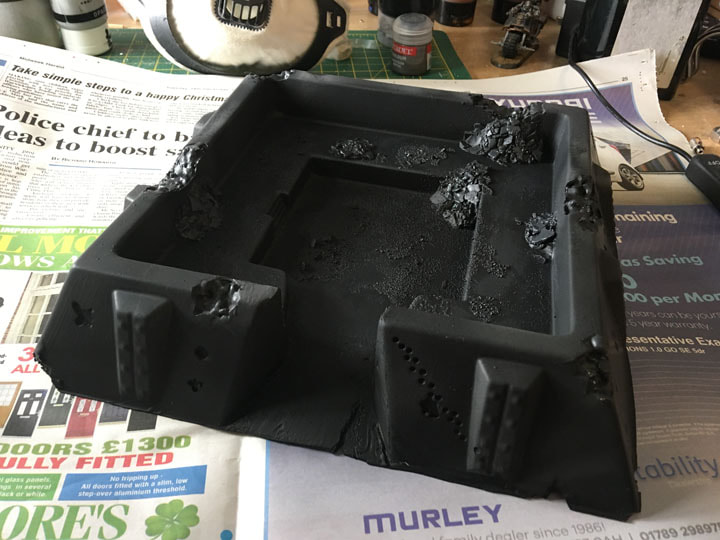
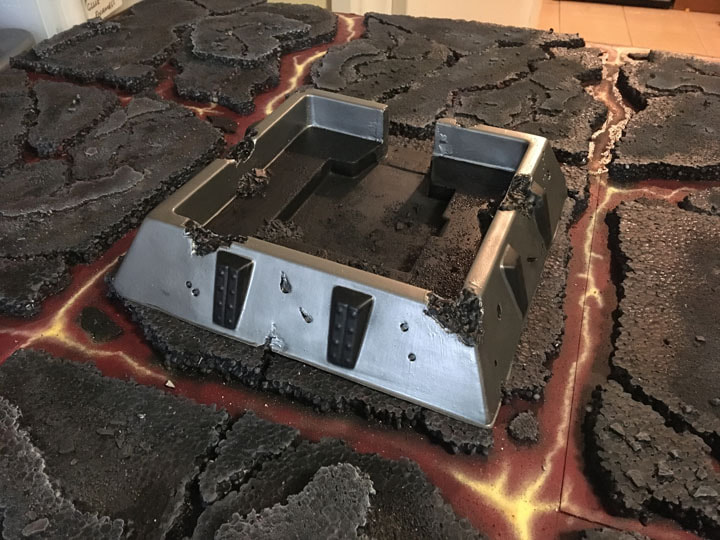
 This was so that the model would look more a part of the landscape. I then plugged all the holes with a mixture of polystyrene, poly filler and plasticard so that all the new holes had something behind them. Finally I cut back into the polysytrene plugs I'd just put in to make the holes deeper and more angular and covered and filled the gaps at the sides where the doors had been. Hopefully the pictures (above left) will help that to make sense.
Next I added rubble by blobbing and painting pva over the model before adding scatter of various sizes from 3 - 5mm bits of plaster to coarse and medium ballast to fine sand, in that order.

A last, and important stage was to the seal it all under a good couple of coats of vallejo polyurethane primer. This protects the polystrene bits I'd added.
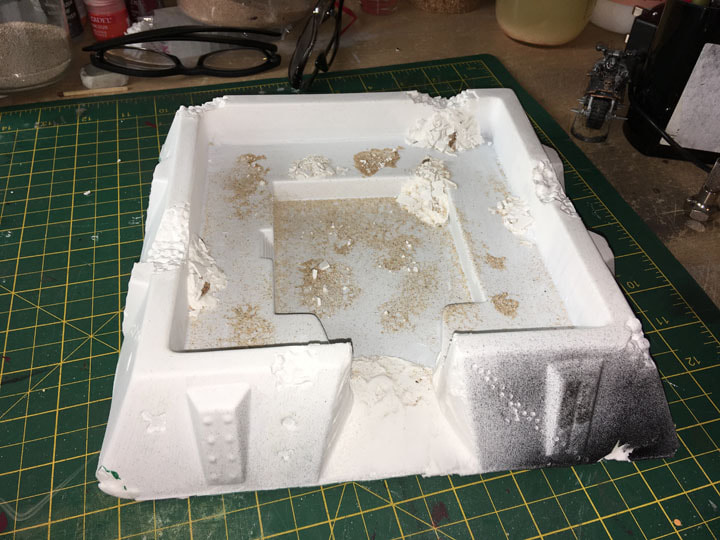
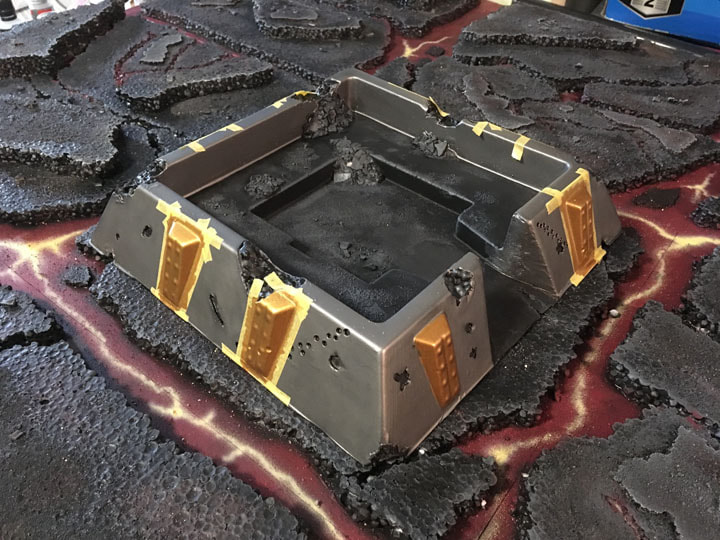
Once that was dry I then primed it again with halfords black primer, I just prefer the finish this gives but without the vallejo layer the halfords primer would melt the polysytrene bits.
Picture
Time for a pause and a breath ... at this stage it looked OK and fitted nicely into the terrain. Well, I thought so ... you can make up your own mind, here it is on the left.
I did consider leaving it black, mostly because I'm lazy, but it was a present so I  wanted to make it pop out a little and I just can't help "doing a bit more" with these things (often with disastrous results).
On the right I've airbrushed some old GW boltgun metal that I'd thinned with water and added a few drops of vallejo's flow improver. I tried (with little success) to avoid the bastions and damaged areas.
On the left I'd gone back over, using a brush, the damaged areas, the interior and the bastions with Abaddon Black.
Next (and on the right) I masked off the bastions and brush painted them with retributor armour. Then (far right) masking off and a first dry drush of a dark grey over the rubble and damaged areas.
To finish the model added a wash of agrax earthshade into the damaged areas and rubble (not sure it made much difference) before I dry drushed these areas with three more (increasingly light) shades of grey -  achieved by adding in a little light grey to the previous mix each time. I also dry brushed mithril silver onto the corners and edges of some of the damaged areas.
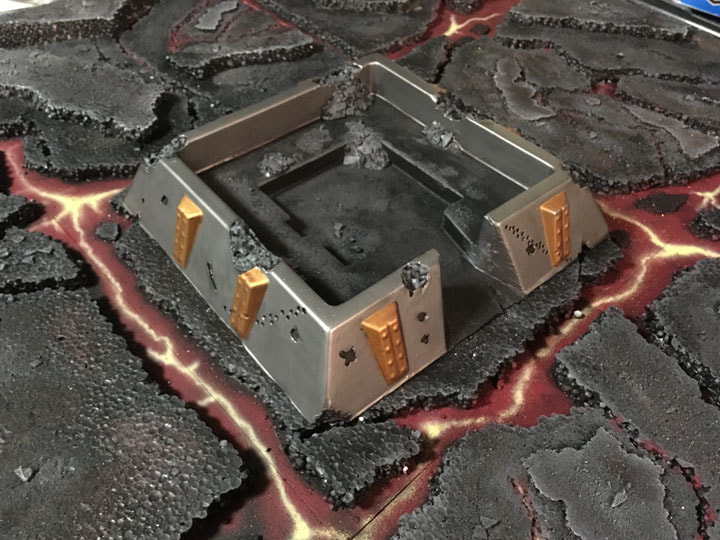
The last stage was to dry brush some blast marks from the shell holes by lightly drag the brush from in-to-out very slowly building up some sooty - looking marks.
And here it is done (below). I hope you like it, I'm a big fan of Amera's stuff so I hope I've done it justice...
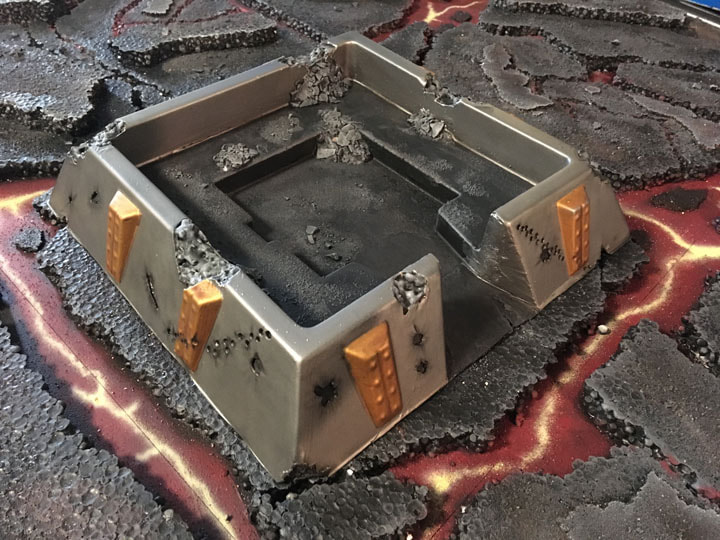
Picture
1 Comment

28mm Lava Terrain

23/12/2018

1 Comment

 
Believe it or not someone actually asked me to make a terrain for them for Christmas. There was no brief other than "can you make us a board to play on" and I know the person in question plays Tau and paints then in pale shades. So ... I thought they'd stand out nicely and look good  against a dark background. Also I'd been wanting to do a lava themed terrain so it was the perfect opportunity.
Part 1: planning and layout
The plan for the board itself was pretty simple, I was going to use the polystyrene packaging (that the GAMEIN5D boards were posted in) to make "rafts" of basalt that would look like a broken up landscape of solid rock over a barely molten (but very, very hot) layer beneath. The gaps between the rafts would be where the joins in the boards would be, some layers I might build up and others I might cut down.
Picture
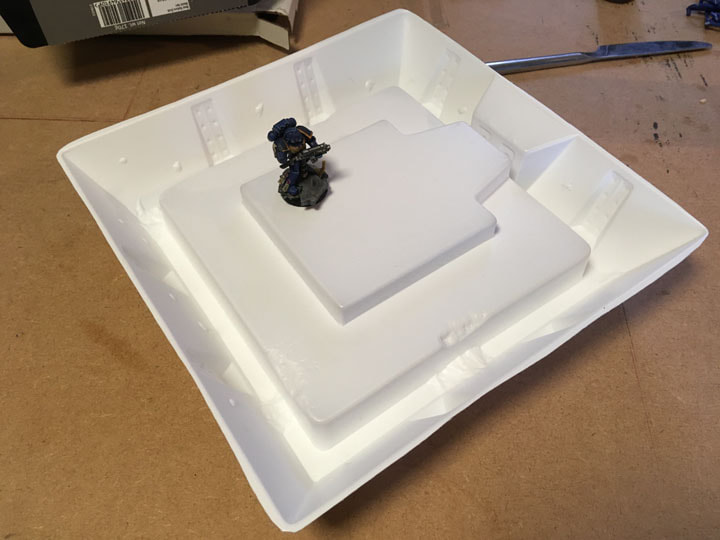
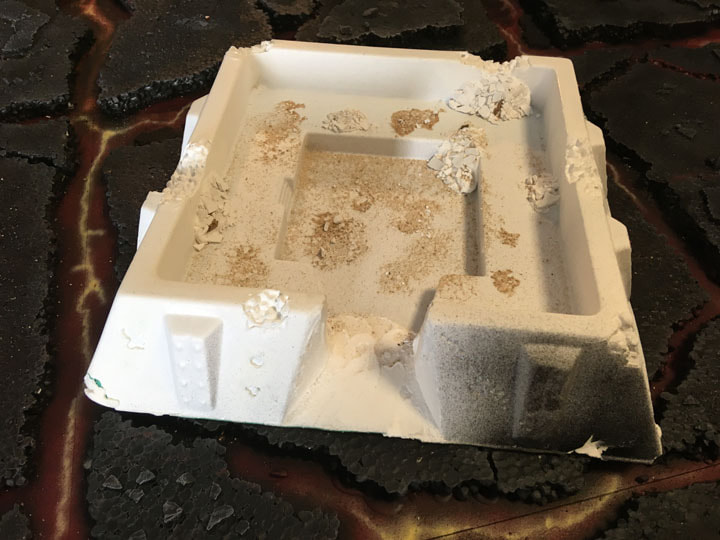
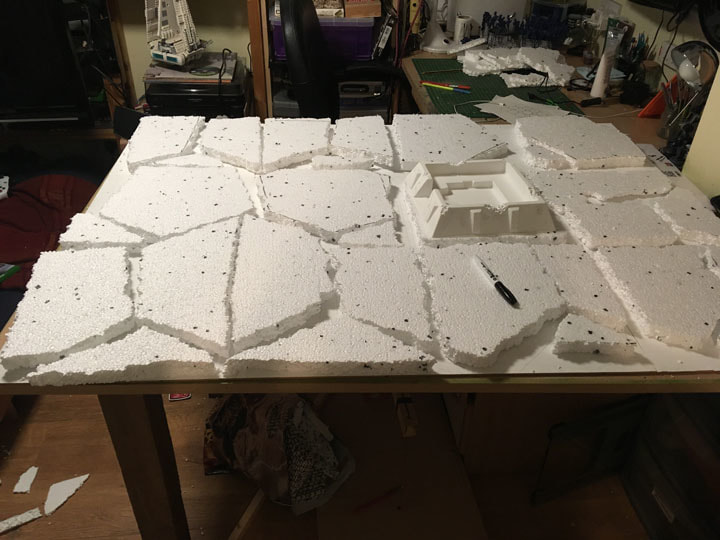
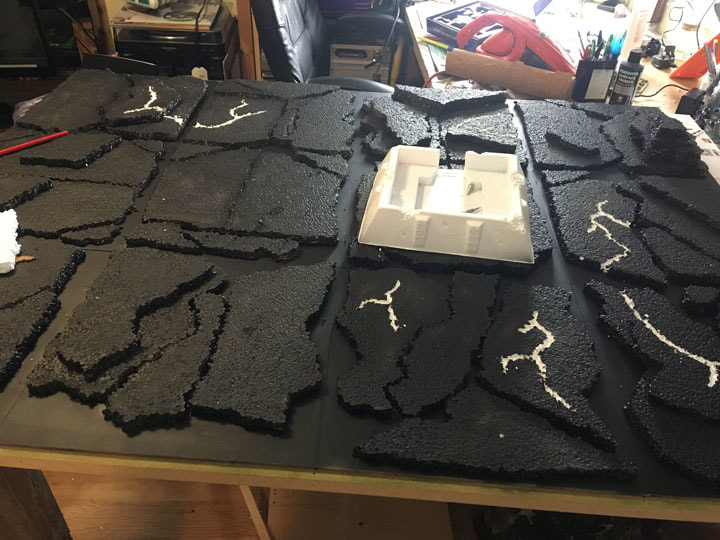
I also wanted to use the Z230 redoubt model from Amera Plastics, because their stuff is great and the model in question fits nicely on the 1 foot square tiles. In the image (above right) I've started to break up the polysytrene into rough hexagons and started to lay them out, on the board. I'd like to think this is a well thought out process, but it isn't. However, I did get them down in some sort of order and then I cut them all in half with my big hot wire cutter. This straight away made them all slightly different thicknesses but also gave me twice as many pieces if I wanted to do this again.
 Part 2: Building
So, on the right, I've glued (pva left overnight) all the basalt rafts (sounds better than polysytrene pieces) and sprayed everything with Vallejo's black acrylic primer. This protects and strengthens the polystyrene and means I can use solvent-based stuff if I want later. I've also built up some areas with double or more layers to create a topography.
Picture
Picture
 At this point I also decided it was looking a little boring with all those flat, black slabs so I started to carve out some cracks with the idea that these could bring a bit of colour across the board as well as break up the parallel and perpendicular lines necessary because of the joins between the boards. This of course assumed I'd be any good at painting lava . . .
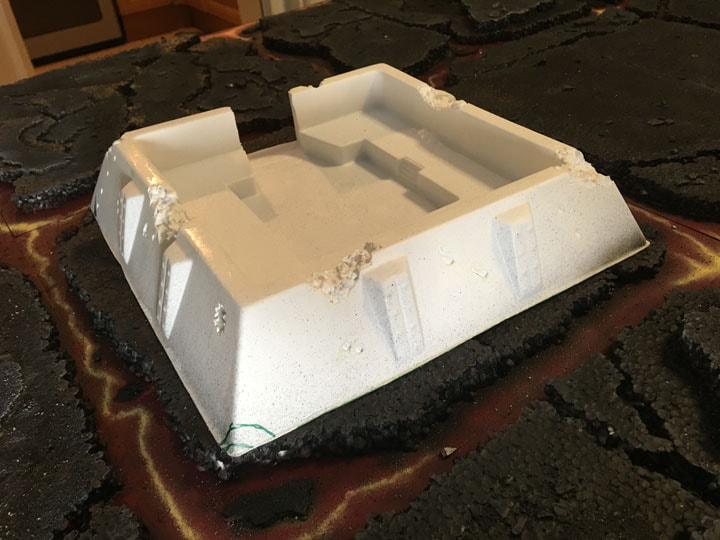
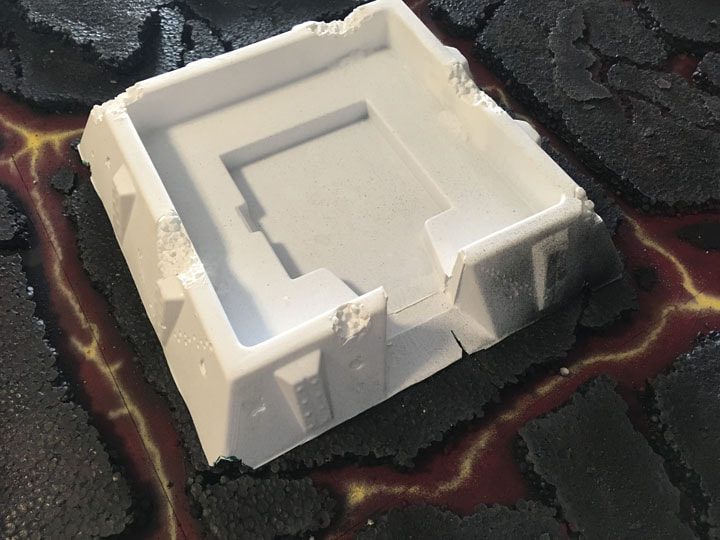
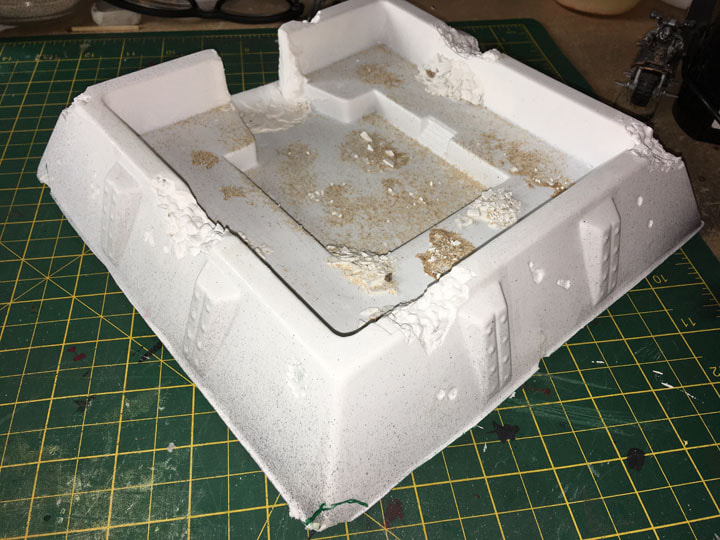
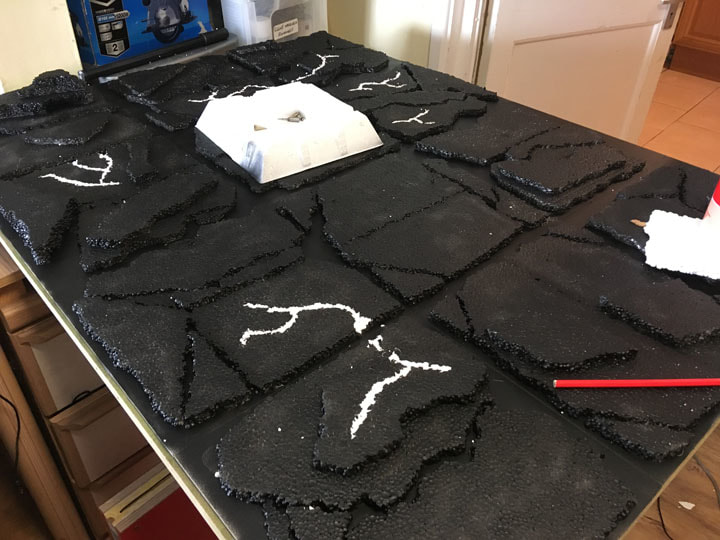
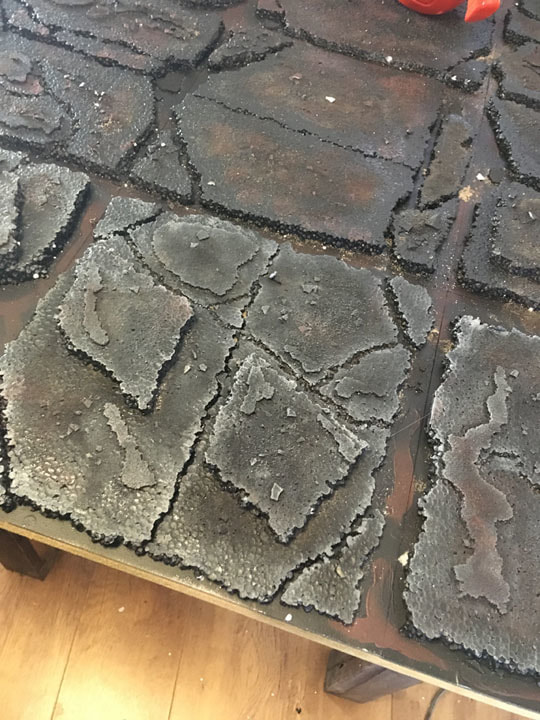
I then added some thinner layers of cork, just roughly torn into pieces that fit on the rafts, again this was just to add variation in height and texture. Finally I added a layer of pva and then scatter materials, fine sand, medium and coarse ballast and finally small angular plaster chunks that I always have a store of. Then it occurred to me I could have done all that before I painted the whole thing black, so I had to paint the whole thing black . . . again. Below you can see the fully built terrain - Black Legion Biker for scale but he buggered off before I took the second photo.
Picture
Picture
Despite my usual total lack of proper planning of steps and stages, and if you remove the huge amount of time spent procrastinating or simply zoning out and staring at the board this process actually seemed quite speedy and I was pleased to have got so far.
Part 3: Dry brushing the basalt
"Dry brushing the basalt" should definitely be a euphemism for something; however, it was time to start breaking up this massive expanse of black.
As it was quite a large area to dry brush I used some cheap acrylic paints, Crawford & Black and Pebeo (neutral grey). I also used cheap and quite large brushes and a big piece of cardboard (all pictured, right) to do mixing. Quite simply I mixed grey into the black in increasing amounts as I worked higher up the levels in the terrain, the higher up the paler the grey.
Picture
For me, this was one of the most enjoyable parts of the project, I love the way dry brushing brings things to life and makes things look so much better. And it doesn't need that much skill, which suits me just fine.
 I was quite happyIn the photo on the right only the lower  tiles have been drybrushed and you can really see the contrast between those tiles and the unbrushed tiles above.

I took some time to work all around the board and I had to go back and darken some areas are I got a bit carried away (or stopped concentrating.

I then broke out the airbrush and painted all the gaps between the rafts in GW's Khorne Red (air) . I didn't try too hard to get the red into the edges of the rafts as that left some shadows but also I didn't mind a bit of red going to the sides of the rafts to give them some glow from the hot ground.
Picture
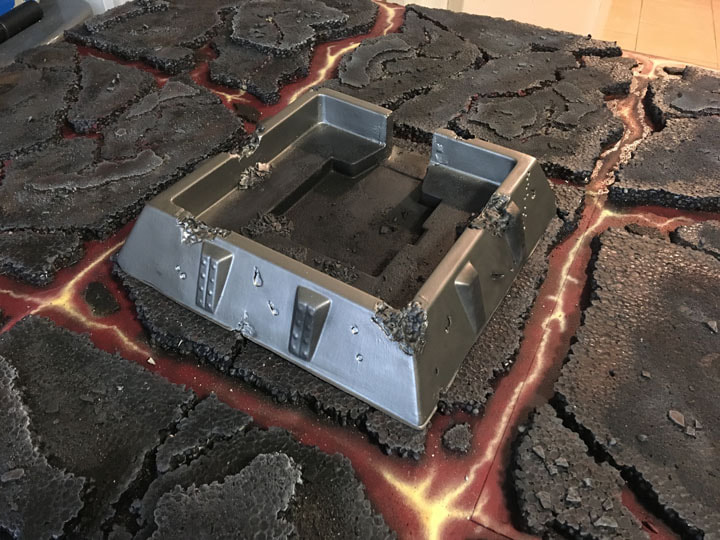
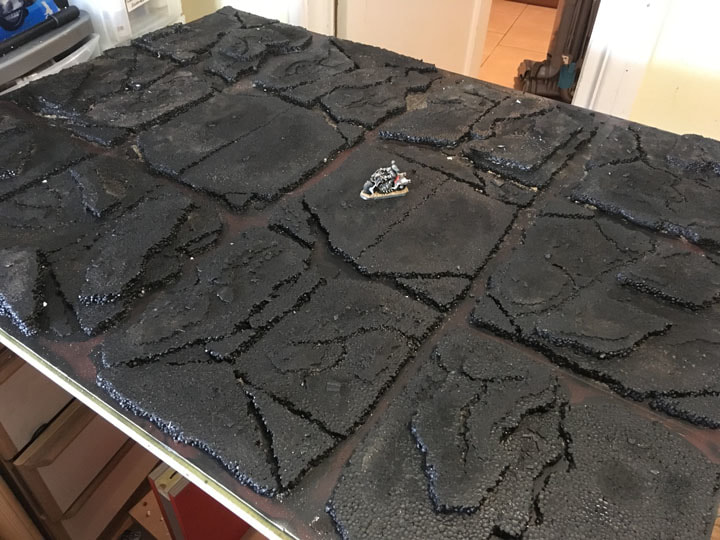
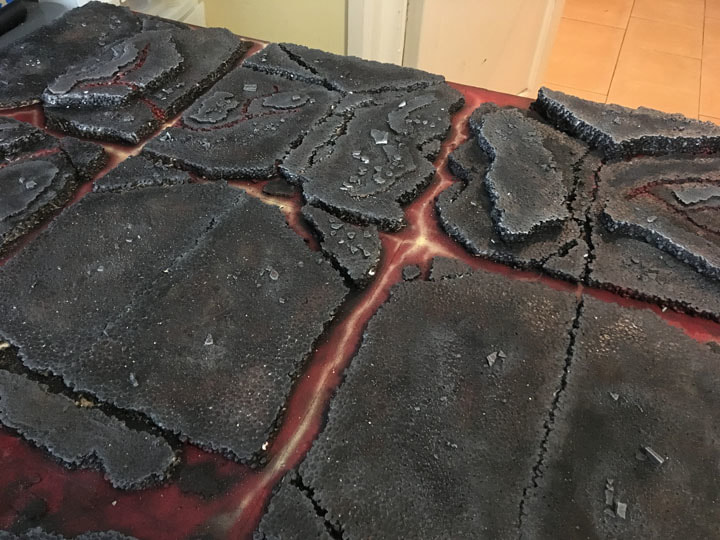
In the photo below the dry brushing was complete and I was about two thirds of the way done with the red. Plus we have an explanation for why the chaos biker naffed off so quickly.
Picture
Part 4: Adding the lava 'glow'
Going back to the original idea I didn't particularly want streams of lava around the rafts, instead I was thinking of cracks where the heat from beneath would shine through.
In the end I settled on laying down a thin layer of GW's blazing orange which I'd thinned down for airbrushing before dropping the pressure on the airbrush so I could add a thin line of yellow (in this case Vallejo's sand yellow, 70.916). This seemed to produce a glowing effect that I could live with as shown on the right.
Picture
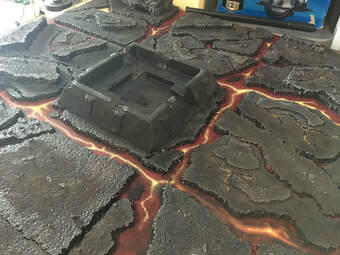
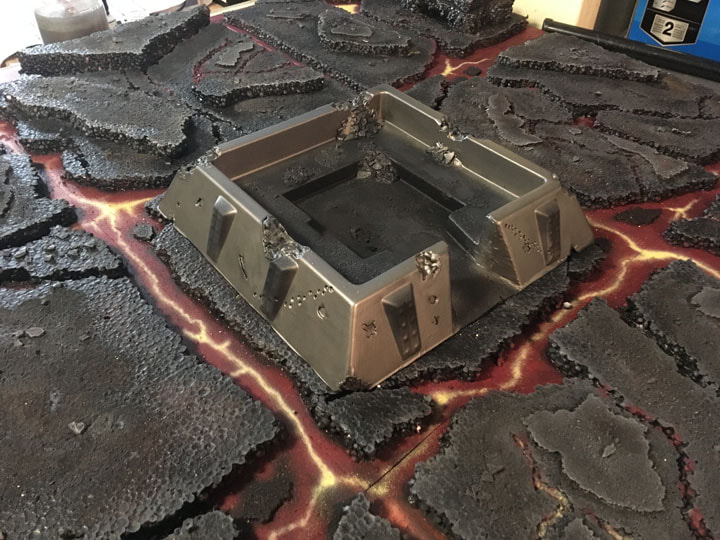
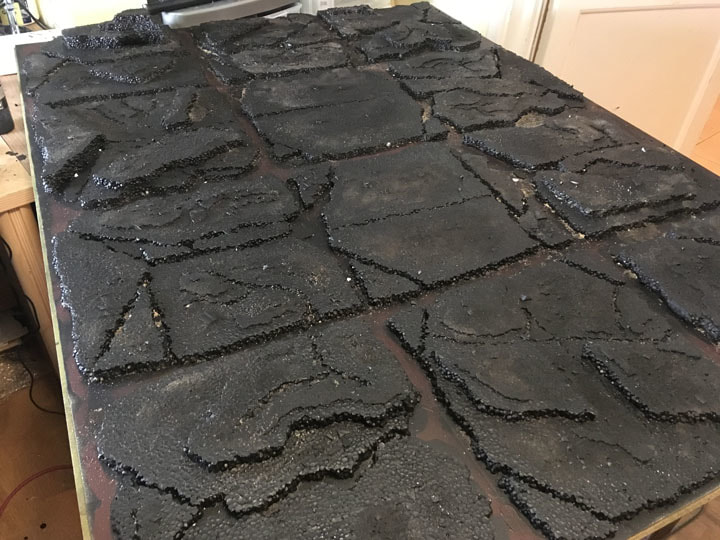
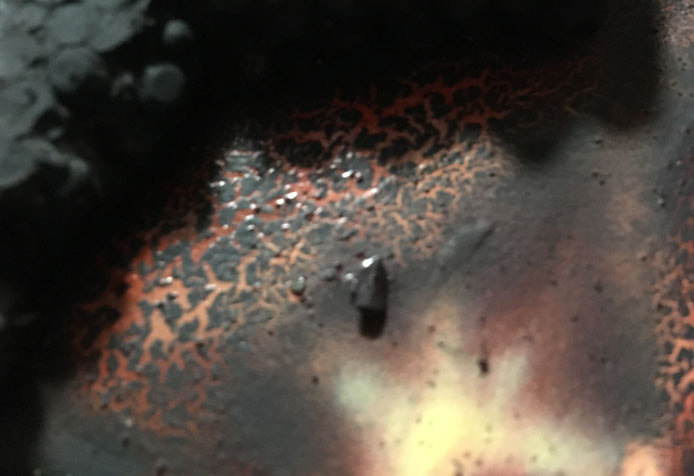
It took a while to build up the desired effect, mostly because I kept messing it up - I'm not great with an airbrush as you can tell. I also went over the cracks I'd cut into the board, yellow first this time then dry brushed orange and then black over the yellow. You can see the completed board below.
Picture
I'd read about using pva to produce a crackle effect for lava so I thought it might be fun to try that in a couple of places. It's a bit unpredictable but I found airbrushing black paint (as thick as you can get through the airbrush) over pva that had been left for a little while to go tacky seemed to work ok, the picture on the right shows on of the better bits.
Picture
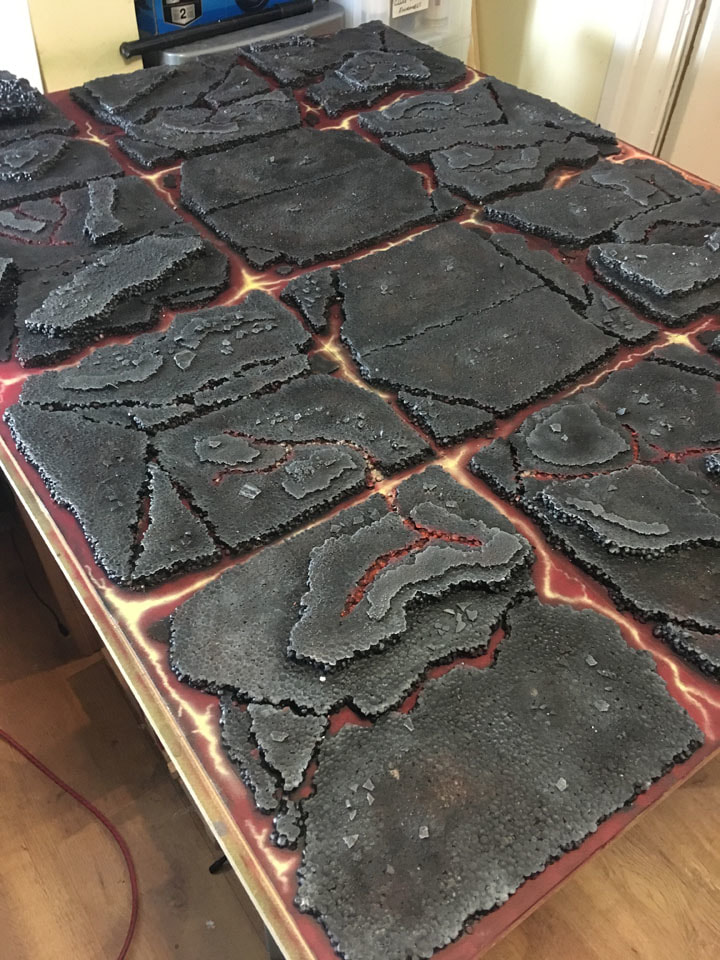
So that's it ... lava terrain done and now since it's after Christmas and Santa has delivered it I can add that the recipient was well chuffed with it (phew). If you've got to the end of this blog entry I salute your perseverance, if you're feeling particularly masochistic you might want to check out the youtube (very) brief description and flyby of the terrain below.
Picture
1 Comment
    Picture

    Hello, I'm Jon. 

    I'm very much a learner model maker, especially dioramas, gaming surfaces, models and toy boxes for me and my children.

    I also invented the GAMEIN5D base boarding system which I'm trying to develop into something more.

    Archives

    March 2019
    January 2019
    December 2018
    April 2018
    January 2017
    December 2016
    November 2016
    October 2016
    September 2016
    August 2016

    Categories

    All
    28mm Lava Terrain
    28mm Ruined Abbey
    Bases For Miniatures
    Dioramas
    Etc.
    Hello
    North Africa 1
    North Africa 2
    Paint
    Tanks
    Tools
    Z230 Redoubt

    RSS Feed

Powered by Create your own unique website with customizable templates.