GAMEIN5D - Bigger Inside
  • HOME
  • PROJECTS BLOG
  • GAMEIN5D 101
  • Kick starter
  • CONTACT
  • HOME
  • PROJECTS BLOG
  • GAMEIN5D 101
  • Kick starter
  • CONTACT

The projects

(GAMEIN5D in action)

28mm Ruined Abbey - Part 3

22/4/2018

0 Comments

 
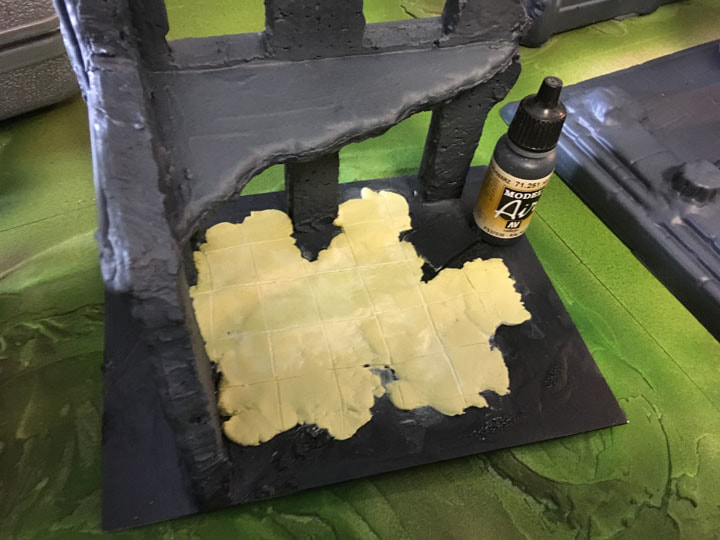
Part 3: First I decided I wanted something a bit better under the buildings, something like the remnants of paved floors and I also realised that there should be a lot of rubble around from all these ruined buildings.
For the building floors I spread milliput thinly across the base and scored a paving pattern into it. I used milliput because it doesn’t shrink when drying. This is really important because I know from experience that the best way to warp the base-boards is to put something that shrinks as it dries directly on to them. The image (right) shows the paving in the first stage, rubble and other detritus will hide the edges.
Picture
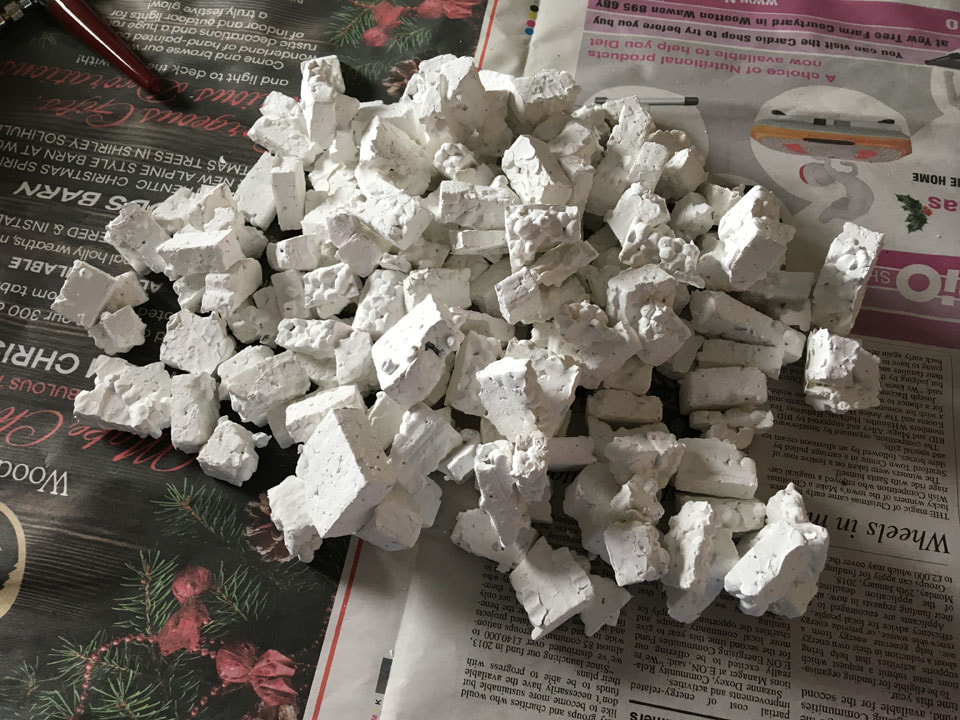
For the large amounts of rubble I cut up lots and lots of scrap foam packaging into brick-sized and smaller pieces. These then got tossed around in a bucket with a generous amount of white acrylic paint until all the pieces were coated. I then spread them all out to dry (image below).
Picture
From this point forward things definitely started to accelerate. I created the milliput paving under the other foam buildings and started planning how the rubble was going to be postioned around the layout. Much of it was going around the buildings but I also wanted to pick out the location of where walls used to be and maybe even suggest the locations of where other buildings may have stood (image below right).
I also made a better pass at painting the terrain adding some darker browns and greens to the lower lying areas and trying to get to a better colour to go under the scatter and flock later on.
 
After the image on the right was taken I also removed all the buildings from the board and airbrushed them a light grey
Picture
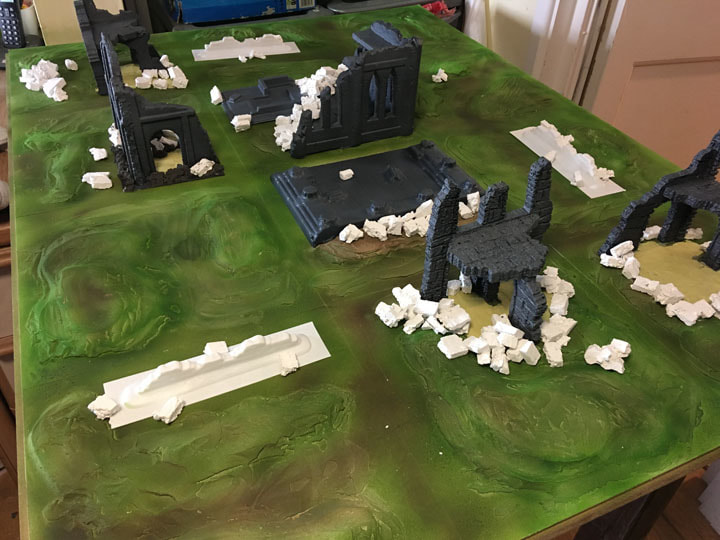
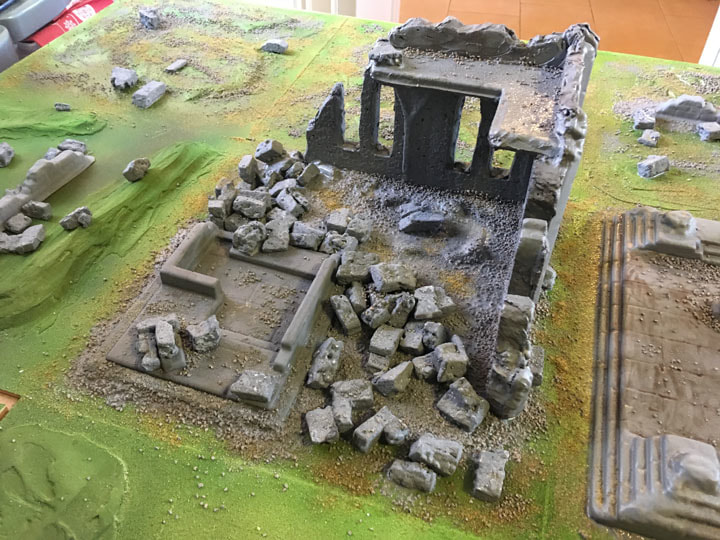
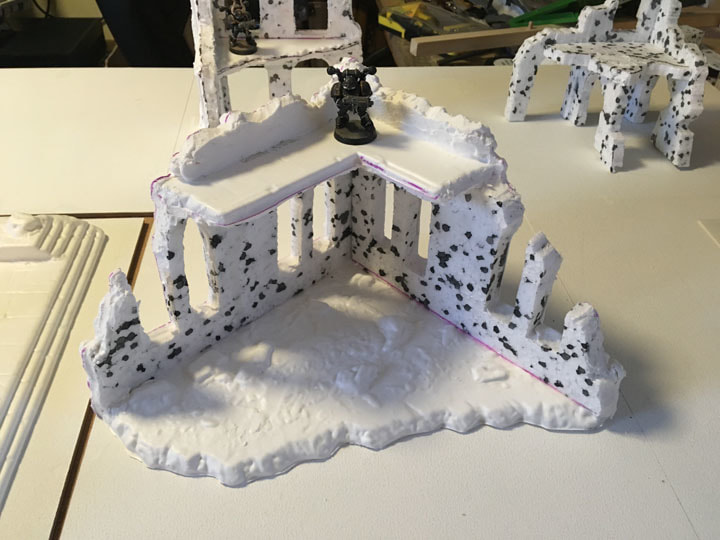
shade and gave then a wash with Agrax Earthshade. The wall sections were trimmed down and painted. The paving stones were painted with a mix of brown and burnt umber (Crawford and Black cheap and cheerful) and the rubble was removed and given a the same treatment as the buildings. I probably didn’t take enough photos at this point both because I was on a roll and it’s still not something I’m particularly used to doing … sorry.
It does at least explain the somewhat sudden jump to the next photo though (image right). This is the start of the end really. At this point I have just started to work my way around the board.
 
The wall section was bonded (PVA) in place and I used a large cheap brush to splodge (very technical term that) on slightly (1:4) watered down PVA where I was going to
Picture
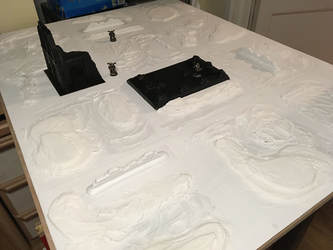
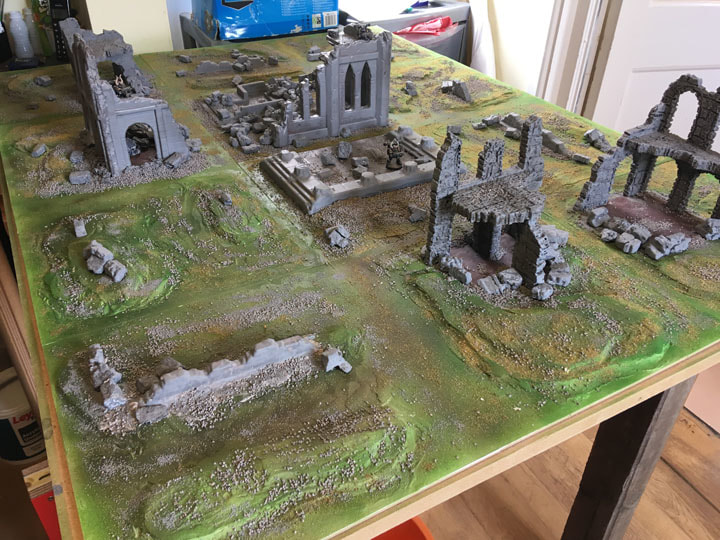
scatter Woodland Scenics coarse ballast. This was a great colour match for the stone colour I’d painted the walls and buildings. I was also (finally) brave enough to bond down the buildings (PVA again) but not until after I had checked the boxes folded up a couple of dozen times.
A word about scatter and folding boxes: If you get too much scatter on the hinges of the boxes it can cause problems when you fold the boxes. To counter this I try and use less, and finer or softer, scatter materials when I’m working across hinges or try to avoid them entirely if I can.
Now it was just a case of working my way around the board. I used PVA to bond the buildings in place and then added the larger pieces of rubble where walls may have fallen down, I used smaller pieces of the foam rubble around and between the larger and finished it off with Woodland Scenics coarse and then fine ballast.
Picture
Picture
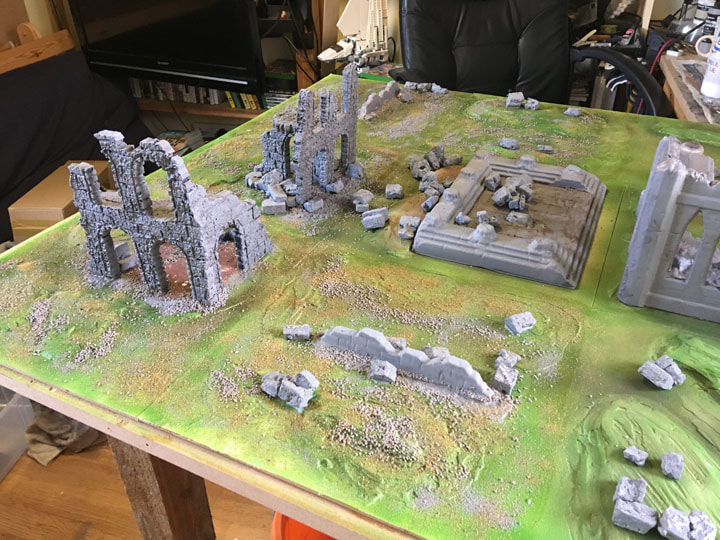
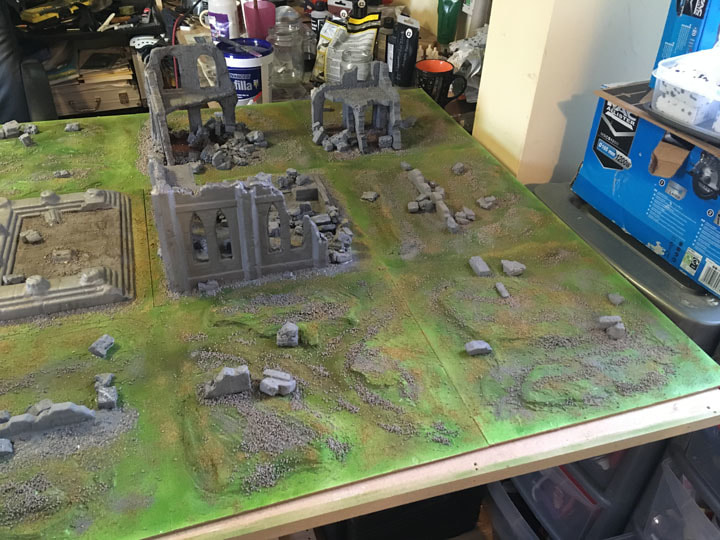
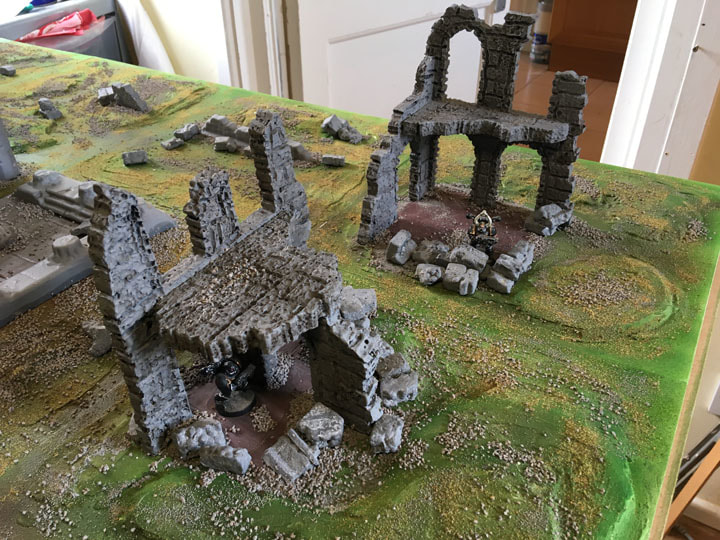
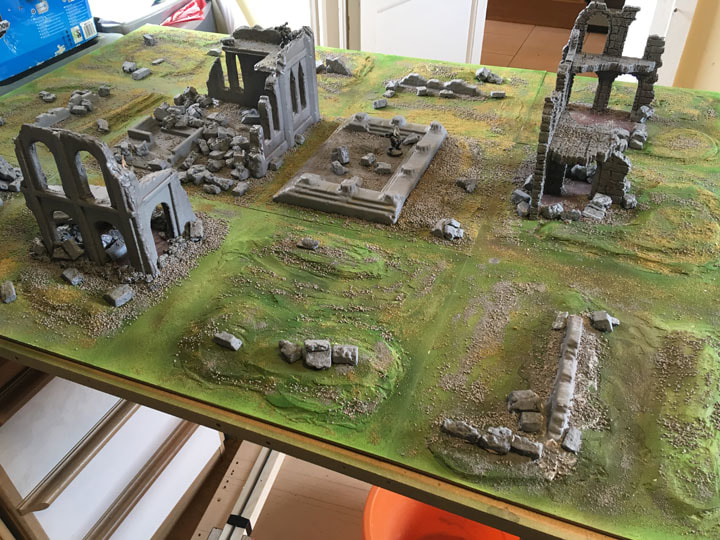
The two images above and the two below are me continuing to work my way slowly around the board.
Picture
Picture
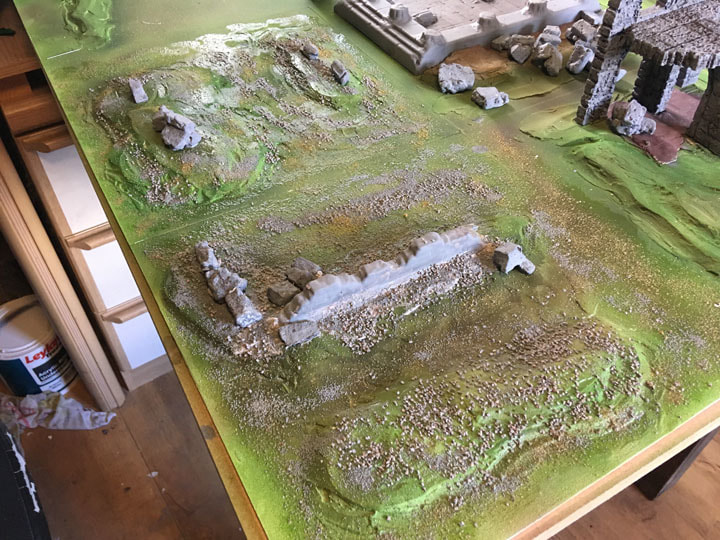
And suddenly … I started to believe I may actually finish this layout. Having bashed through and done all the sticking down of buildings, rubble and scatter the board was quite damp so I thought I may as well carry on and start to add some flock, darker green in the lower areas and mixed blends and a lighter green in the higher areas which is a nice way of shading.
Then the slight mania passed and I realised that everything was definitely in need of an opportunity to dry and solidify. At this stage (and in the image on the right) it was a bit of a PVA swamp I started to have at least 3 bodings about whether or not it would all now fold up. Of course it was far too late to do anything about it and any attempted folding up while things
Picture
were still drying would probably result in a spectacularly horrible Atlantis-like sliding of everything off the board. So I decided not to do that and left it to dry overnight and tried not to worry (too much).
Picture
In the end though it worked out. The next morning it had dried pretty well but I left it until I came back from work that evening to check it all out.
 
The “first-folding” was a bit traumatic and stressful as loose scatter gets everywhere and gets stuck in the gaps and stops the magnets connecting or gets wedged in the
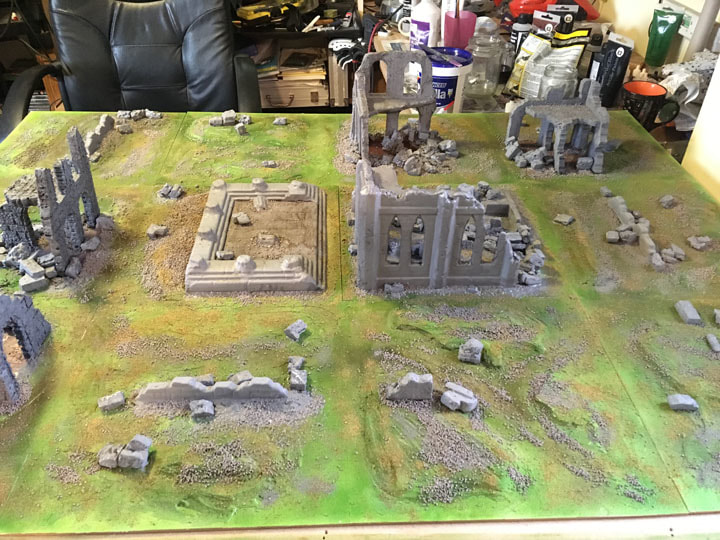
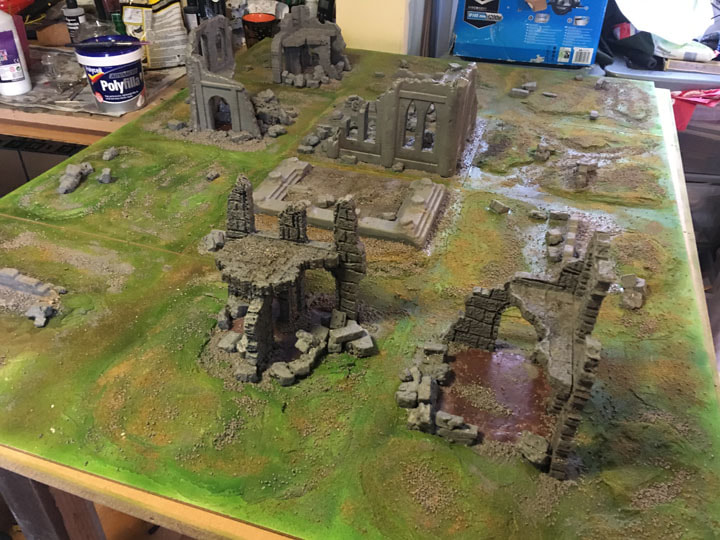
hinges and stops things folding but a bit of blowing, a gentle brush (possibly getting a bit Mills & Boon here) and liberal application of a dust-buster (hopefully never used in Mills & Boon) and the problem is cleaned up and the boxes folded up nicely. Although not finished I definitely felt I was finished enough to show others (and at time of writing I still haven’t got any further) but I was still quite happy with some of the elements (images above and to the left).
The End: Well … the end of this tutorial anyway, I hope I’ve shown the main stages of how I built this terrain and how to make sure the whole thing folds up as it should. I haven’t included any photos of it folded up as that would just be pictures of a box with a logo on it (with a magical secret within) and the YouTube videos so a better job of showing that (search GAMEIN5D).
Picture
Picture
 
Happy building. Jon
0 Comments

28mm Ruined Abbey - Part 2

22/4/2018

1 Comment

 
Part 2a: This is probably the part I enjoy the most because it’s basically just playing around with the terrain elements you have and imaging how and why the various pieces fit together. The only difference with the GAMEIN5D boards is that you have to keep one eye on how things will fold up into 3D. Fortunately I’ve always been OK at “seeing” how things fit together but even if you’re not its easy just to blue-tac things to
Picture
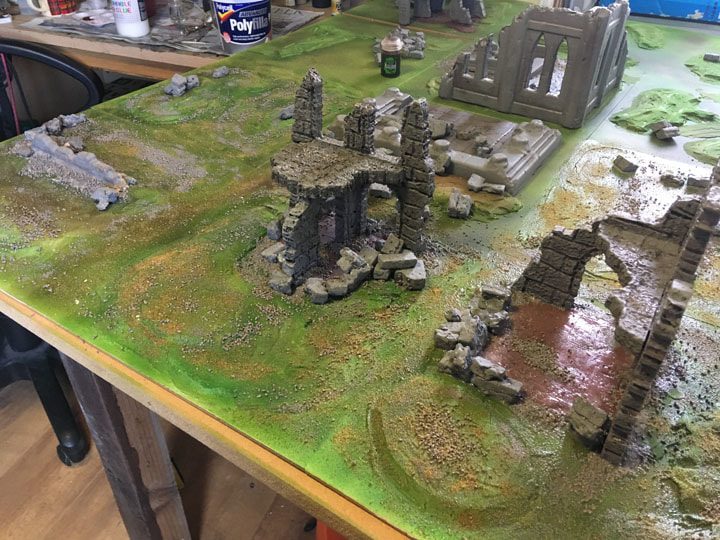
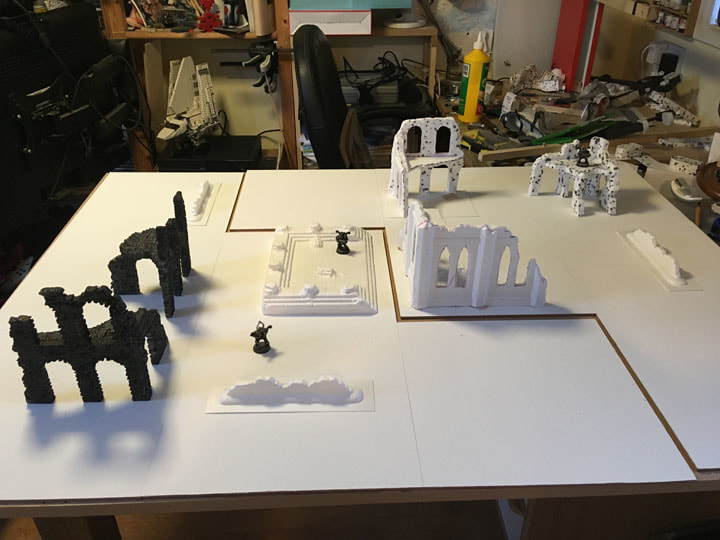
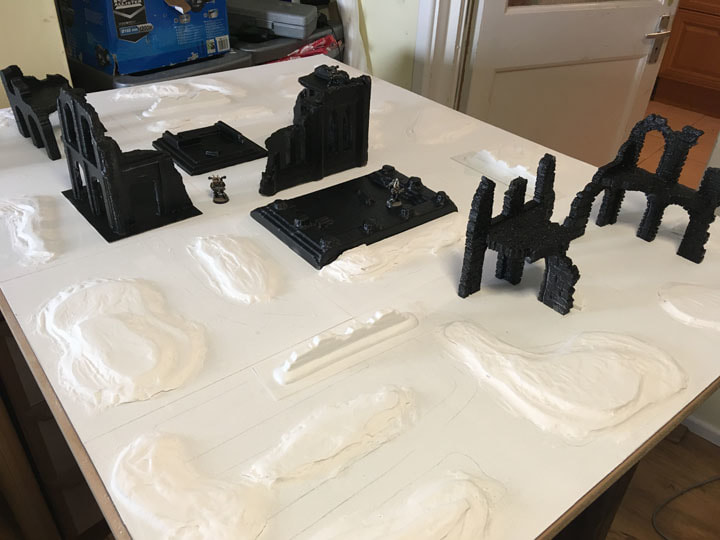
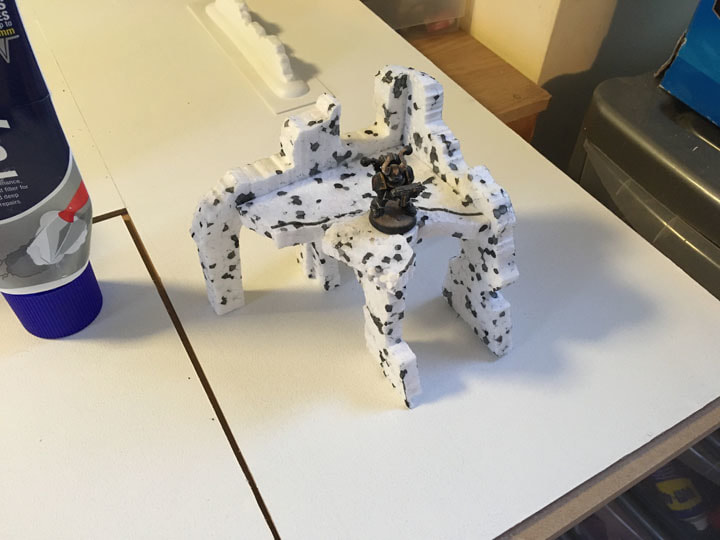
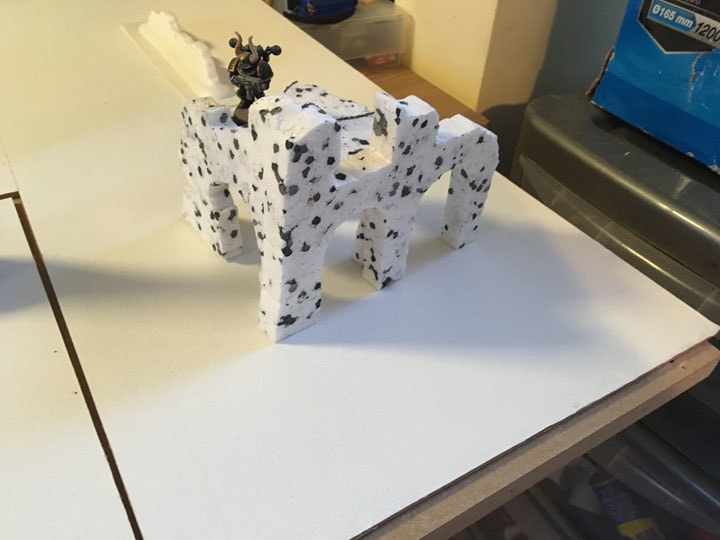
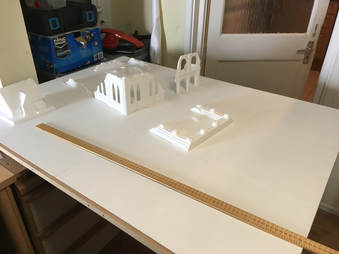
the board and then fold up the boards to see if they fit – if the box closes – it’ll work fine. This was pretty much what I settled on in the end (image right); I’ve separated the two boards so you can see where they are located. The idea was to have the Chapel and Temple ruins in the centre as the “bottom” of both boxes – I liked the idea of the later Abbey being built on the site of an older Temple. The three ruins and the wall on the top right of the photo form the outer remnants of a larger building and the two (black) buildings on the left are what remains of another building in a larger monasterial complex.
The technical bit: making sure it all folds up. I’ve tried a few times to come up with some sort of diagram to facilitate showing people how to make sure things fold but in the end it comes down to using your imagination and/or blue-tac, folding it up and checking nothing crushes anything else. Specifically in this case (and here I refer only to the first photo in this section) the main trouble-spot was the Ruined Building at the back and the Ruined Chapel in front of it as these were the two biggest elements and I wanted them next to each other. However by moving the Building “back” enough you also raise it “up” in the folded box and so out of the way of the Chapel. In the end I blue-tacked it and folded the box up to make sure. The building (top right) is on a single “lid” tile
Picture
Picture
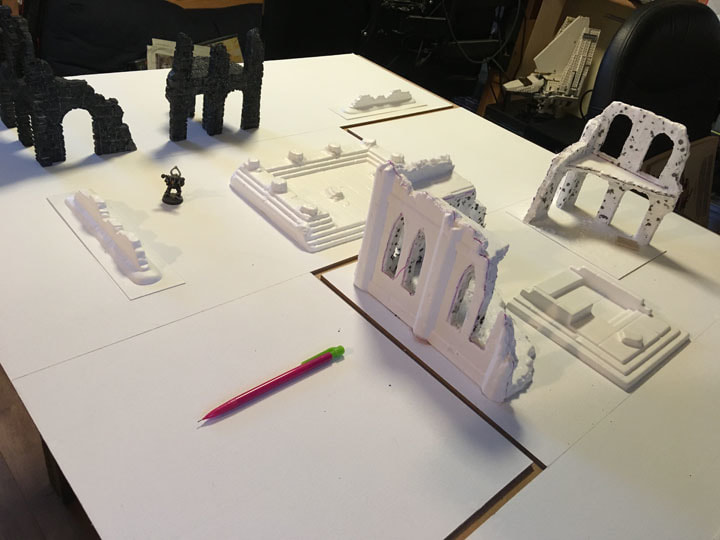
so that got blue-tacked and I closed the box (there was loads of room for this). Similarly on the left-hand-side the upper black building needs to be moved “left” enough that it doesn’t impinge on the Temple Ruin when the box folds but as the Temple is quite low this isn’t too problematic. The bottom-left black building is also on a lid-tile so again I blue-tacked them all and folded up the box to make sure they fitted. Two more pictures from different angles are shown on the right.
At this stage it was buildings (check), layout planned out (check) and hopefully the whole thing would fold up without horrible grinding/crunching/oh-bugger I’ve just ruined hours of work – type noises. However, I wasn’t brave enough to bond anything to the boards just yet as I wanted to build up the flat areas first.
Part 2b: At this point the rest of the board was flatter than a disappointed flat-fish and while there’s no reason a monastery needs to have particularly lumpy grounds I felt a ruined one would probably have mounds where walls once stood. I used some foam-board which I’ve had lying around for actual years but I wished I’d used up some of the cardboard packaging I
Picture
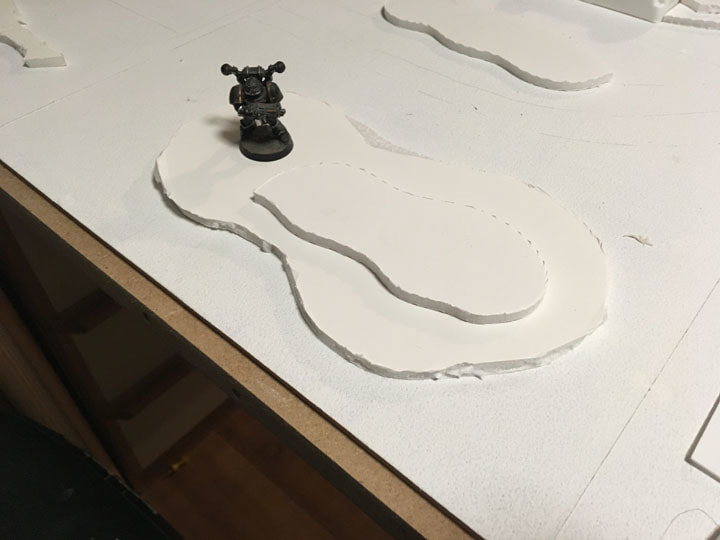
had left from the boards (that’s definitely making it into the sequel). Quite simply I cut out some shapes and chucked them around the board, moving them until I liked the layout and it made sense with the wider idea of the terrain. In some cases I layered one on top of another literally making a sort of contour map (image right).
Picture
Picture
The foam board is nice and flat and light-weight and once I was happy with where everything was (and I’d checked that I hadn’t messed up anything
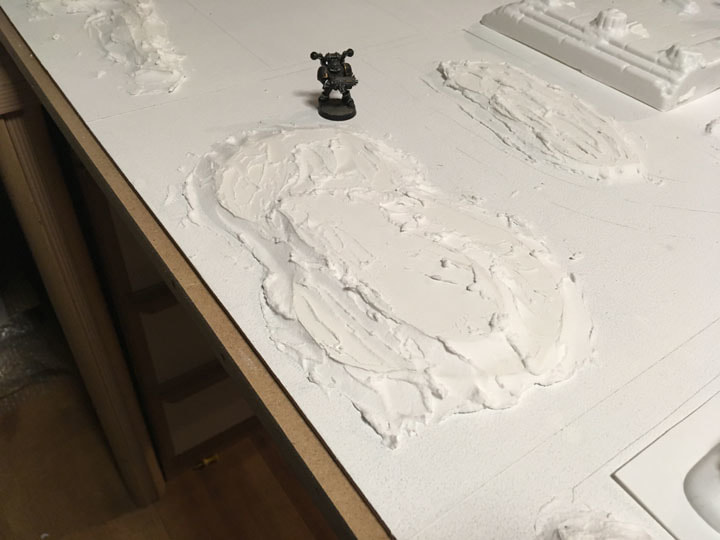
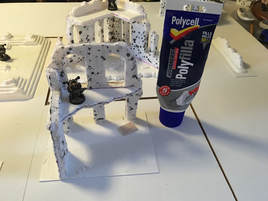
once the boxes were folded) I used PVA to glue down the bits of foam board. Obviously at this point the newly raised lumps and bumps looked a bit blocky (image above left) so I used the same Polycell foam filler as before to smooth those steps out and give the lumps and bumps a more rounded appearance (image above right). This is a pretty slap-dash affair and quite pleasing to do; once it was dry I went over it all with a bit of sand-paper.
Then it was just a case of working my way around the whole board and giving it all a rub-down with sandpaper (a much less pleasing job). At this point I also decided to base-coat all the building elements (Vallejo polyurethane primer again). I’m not exactly sure why as it didn’t serve any great purpose at this stage but with hindsight it did make the buildings stand out really nicely from the board in photos (image right).
Picture
Picture
It did still all look a little flat and I wanted more texture under the actual buildings as well so I went back for another go with the foam filler and tried to eradicate most of the perfectly flat parts. I also spread out a decent amount of filler where the buildings were going to be and replaced them making imprints of the building pillars before removing the buildings again. This gave me both a reference for where the
buildings were and more texture beneath the buildings themselves.
Partc 2c: I actually wasn’t kidding about the procrastination stage. Buildings on, buildings off, buildings on again and generally not getting very far. At this point I also decided to paint the terrain green (image right) mostly because I was bored of it looking white and I wanted to feel like I was making progress (I wasn’t) and also because I wanted to see if I could put some
Picture
very cheap (£2 Daler and Rowney) paint through my airbrush (I could). This is a very common stage for me when building stuff and usually preceeds the final, somewhat rushed end-stages where I push on regardless, make decisions without really thinking them through and more-or-less hope for the best (I don’t recommend this stage to others, many models died because of this). (Go to Part 3)
1 Comment

28mm Ruined Abbey - Part 1

20/4/2018

0 Comments

 
Part 1: The Amera buildings are namely F225 Ruined Chapel and F224 Building Ruins as well as F218 Temple Ruins, F207 Terrace Ruins and three F215 Ruined Walls. They come looking like the image (right) and it’s a very quick job with a sharp knife to remove the parts from the plastic sheet. The parts are thin and one sided, which is great because it keeps them light and although you can definitely use them like
Picture
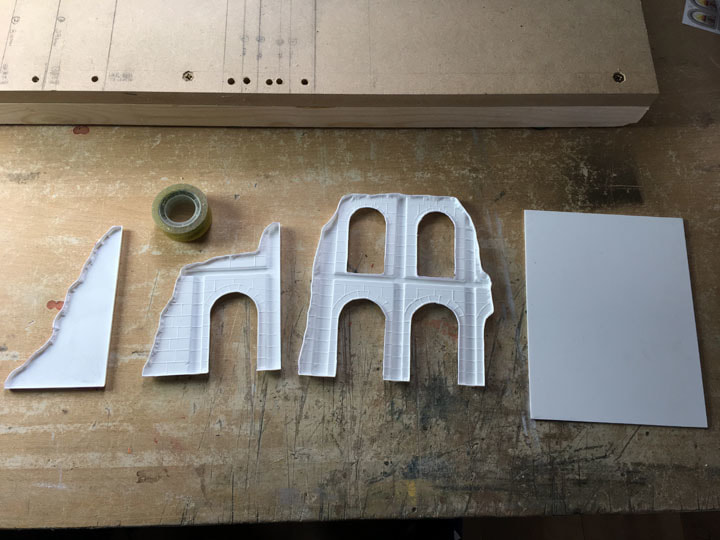
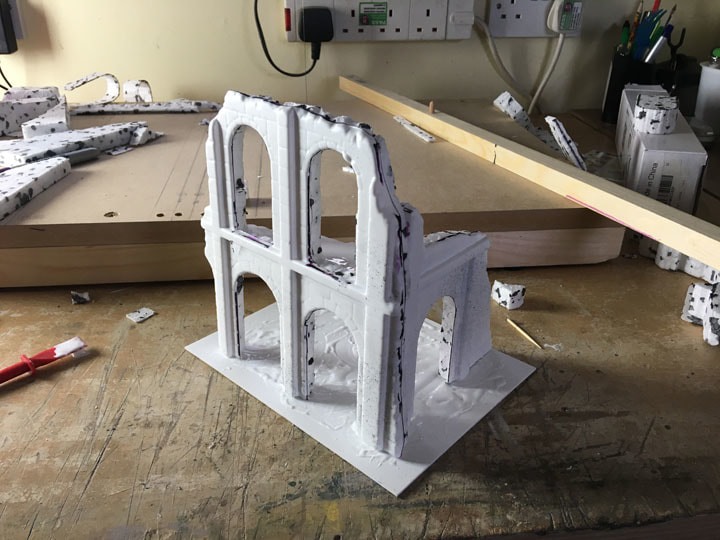
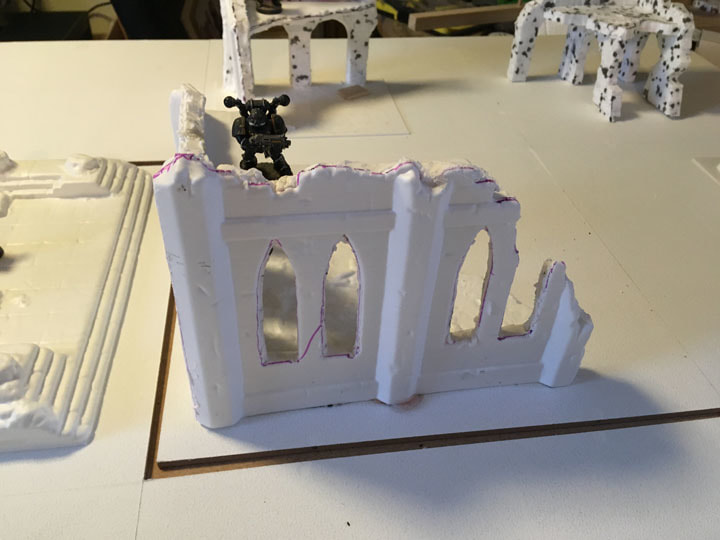
this I like to “pad – out” the walls to make them a more realistic thickness. The picture (above right) is of the Ruined Chapel and this is the biggest element on the board and I thought it would make a great centre-piece for the whole terrain.
Here is the Building Ruin (image right) with all the pieces removed from the main sheet. This model comes with a base which is just a piece of flat plastic - I used it even though I was eventually going to bond it to the board. Waste not, and all that.In order to pad-out the walls I traced around the walls and floor onto some pieces of foam packaging (image below left) and cut them out using my hot wire foam cutter.
Picture
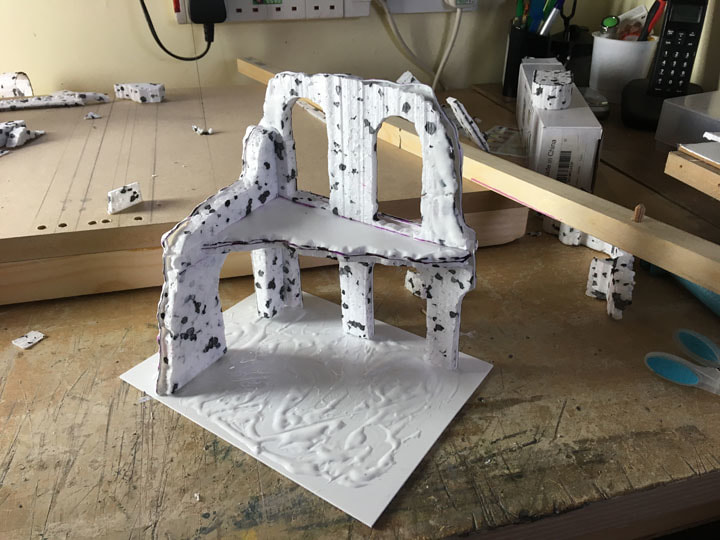
The foam is 25mm thick so when I finished I cut it in half to give two copies about 12.5mm thick. I then made some changes to the second copy to make it even more wrecked (image below right). This will form the basis of a second ruined building.
Picture
Picture
[Going back to the Amera Ruined Building] I then push-fitted the parts and trimmed and cut pieces as necessary so that the original plastic parts and the foam parts all form a
coherent whole. This mostly involves pushing it all together, then it falling apart, going back and trimming some more until it all fits together nicely.
The only tricky bit is cutting a horizontal section from the front and side walls so the floor can fit in. Eventually I got it all to fit and PVA-ed the heck out of it et voila (images right)!
Picture
Picture
I wasn’t sure how I was going to deal with the base and then I spilled a load of PVA on it anyway so I smeared it out to make the surface a bit bumpy.
Picture
There were some sharp edges where the plastic and foam didn’t marry-up well so I used a foam filler (image left) to fill in any gaps and smooth out any remaining problems. I really like this Polycell stuff, it dries really quickly and you can sand and paint it once it’s dry – it’s great for applications like this (I’ve no idea what it’s like for the DIY purposes it’s probably intended for).
Overall I was pretty happy with how the building turned out at this stage.
I built the Ruined Chapel and filled out the walls in the same way – this model has a much more substantial and detailed base with loads of rubble
Picture
Picture
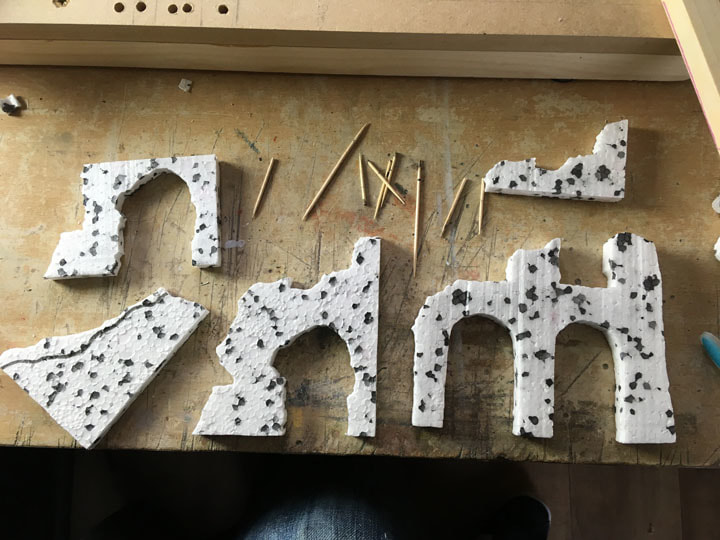
(images above right). At this point I also put together the second lot of foam pieces I cut before. I roughly joined them using tooth picks.
Picture
Picture
The assembled building is shown in the images on the left, a bit blocky and clumsy looking at this stage but as I was making this up as I went along
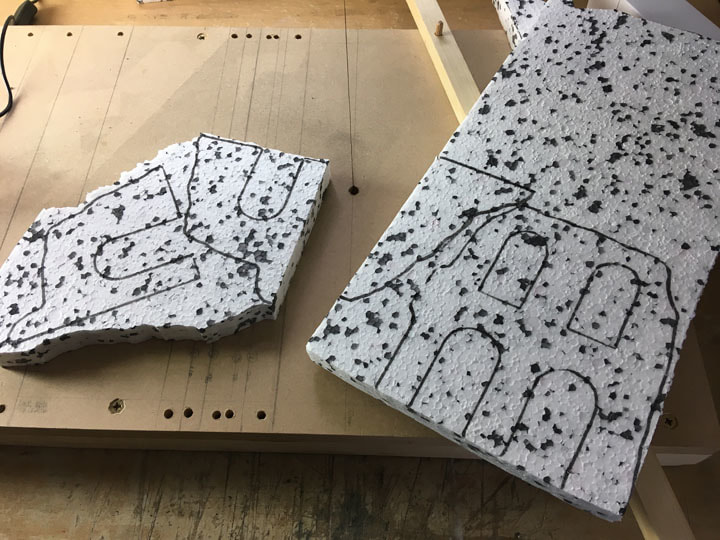
I was actually OK with how it looked. Certainly it was encouraging enough to try again so I sketched out some designs on foam in a similar style to the Building Ruins I already had. What I didn’t do was take any photos of these stages unfortunately.
So … I think a more detailed look at how I made the foam buildings is best dealt with separately and in more detail somewhere else. In short I cut out my designs using the foam cutter, then assembled them using tooth picks and PVA. I then used the tip of a foam cutting tool to score some brickwork details into the surfaces of the foam. Finally I base-coated the whole thing with Vallejo polyurethane primer.
Picture
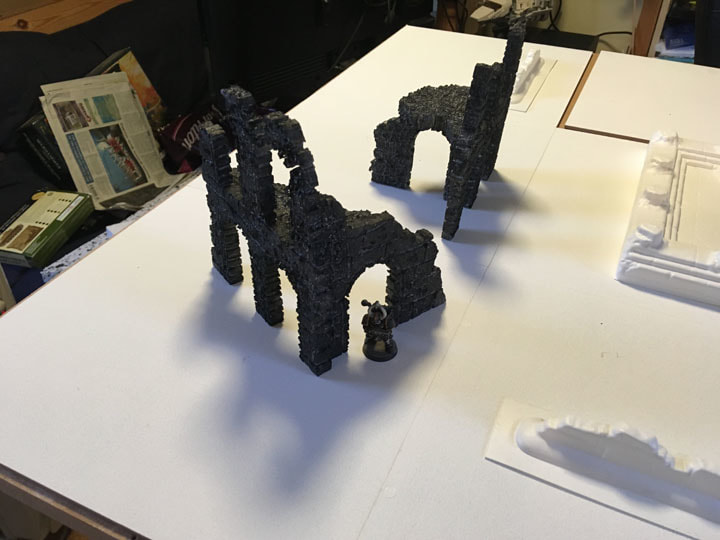
I also tried base-coating with an aerosol primer but it appears that was solvent based and I melted the model – live and learn. I also learned that black is not the best colour for photos as well but here’s (image right) the best picture I have of the buildings. At this point I had all the main building elements, at least, constructed and in a state to go on the board so it was time to move on to Part 2.
0 Comments

28mm Ruined Abbey - Introduction

20/4/2018

0 Comments

 
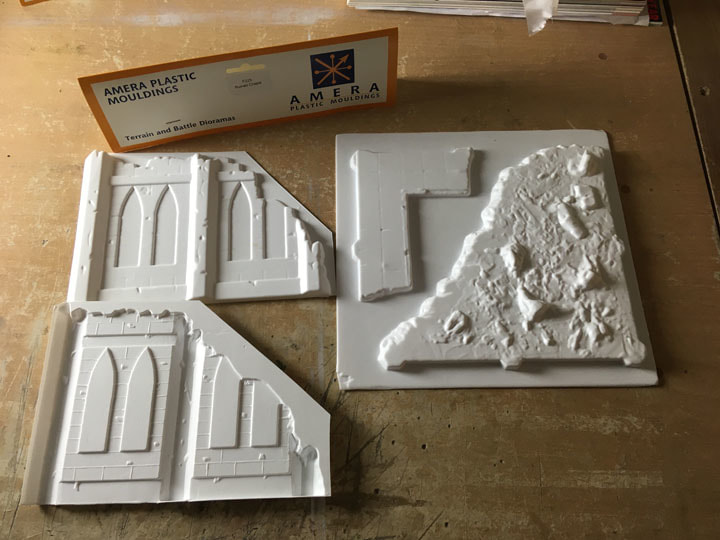
Getting the idea. I had some large, 28mm terrain elements already from Amera Plastics. Since they all had a vaguely Abbey-esque feel I was reminded of trips to Fountains Abbey which was this really cool ruined monastery which we used to visit when I was little. Who wouldn’t want to wage a futuristic galaxy-spanning war in a place like that?
It seemed like some larger ruined building elements with remnants of walls in a coherent design would make for a pretty cool layout – hopefully.
Picture
Starting somewhere. So here’s the starting point (image left) – a two W – board layout. I do prefer the W’s they are less versatile but I tend to stick to rectangular layouts anyway and the boxes are a bit more robust. That said the plan will be to add two A – style boxes eventually to make a full 6’ x 4’ layout. All the Amera elements are roughly assembled and placed on the
board and I start by shuffling them about trying to get a feel for where everything might go and what might be fun. The little cottage (F223) didn’t make the cut – maybe it’ll make the sequel. First impression was that I was going to need some additional elements (even 4’ x 3’ is a lot of space to fill), and as I wanted to try and do something with the foam packing I had left, this seemed like an opportunity to have a play around and scratch-build some ruined buildings. So with that in mind this “tutorial” (for want of a better word but it’s really just a description of what I did in approximately the order I did them) will now be split into 3 main parts:
  • Part 1: where I assemble and/or build the main ruined building elements.
  • Part 2: where (a) I decide on the locations of the main elements to the board and (b) start to build up some uneven terrain across the whole board and (c) procrastinate a lot.
  • Part 3: where I fix down the main elements and finish with paint, scatter materials and flock.
There’ll be overlap of Parts 1 – 3 and as I’m a numpty I didn’t take pictures of every stage so forgive me if there are some serious (though probably not as bad as The Last Stand) continuity issues with the pictures (go to Part 1).

0 Comments

28mm Ruined Abbey - Video

6/4/2018

0 Comments

 
So ... my KickStarter was funded and the "fun" began - cue a year of doing nothing but making 200+ GAMEIN5D boards from scratch and by hand. Plus all the joy of solving the problems of mass producing large items in a small room, shipping large heavy objects all over the world and retaining sanity. Thankfully I had very nice (and most importantly patient) backers.
Picture
With that done I can return to the, much more interesting, business of making stuff and I've made this 4 x 3 Ruined Abbey layout. There's a video of it giving more details up on YouTube and I'll be posting more details of how I made it here over the next few days as a sort of tutorial. I hope you like it.
0 Comments
    Picture

    Hello, I'm Jon. 

    I'm very much a learner model maker, especially dioramas, gaming surfaces, models and toy boxes for me and my children.

    I also invented the GAMEIN5D base boarding system which I'm trying to develop into something more.

    Archives

    March 2019
    January 2019
    December 2018
    April 2018
    January 2017
    December 2016
    November 2016
    October 2016
    September 2016
    August 2016

    Categories

    All
    28mm Lava Terrain
    28mm Ruined Abbey
    Bases For Miniatures
    Dioramas
    Etc.
    Hello
    North Africa 1
    North Africa 2
    Paint
    Tanks
    Tools
    Z230 Redoubt

    RSS Feed

Powered by Create your own unique website with customizable templates.