GAMEIN5D - Bigger Inside
  • HOME
  • PROJECTS BLOG
  • GAMEIN5D 101
  • Kick starter
  • CONTACT
  • HOME
  • PROJECTS BLOG
  • GAMEIN5D 101
  • Kick starter
  • CONTACT

The projects

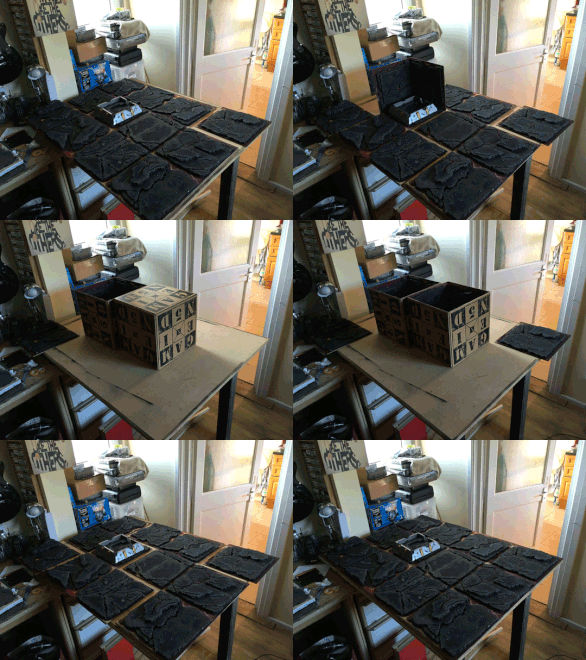
(GAMEIN5D in action)

Lava bases for miniatures

25/3/2019

1 Comment

 
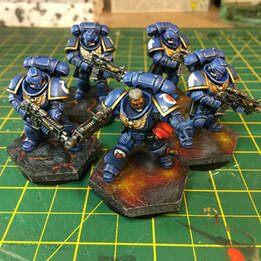
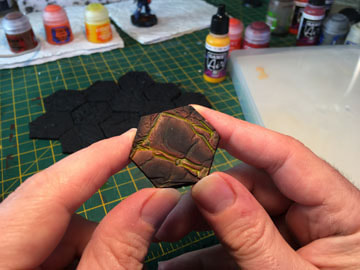
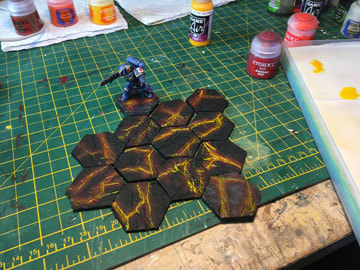
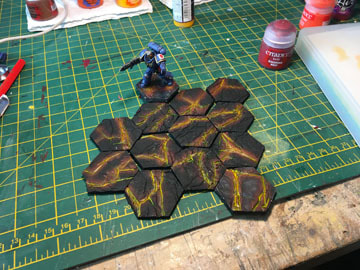
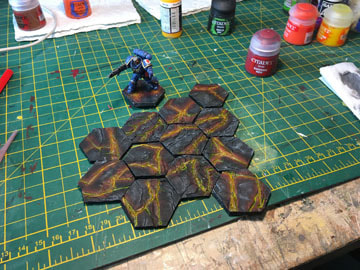
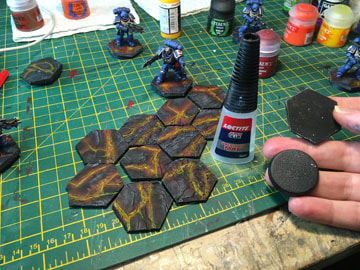
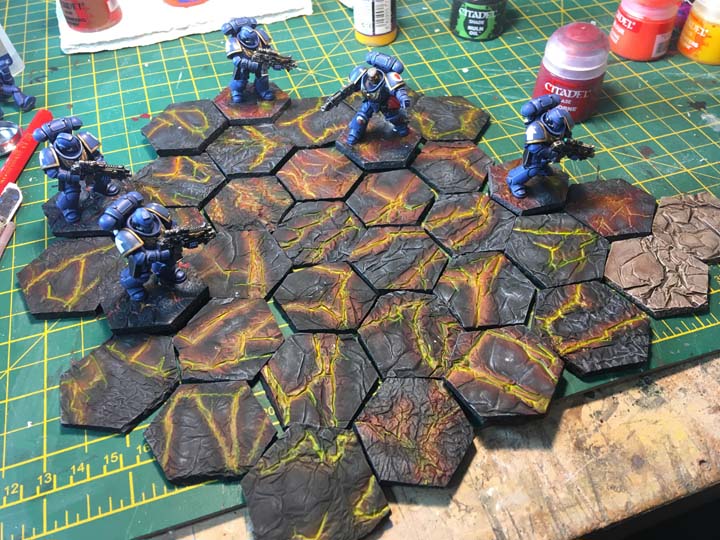
So the lava theme of previous posts has flowed into my [fledgling] attempts at miniature painting. Slogging my way slowly through Dark Imperium I finally finished a set of intercessors (on the right) and decided to try making the bases a bit more interesting.
So this post is about how I made these bases...
Picture
Part 1: Making the bases.
This is the first part where I go through the process of making the actual bases. You will need: plaster-of-paris, tin foil, ruler, pencil, craft knife, water, pva glue, the last light from a dying star, a tile or similar and a flat board. There's a youtube video too ...
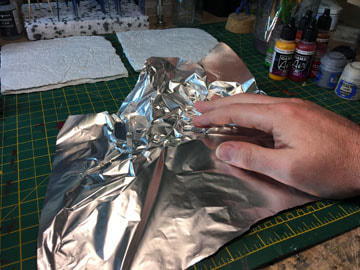
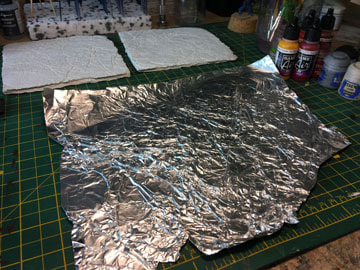
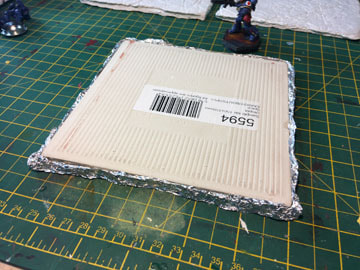
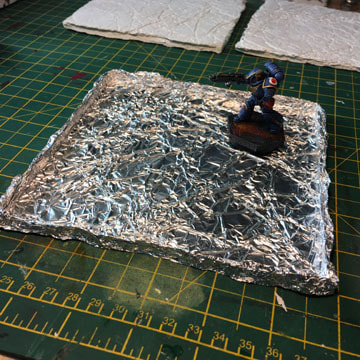
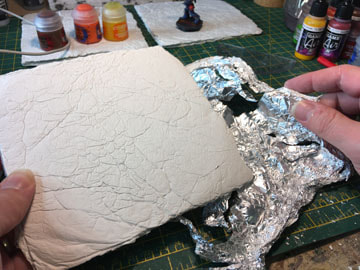
Like many great things in life like, well like ermm ... KitKats ... this starts with a piece of tin foil. Give the foil a bit of a scrunch, satisfying when done in moderation  but don't scrunch it up too tightly or you will  spend ages trying to unscrunch it. Then unscrunch the (lightly) scrunched tin foil and lay it out flat. Then placed a tile on the tin foil and fold up the edges all the way around the tile to create a lip.
After that, carefully remove the tile (or other suitable rectangular object)  and your mould is complete (for that was what we were constructing).
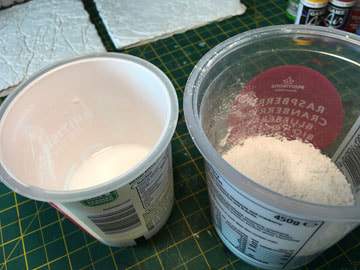
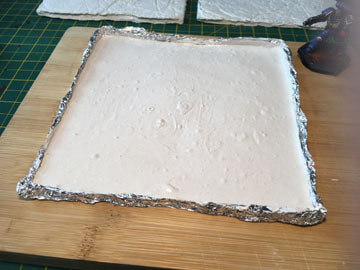
Next, place the mould on something solid and flat (like your partners chopping board, but not that because that would be bad). Then mix some plaster-of-paris. I used (to fill a 6 in square mould) 120g plaster, 60g water and 12g pva glue. Mix the glue and water thoroughly and then pour it into the plaster and mix it like you don't care about air bubbles - because we don't - it's lava, it has bubbles in it (vesicles to be precise, yay geology!).
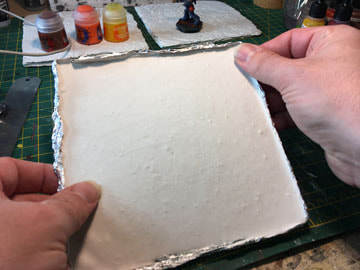
Smooth out the plaster into the corners of the mould and then lift the (chopping) board and drop it a few times so that the plaster settles nice and flat (it's possible that this bit  might make more sense if you watch the video). After about an hour the plaster should be set enough to allow you to remove the tin foil and you should have a nice flat piece of plaster. Turn it over and admire the lovely texture you have created.
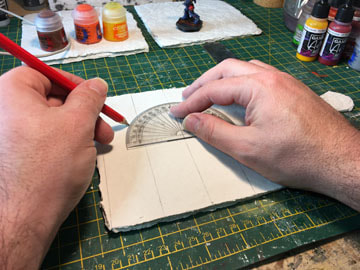
Next we mark out the hexagons. We will need some miniature bases (I used 32mm ones), a pencil, ruler, protractor and knife.
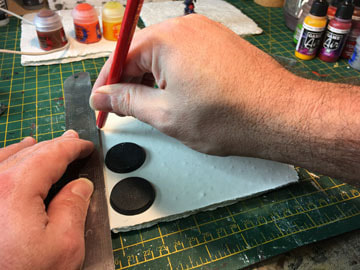
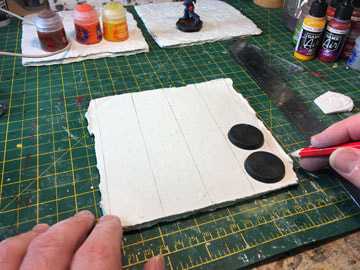
So on the flat side of the plaster make a series of lines parallel to the side. Use the bases to set your lines the correct distance apart (about 34mm in this case). Work across the whole piece of plaster.
Next draw a line at 60 degrees (hence the protractor) to the lines you have just drawn.
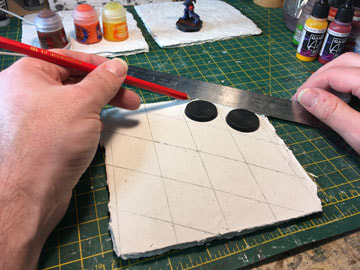
Once again (and using the bases to help) draw parallel lines across the plaster using your first 60 degree line as a guide.
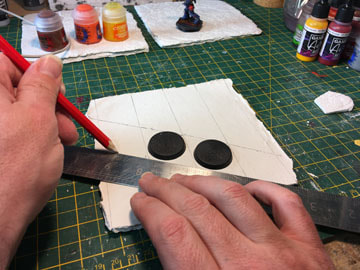
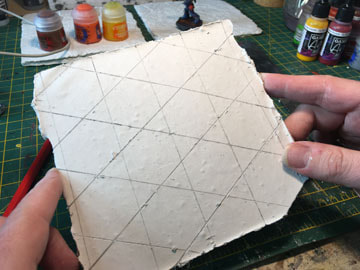
At this point you will have a pattern of parallelograms, place the two bases in two adjacent parallelograms and draw a final set of parallel lines across the plaster.
Now having chanelled your inner MC Escher, you should end up with a tessellation of hexagons and triangles (geometry, yay!)
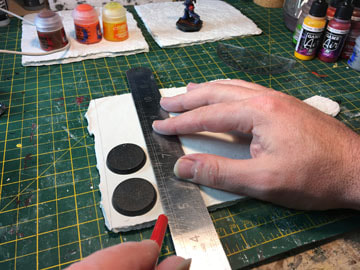
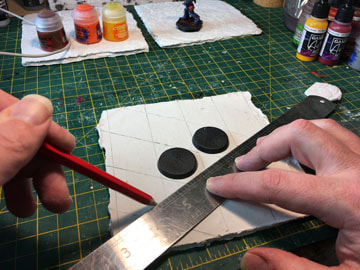
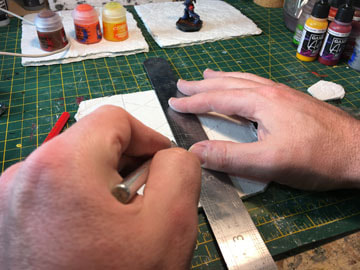
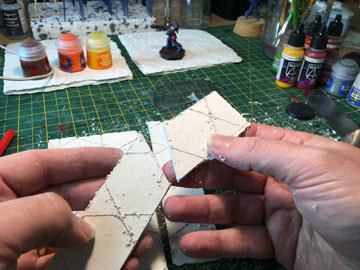
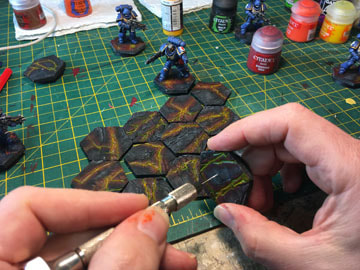
 Next, using a ruler and craft knife, score along all the lines you've just drawn. Don't press too hard or you'll just crack the plaster and that would be sad ...

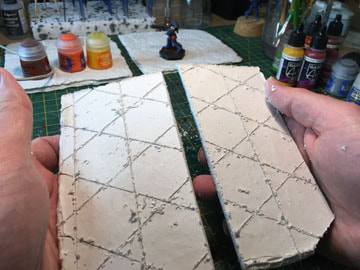
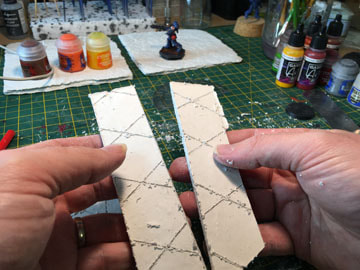
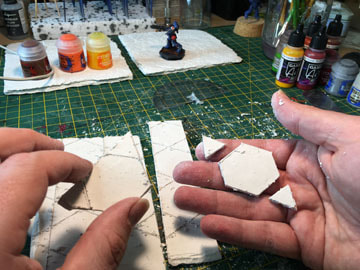
Once you've scored the lines you should be able to snap the plaster quite cleanly. Very satisfying (when it works nicely).

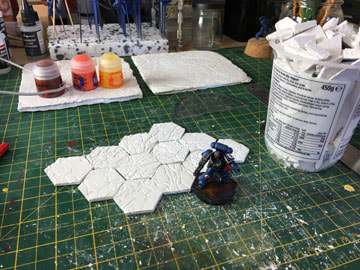
Keep snapping until it's all hexagons.
 So that's the end of the first stage - making the little 6-sided plaster pieces of geometric goodness. Let the plaster cure thoroughly, for at least a day.

Now we have to paint the damn things.
Part 2: Painting bases
The hexagons need painting so this bit is about painting them, but I guess the title probably gave that away already.

There's a youtube video for this bit too if my prose gets too much and instead you want to be lulled to sleep by my dulcet tones...
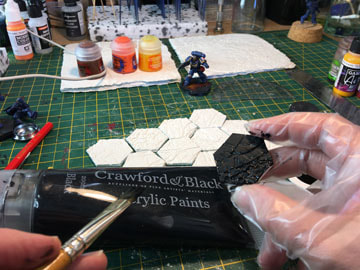
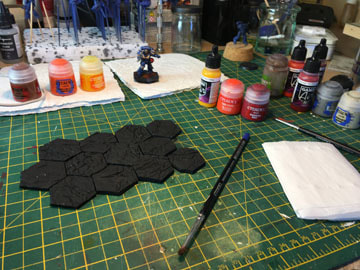
The first stage is pretty straightforward, get some black paint, I use cheap and cheerful Crawford and Black watered down 3:2 water to paint and then slop it on. You'll probably need a couple of coats and if you're like me you'll still end up missing bits.
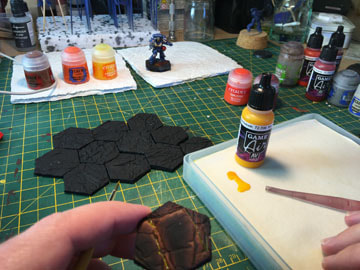
The next stage is to have a look at the bases. Pick one up and choose a couple of deeper, longer or just interesting cracks on the bases. These will be the areas where the heat might be more intense and these will be the areas we are going to liven up...
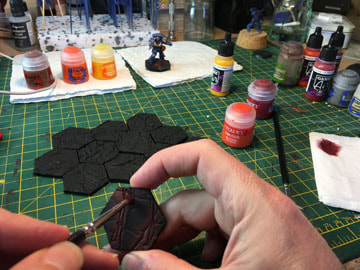
Paints-wise I used GW's Khorne Red but any similar dark red like Vallejo's Gory Red will be fine. With a large dry-brush I kind-of dry-brush  the red in a wide, diffuse swathe either side of the crack I'm trying to emphasise.
Picture
I leave a decent amount of paint on the brush so it's quite heavy dry-brushing (is that over-brushing?). I'm also going for the flat areas rather than trying to catch edges.
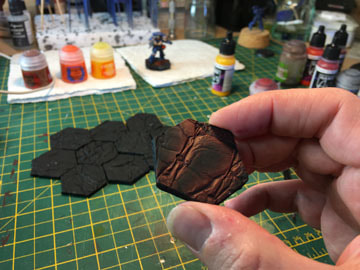
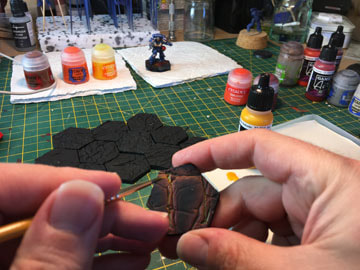
The next step is to use a smaller brush and dry-brush orange (GW's blazing orange in this case) inside the red area created in the previous stage. I also so pick out edges and raised areas near the crack with the orange.
The next stage is really easy but very hard to photograph. I put a few drops of Vallejo's Sun Yellow and a few drops of water on my wet palette and rather meekly introduce them to each other - like two shy people on a first date. to begin with I use the watery end to wet the middle of where the orange paint is, which is probably a deeper crack in the texture.
Picture
OK ... time out, and I have tried to be a grown up about this but this section needs liberal use of the words crack, deep, wet, wetting (which is a horrible word) and brush, it's a double-entendre minefield. At one point when I was making the video the many variations on the sentence "making the crack wet" loomed up in front of me, and there's definitely a pause as I try and avoid it. OK ... trying to be a grown up here.
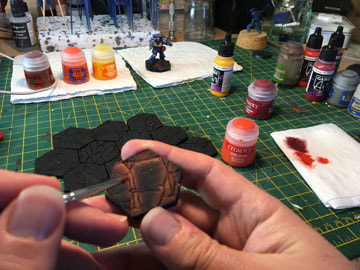
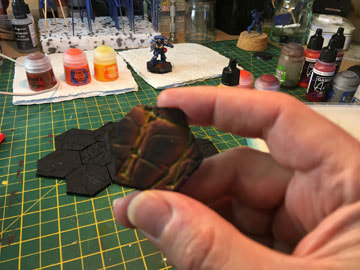
So once the crack is wet (ahem) put my brush in the more pigment heavy bit and just dab that onto the base. The (thin) paint gets drawn along the crack like a pin wash.

The paint is very thin and although it might look quite bright to begin with it fades a lot when it dries. Several passes are needed like this and let it dry so you can see the colour build up.
Corners, intersections and deeper bits all get the most pigment as this is where the heat flow would be highest. In truth I usually get impatient and start using just straight paint lightly added to areas wetted with water if the process is taking too long.
Picture
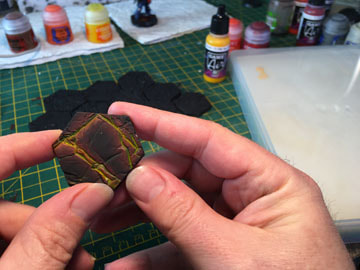
Impatience notwithstanding it still took several passes to build up sufficient yellow to look OK. In the photo on the left the bottom-most base is the one I've been working on, the middle six I made more passes and the upper five had fewer. You can see the variation in intensity.
At this stage I had completed the single base with some grey dry-brushing of the black areas (which is why it looks different).  We'll use the other bases to demonstrate this bit.
At this point with the "hot" colours done the black bits are a bit boring. So I dry brush GW's Dawnstone lightly on the the flat black bits and pick out some raised bits and edges. This is repeated with Administratum grey but sparingly.
A word about getting miniatures onto the base next but that is (I solemly promise) the last stage. If you got this far you're probably asleep anyway...
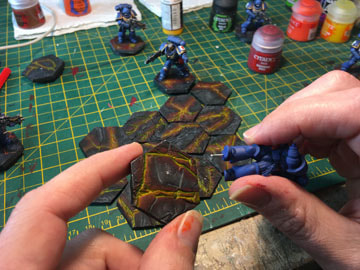
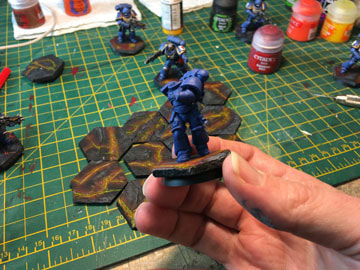
So, you will need: superglue, a fine drill, plastic bases (I used 32mm) and a miniature. I superglue the plastic base to the bottom of the hexagon. This protects the plaster-of-paris and I like how they look being a little raised up. I drill a small metal rod (bit of paperclip) into one foot and superglue that too. Use the drill to drill through the plaster base (don't push to hard). Finally the little rod goes through the base and a little more superglue keeps it all together.
As promised that is it. I think making these little bases might be habit forming as I've made quite a few while noodling around trying to put this post together. I've tried a muddy/parched colour scheme (bottom right in the photo below) and will probably try an ice scheme too but that's it for now. Thanks for reading and if you are already asleep, sweet dreams.
Picture
1 Comment

Z230 Redoubt - modifying and painting

5/1/2019

1 Comment

 
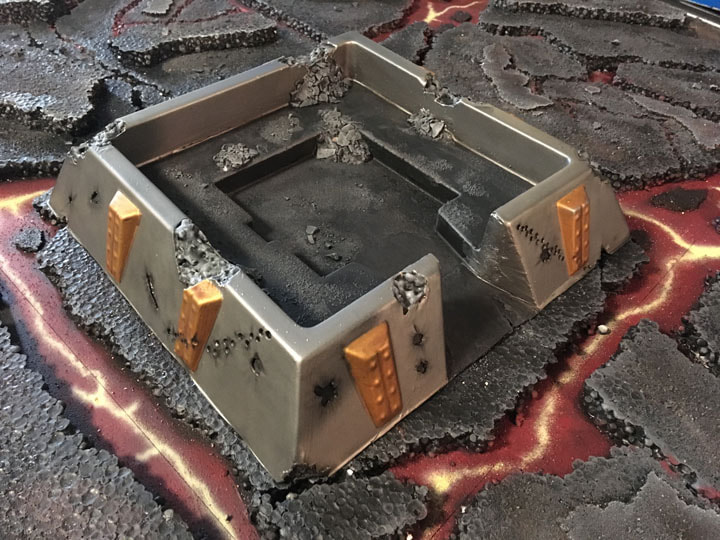
Right ... this is an attempt at a [quick] guide to how I modified and painted the Z230 Redoubt from Amera Plastic Mouldings that I used in my Lava Terrain . In this post most of  the pictures are in galleries, and you can hover over some pictures for a bit more information.
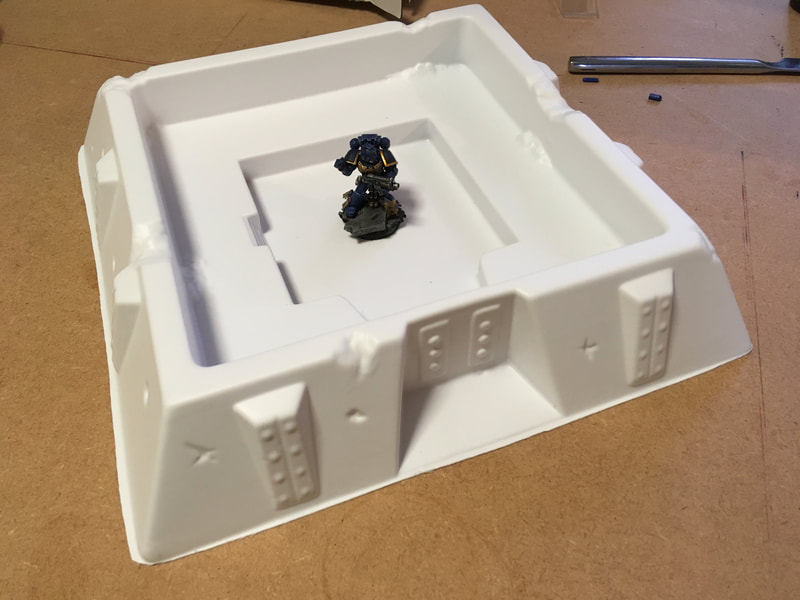
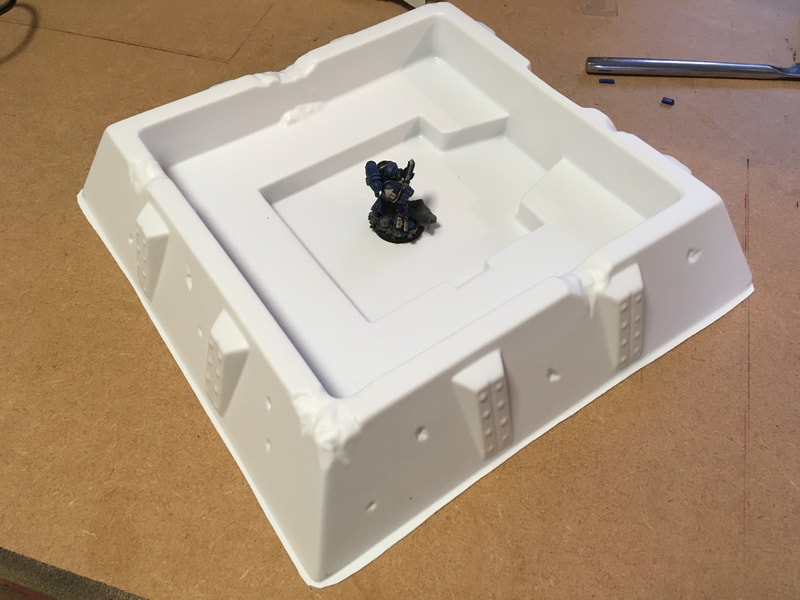
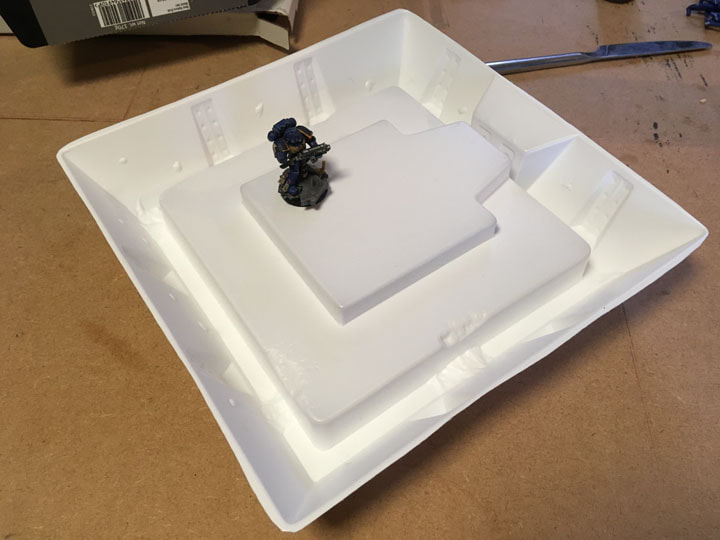
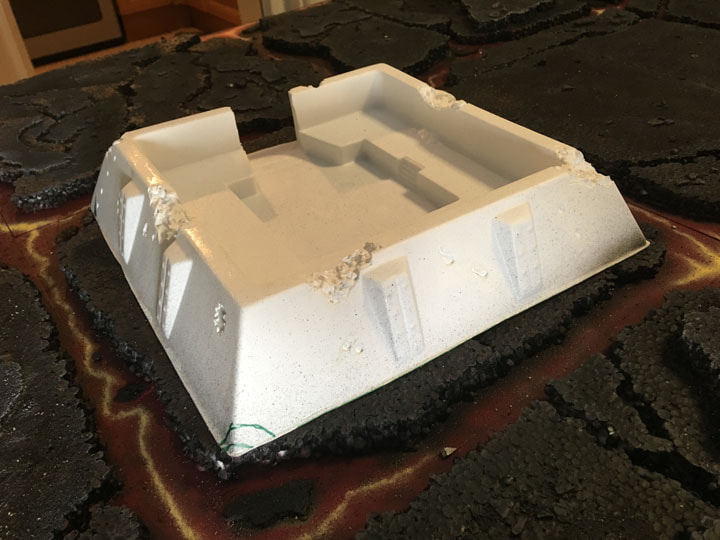
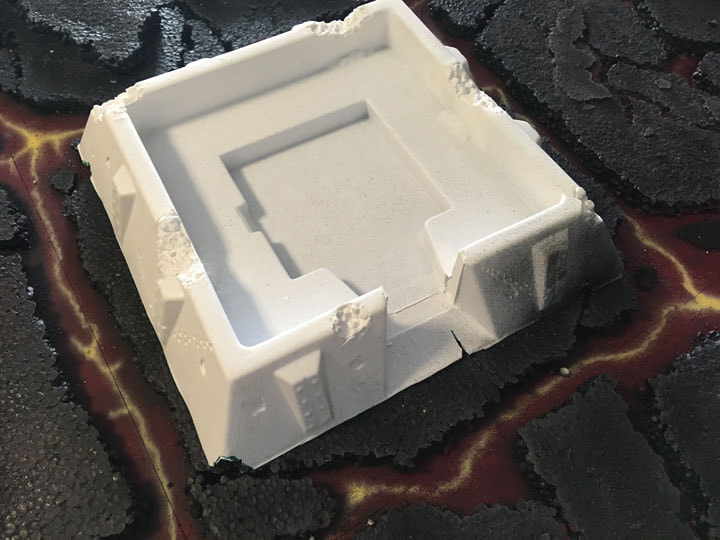
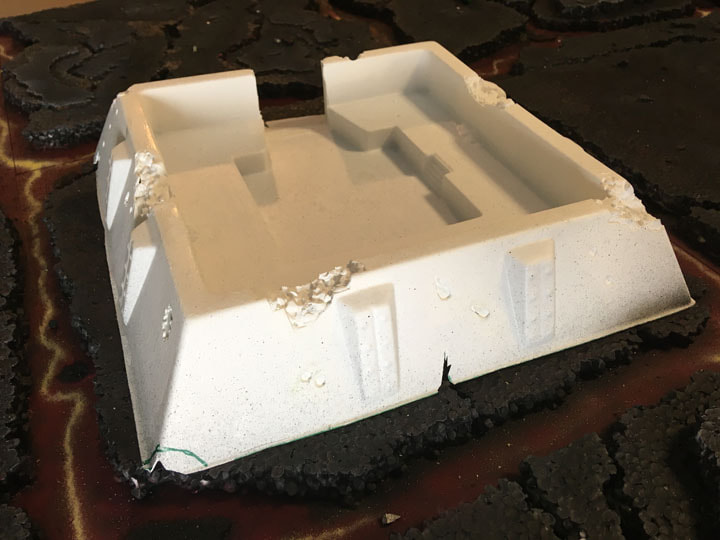
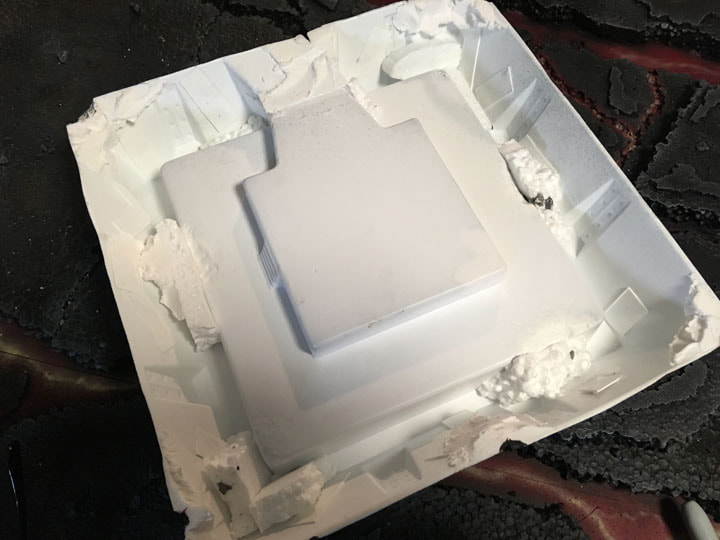
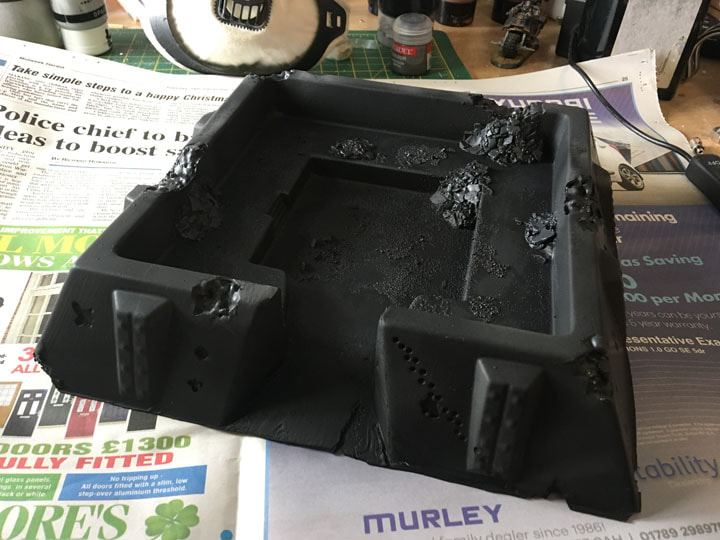
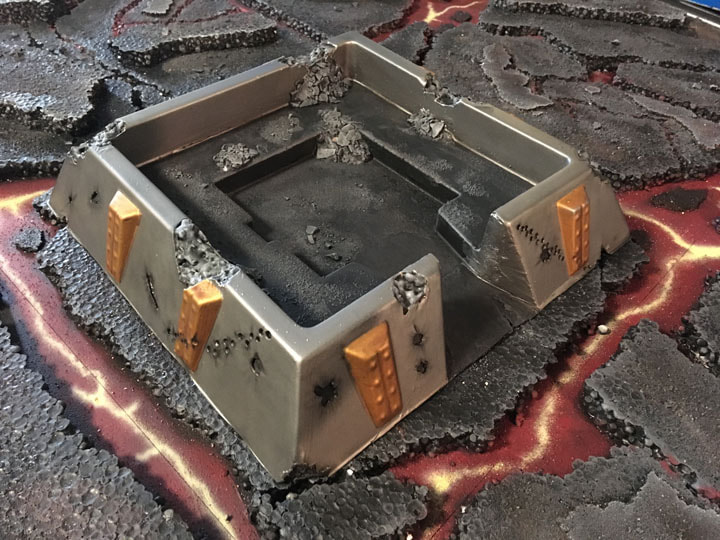
Here's the Redoubt after it has been trimmed  - this is best done with a large, sharp pair of scissors as the plastic is quite strong. As you can see in the images (right) the redoubt looks great "as is" with some battle damage but I wanted the damage to be a bit more severe and I wanted there to be more of it. I also wanted to remove the doors.
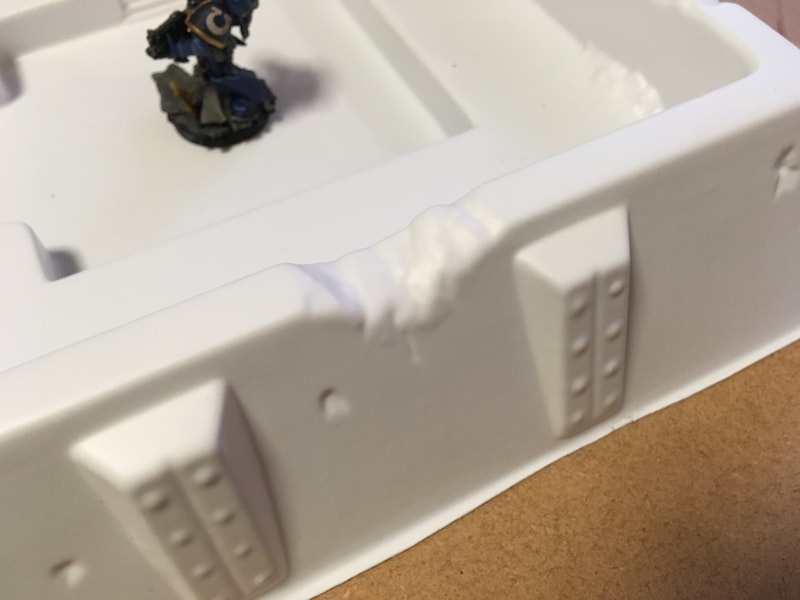
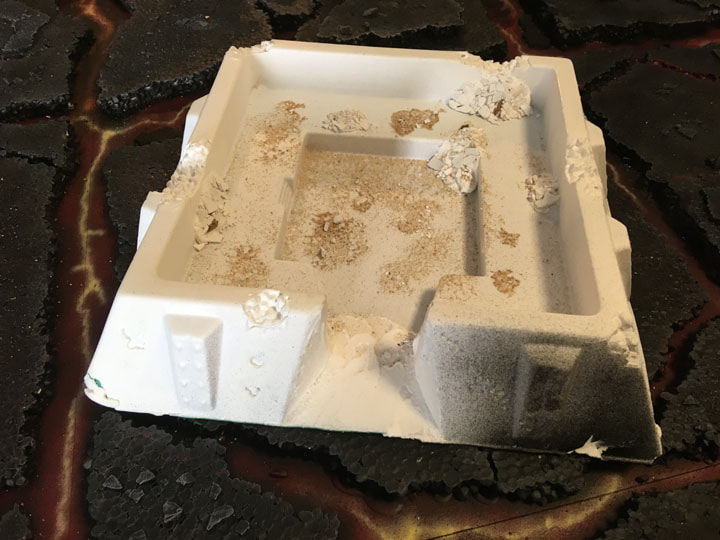
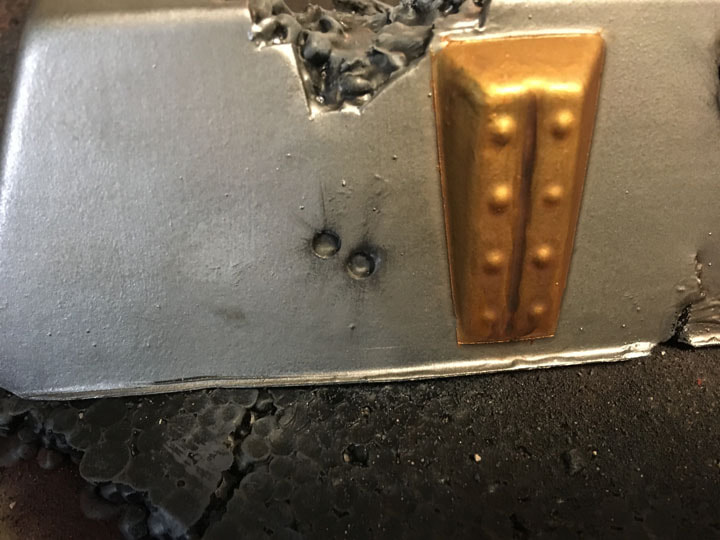
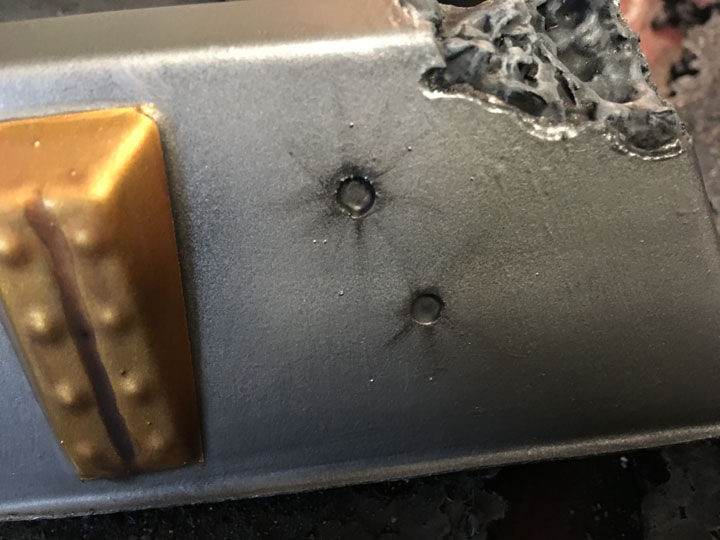
The next step was to attack the model, I used a combination of scissors, an exacto knife and a small drill to remove all the damaged areas and enlarge them. I also added many more shell and bullet holes, the latter in a strafing pattern across the model. Finally I cut cracks and removed corners from anywhere where the model was going to sit on cracks in the terrain.

 This was so that the model would look more a part of the landscape. I then plugged all the holes with a mixture of polystyrene, poly filler and plasticard so that all the new holes had something behind them. Finally I cut back into the polysytrene plugs I'd just put in to make the holes deeper and more angular and covered and filled the gaps at the sides where the doors had been. Hopefully the pictures (above left) will help that to make sense.
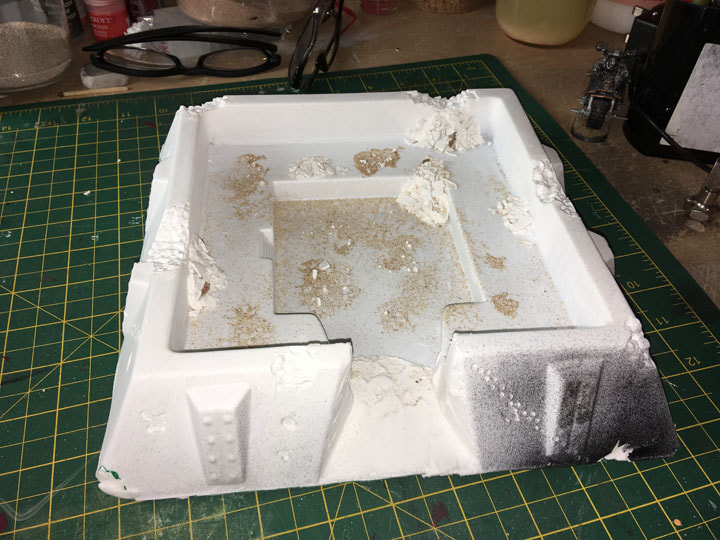
Next I added rubble by blobbing and painting pva over the model before adding scatter of various sizes from 3 - 5mm bits of plaster to coarse and medium ballast to fine sand, in that order.

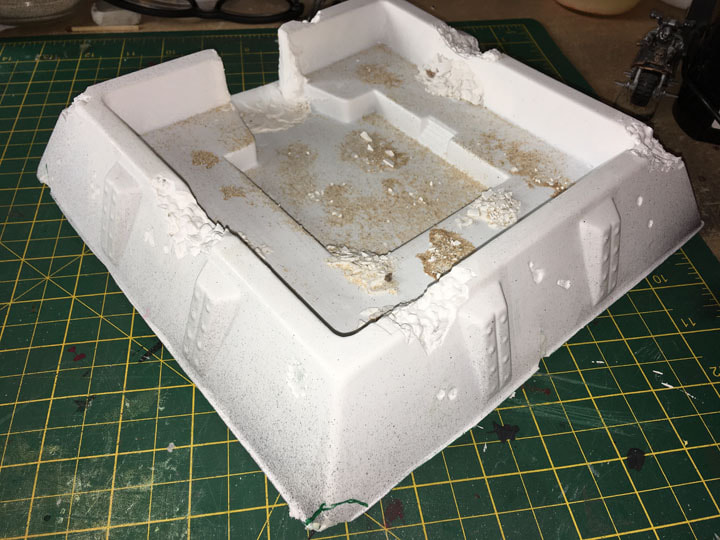
A last, and important stage was to the seal it all under a good couple of coats of vallejo polyurethane primer. This protects the polystrene bits I'd added.
Once that was dry I then primed it again with halfords black primer, I just prefer the finish this gives but without the vallejo layer the halfords primer would melt the polysytrene bits.
Picture
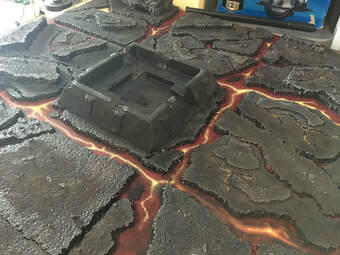
Time for a pause and a breath ... at this stage it looked OK and fitted nicely into the terrain. Well, I thought so ... you can make up your own mind, here it is on the left.
I did consider leaving it black, mostly because I'm lazy, but it was a present so I  wanted to make it pop out a little and I just can't help "doing a bit more" with these things (often with disastrous results).
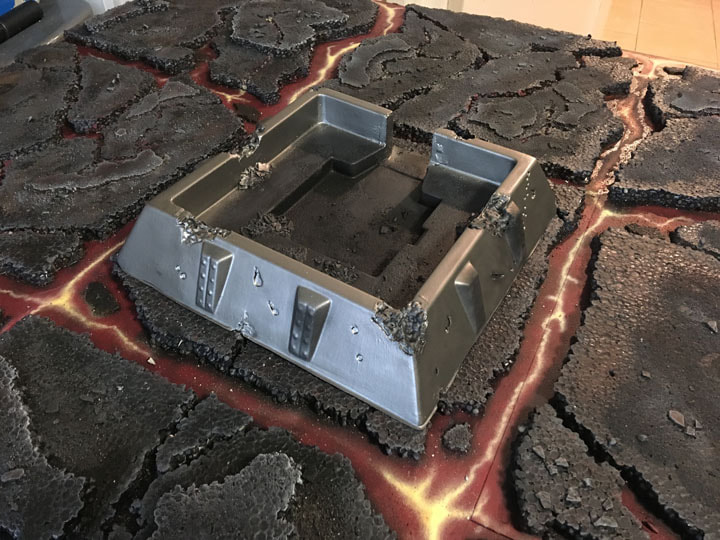
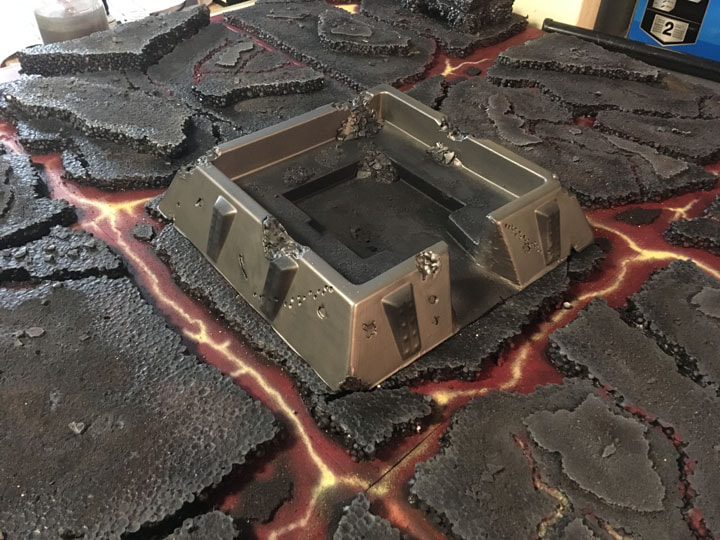
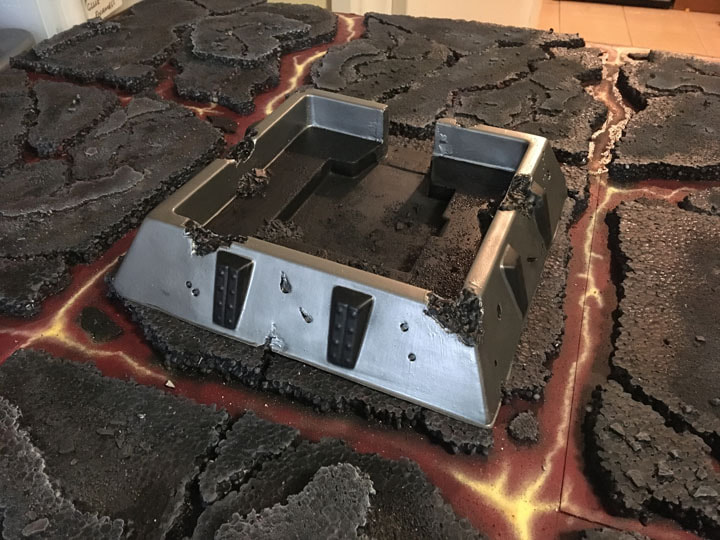
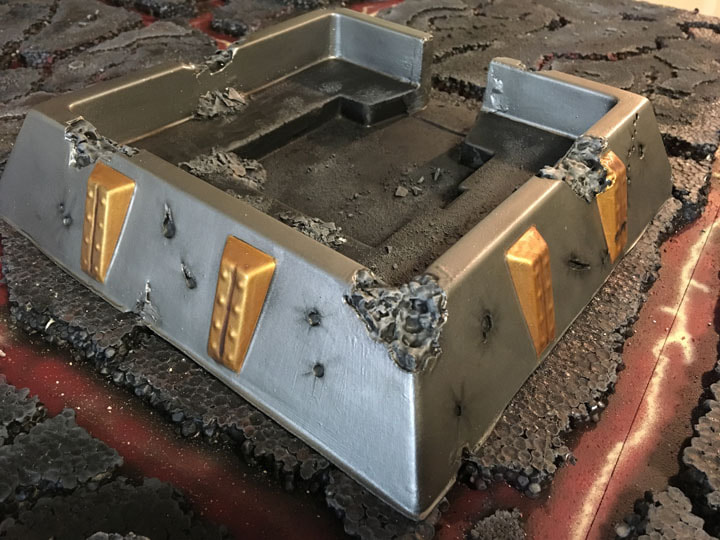
On the right I've airbrushed some old GW boltgun metal that I'd thinned with water and added a few drops of vallejo's flow improver. I tried (with little success) to avoid the bastions and damaged areas.
On the left I'd gone back over, using a brush, the damaged areas, the interior and the bastions with Abaddon Black.
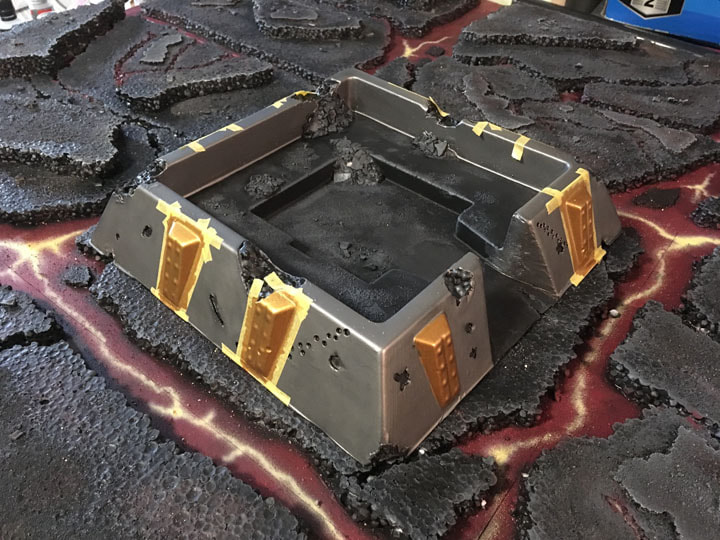
Next (and on the right) I masked off the bastions and brush painted them with retributor armour. Then (far right) masking off and a first dry drush of a dark grey over the rubble and damaged areas.
To finish the model added a wash of agrax earthshade into the damaged areas and rubble (not sure it made much difference) before I dry drushed these areas with three more (increasingly light) shades of grey -  achieved by adding in a little light grey to the previous mix each time. I also dry brushed mithril silver onto the corners and edges of some of the damaged areas.
The last stage was to dry brush some blast marks from the shell holes by lightly drag the brush from in-to-out very slowly building up some sooty - looking marks.
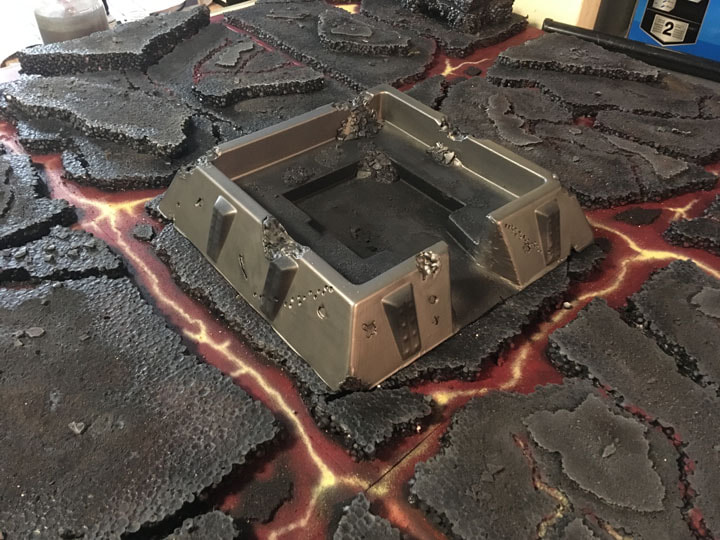
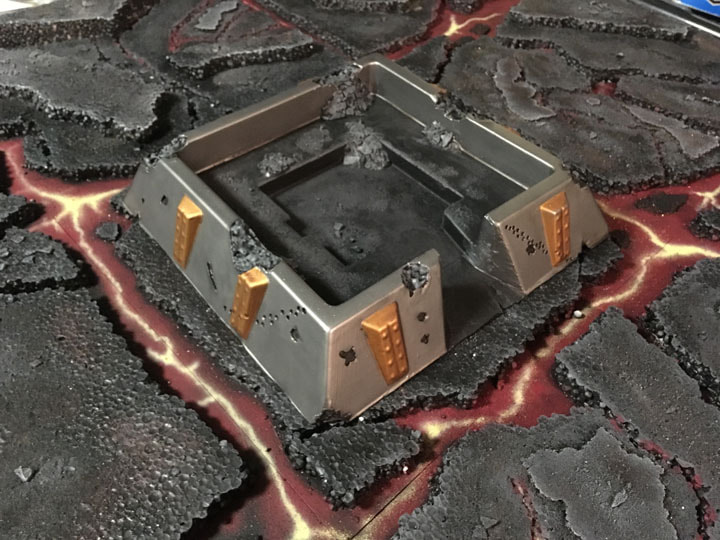
And here it is done (below). I hope you like it, I'm a big fan of Amera's stuff so I hope I've done it justice...
Picture
1 Comment

28mm Lava Terrain

23/12/2018

1 Comment

 
Believe it or not someone actually asked me to make a terrain for them for Christmas. There was no brief other than "can you make us a board to play on" and I know the person in question plays Tau and paints then in pale shades. So ... I thought they'd stand out nicely and look good  against a dark background. Also I'd been wanting to do a lava themed terrain so it was the perfect opportunity.
Part 1: planning and layout
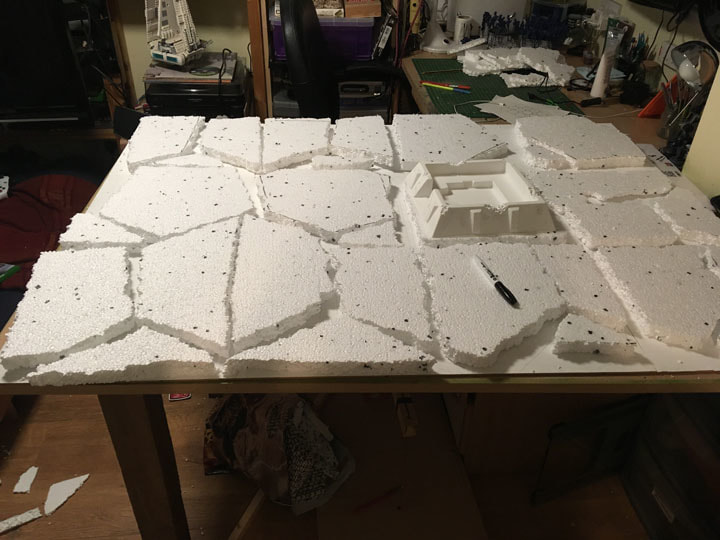
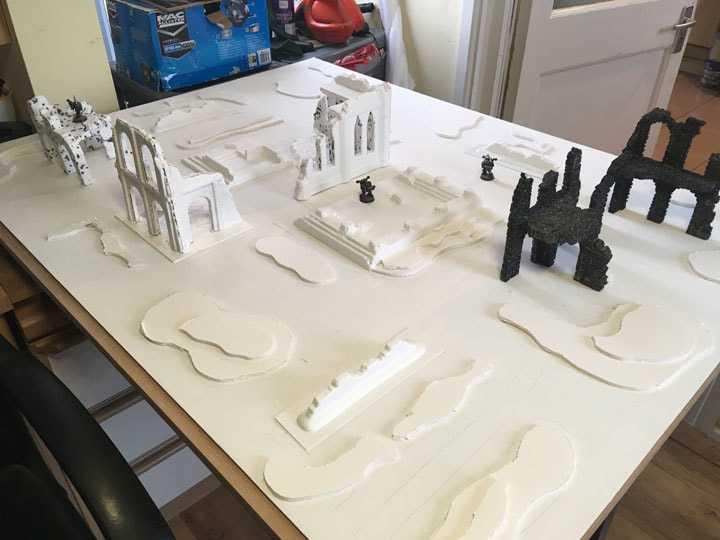
The plan for the board itself was pretty simple, I was going to use the polystyrene packaging (that the GAMEIN5D boards were posted in) to make "rafts" of basalt that would look like a broken up landscape of solid rock over a barely molten (but very, very hot) layer beneath. The gaps between the rafts would be where the joins in the boards would be, some layers I might build up and others I might cut down.
Picture
I also wanted to use the Z230 redoubt model from Amera Plastics, because their stuff is great and the model in question fits nicely on the 1 foot square tiles. In the image (above right) I've started to break up the polysytrene into rough hexagons and started to lay them out, on the board. I'd like to think this is a well thought out process, but it isn't. However, I did get them down in some sort of order and then I cut them all in half with my big hot wire cutter. This straight away made them all slightly different thicknesses but also gave me twice as many pieces if I wanted to do this again.
 Part 2: Building
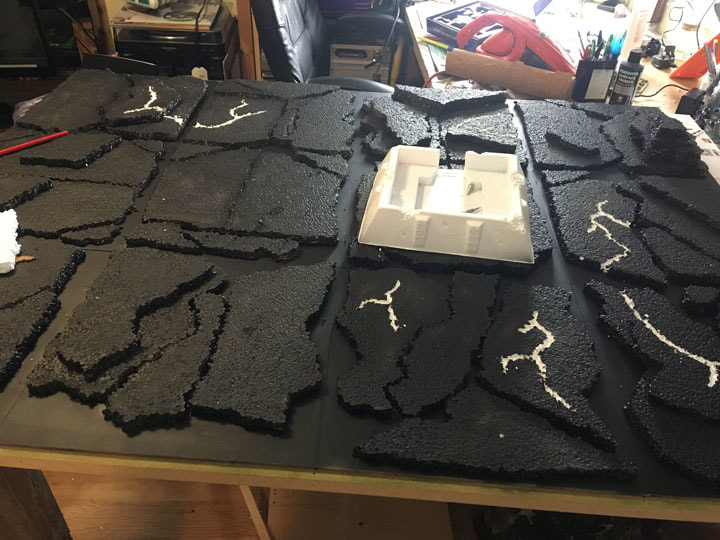
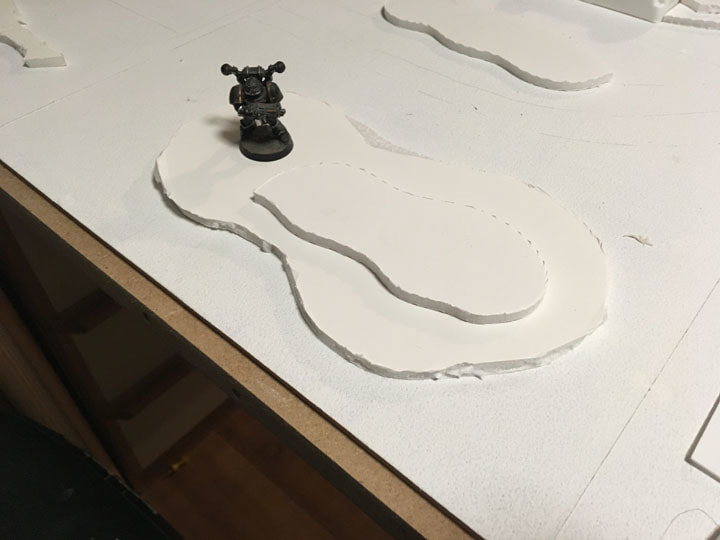
So, on the right, I've glued (pva left overnight) all the basalt rafts (sounds better than polysytrene pieces) and sprayed everything with Vallejo's black acrylic primer. This protects and strengthens the polystyrene and means I can use solvent-based stuff if I want later. I've also built up some areas with double or more layers to create a topography.
Picture
Picture
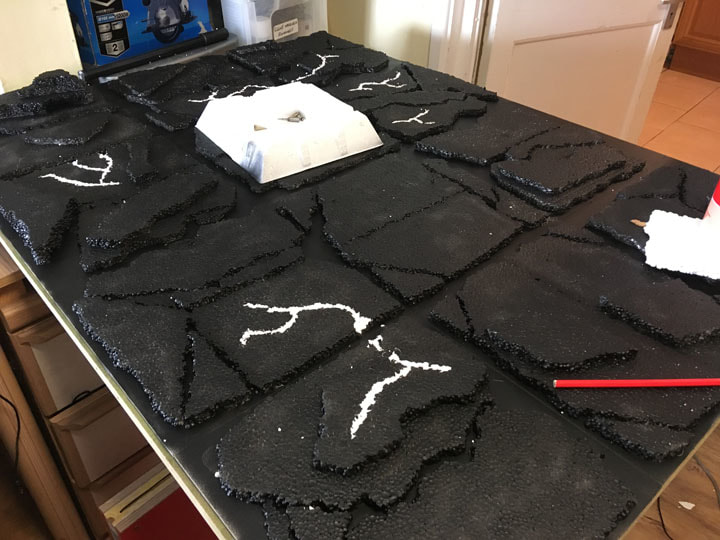
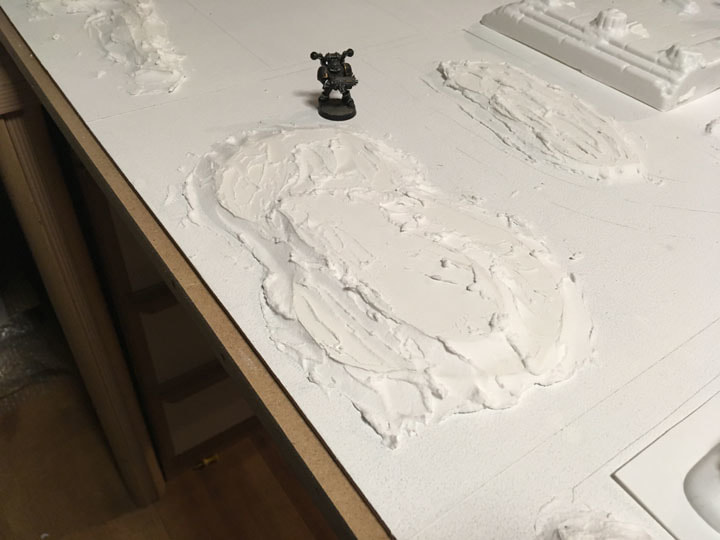
 At this point I also decided it was looking a little boring with all those flat, black slabs so I started to carve out some cracks with the idea that these could bring a bit of colour across the board as well as break up the parallel and perpendicular lines necessary because of the joins between the boards. This of course assumed I'd be any good at painting lava . . .
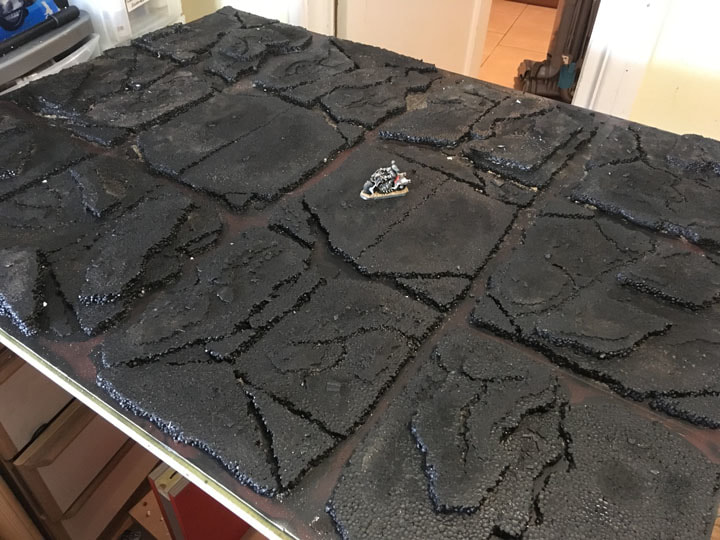
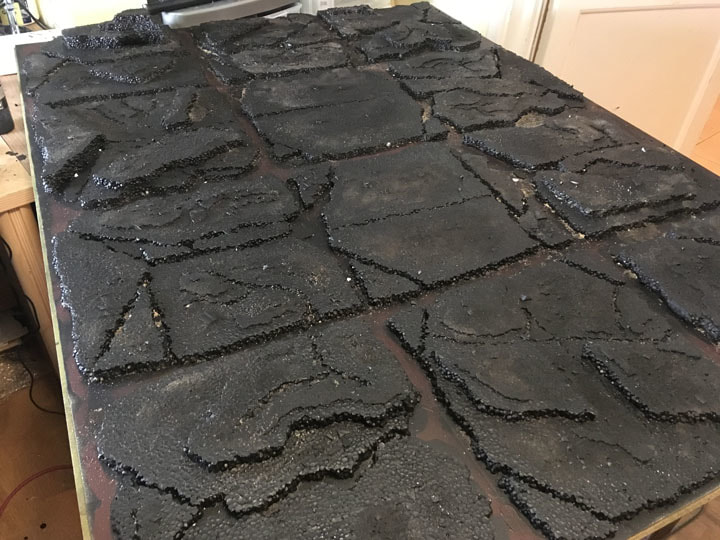
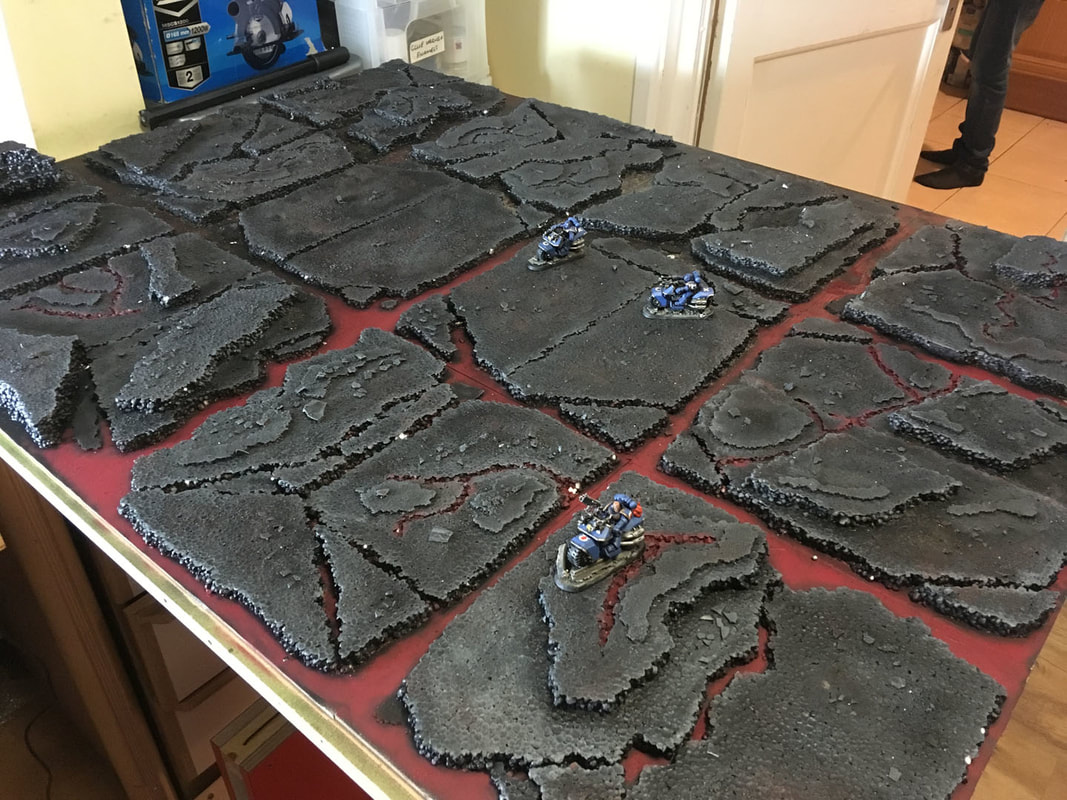
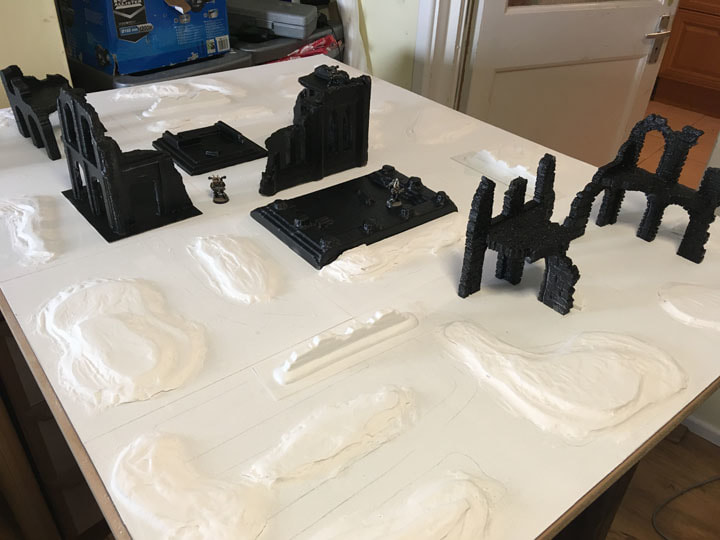
I then added some thinner layers of cork, just roughly torn into pieces that fit on the rafts, again this was just to add variation in height and texture. Finally I added a layer of pva and then scatter materials, fine sand, medium and coarse ballast and finally small angular plaster chunks that I always have a store of. Then it occurred to me I could have done all that before I painted the whole thing black, so I had to paint the whole thing black . . . again. Below you can see the fully built terrain - Black Legion Biker for scale but he buggered off before I took the second photo.
Picture
Picture
Despite my usual total lack of proper planning of steps and stages, and if you remove the huge amount of time spent procrastinating or simply zoning out and staring at the board this process actually seemed quite speedy and I was pleased to have got so far.
Part 3: Dry brushing the basalt
"Dry brushing the basalt" should definitely be a euphemism for something; however, it was time to start breaking up this massive expanse of black.
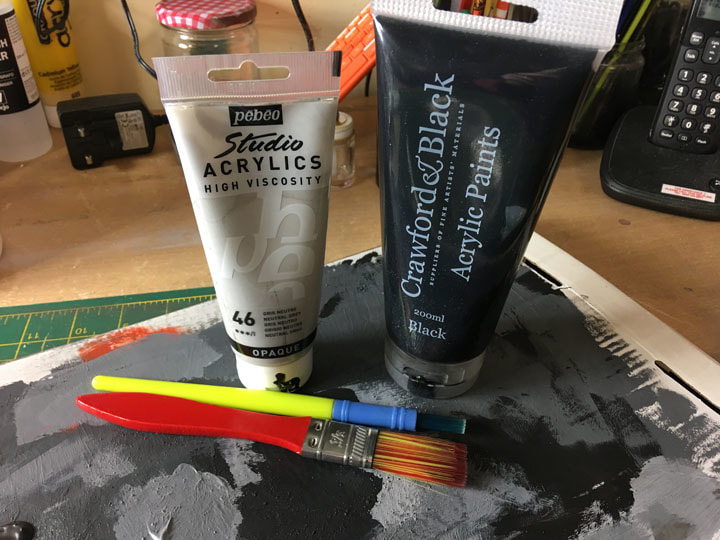
As it was quite a large area to dry brush I used some cheap acrylic paints, Crawford & Black and Pebeo (neutral grey). I also used cheap and quite large brushes and a big piece of cardboard (all pictured, right) to do mixing. Quite simply I mixed grey into the black in increasing amounts as I worked higher up the levels in the terrain, the higher up the paler the grey.
Picture
For me, this was one of the most enjoyable parts of the project, I love the way dry brushing brings things to life and makes things look so much better. And it doesn't need that much skill, which suits me just fine.
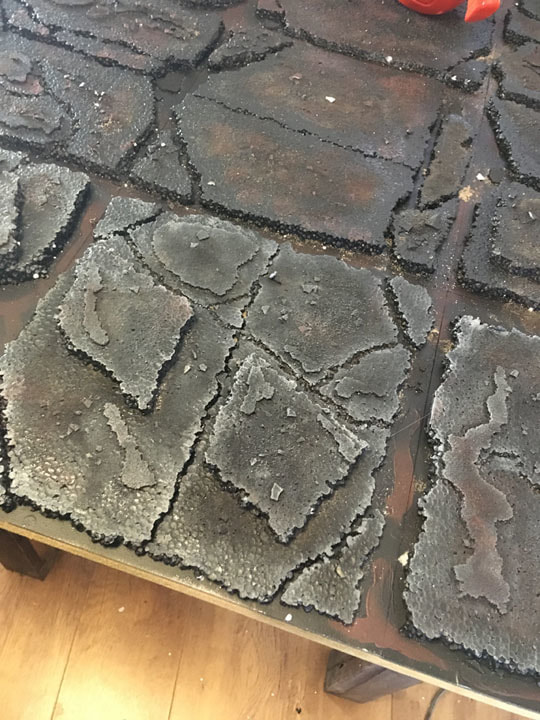
 I was quite happyIn the photo on the right only the lower  tiles have been drybrushed and you can really see the contrast between those tiles and the unbrushed tiles above.

I took some time to work all around the board and I had to go back and darken some areas are I got a bit carried away (or stopped concentrating.

I then broke out the airbrush and painted all the gaps between the rafts in GW's Khorne Red (air) . I didn't try too hard to get the red into the edges of the rafts as that left some shadows but also I didn't mind a bit of red going to the sides of the rafts to give them some glow from the hot ground.
Picture
In the photo below the dry brushing was complete and I was about two thirds of the way done with the red. Plus we have an explanation for why the chaos biker naffed off so quickly.
Picture
Part 4: Adding the lava 'glow'
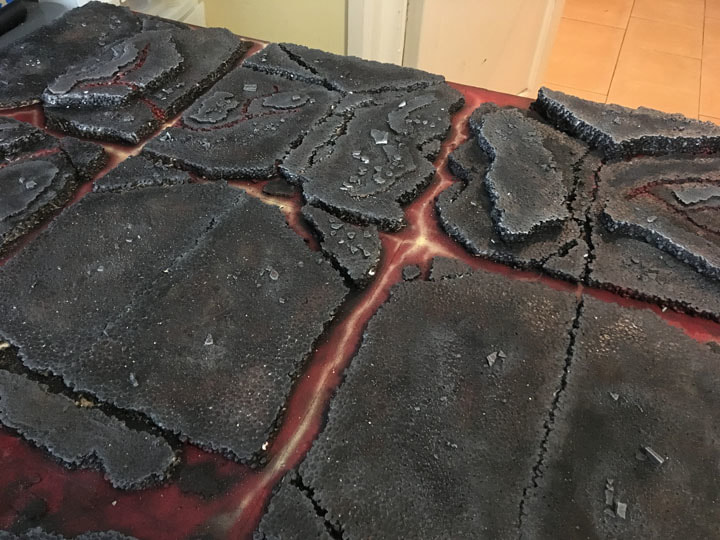
Going back to the original idea I didn't particularly want streams of lava around the rafts, instead I was thinking of cracks where the heat from beneath would shine through.
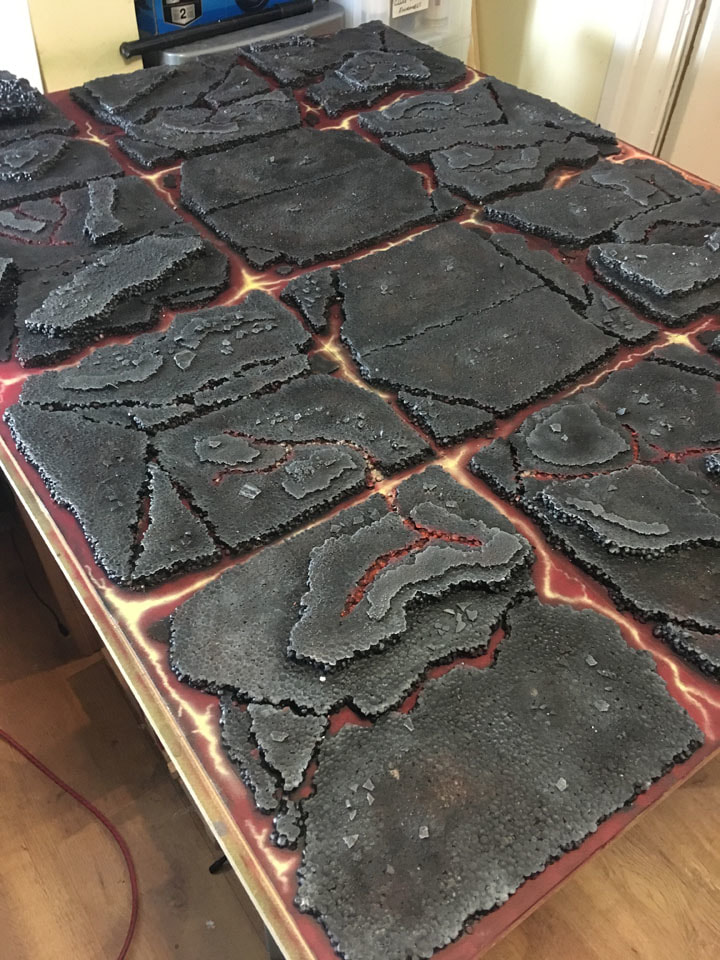
In the end I settled on laying down a thin layer of GW's blazing orange which I'd thinned down for airbrushing before dropping the pressure on the airbrush so I could add a thin line of yellow (in this case Vallejo's sand yellow, 70.916). This seemed to produce a glowing effect that I could live with as shown on the right.
Picture
It took a while to build up the desired effect, mostly because I kept messing it up - I'm not great with an airbrush as you can tell. I also went over the cracks I'd cut into the board, yellow first this time then dry brushed orange and then black over the yellow. You can see the completed board below.
Picture
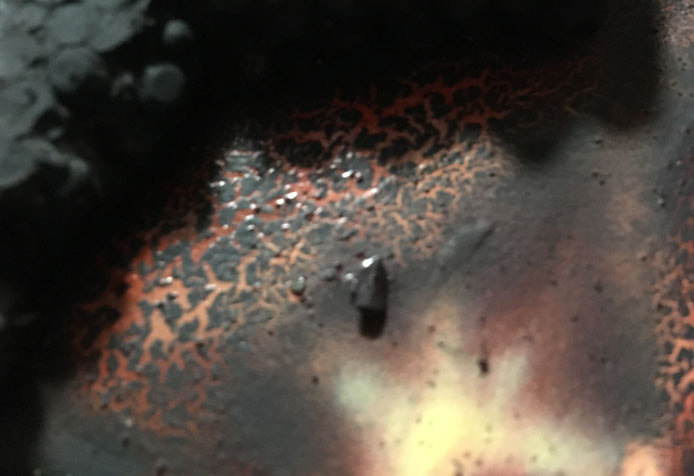
I'd read about using pva to produce a crackle effect for lava so I thought it might be fun to try that in a couple of places. It's a bit unpredictable but I found airbrushing black paint (as thick as you can get through the airbrush) over pva that had been left for a little while to go tacky seemed to work ok, the picture on the right shows on of the better bits.
Picture
So that's it ... lava terrain done and now since it's after Christmas and Santa has delivered it I can add that the recipient was well chuffed with it (phew). If you've got to the end of this blog entry I salute your perseverance, if you're feeling particularly masochistic you might want to check out the youtube (very) brief description and flyby of the terrain below.
Picture
1 Comment

28mm Ruined Abbey - Part 3

22/4/2018

0 Comments

 
Part 3: First I decided I wanted something a bit better under the buildings, something like the remnants of paved floors and I also realised that there should be a lot of rubble around from all these ruined buildings.
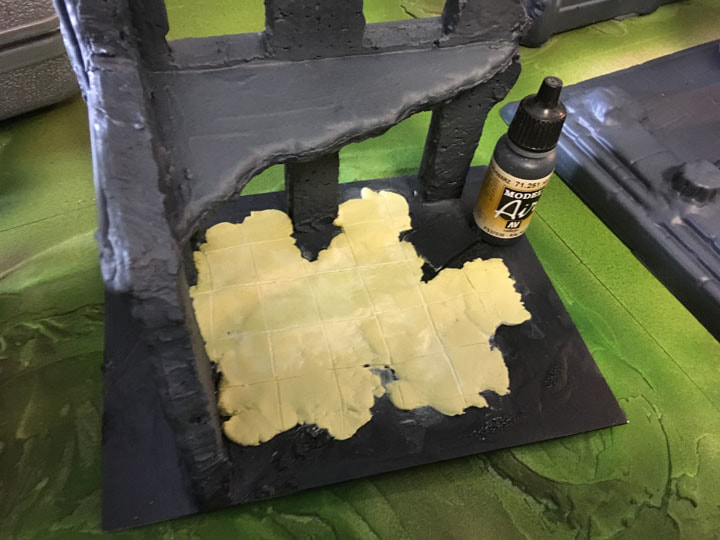
For the building floors I spread milliput thinly across the base and scored a paving pattern into it. I used milliput because it doesn’t shrink when drying. This is really important because I know from experience that the best way to warp the base-boards is to put something that shrinks as it dries directly on to them. The image (right) shows the paving in the first stage, rubble and other detritus will hide the edges.
Picture
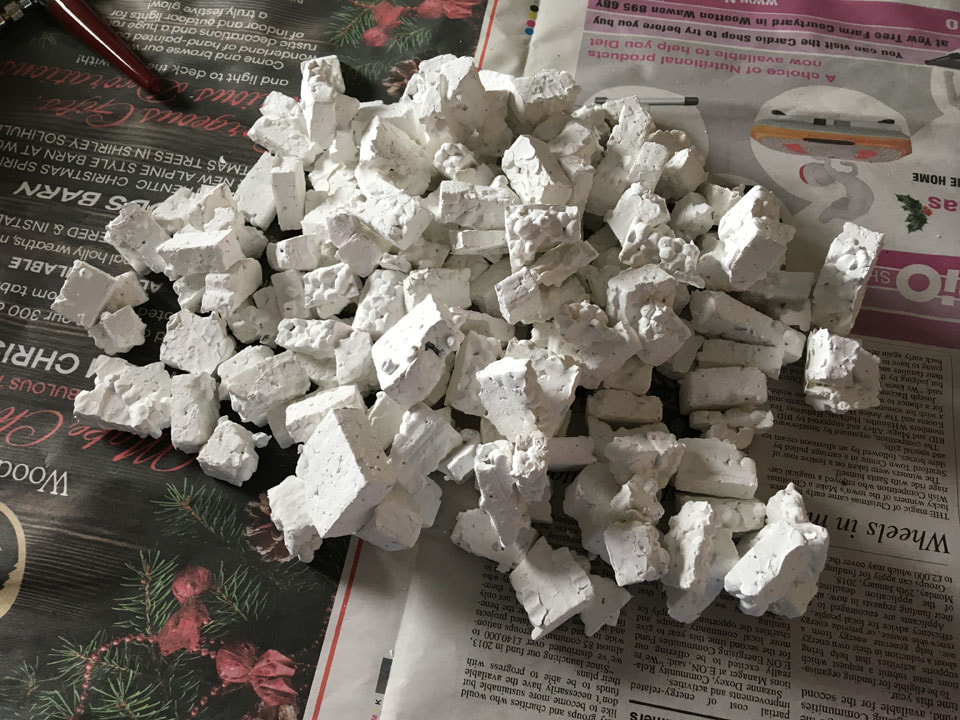
For the large amounts of rubble I cut up lots and lots of scrap foam packaging into brick-sized and smaller pieces. These then got tossed around in a bucket with a generous amount of white acrylic paint until all the pieces were coated. I then spread them all out to dry (image below).
Picture
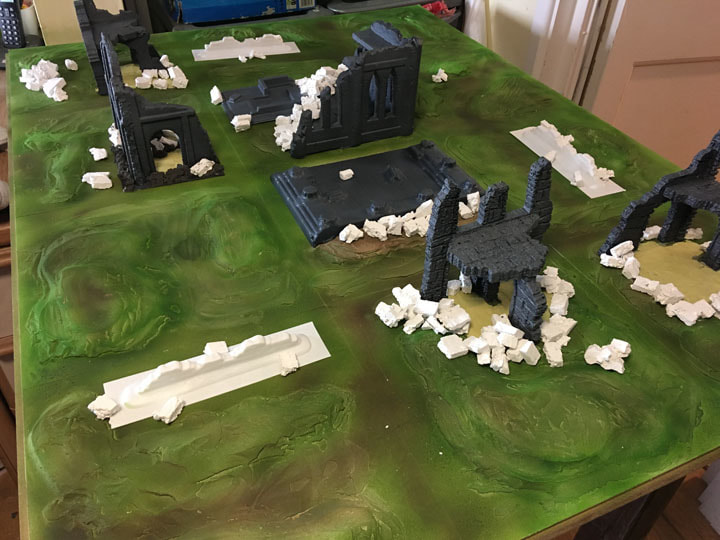
From this point forward things definitely started to accelerate. I created the milliput paving under the other foam buildings and started planning how the rubble was going to be postioned around the layout. Much of it was going around the buildings but I also wanted to pick out the location of where walls used to be and maybe even suggest the locations of where other buildings may have stood (image below right).
I also made a better pass at painting the terrain adding some darker browns and greens to the lower lying areas and trying to get to a better colour to go under the scatter and flock later on.
 
After the image on the right was taken I also removed all the buildings from the board and airbrushed them a light grey
Picture
shade and gave then a wash with Agrax Earthshade. The wall sections were trimmed down and painted. The paving stones were painted with a mix of brown and burnt umber (Crawford and Black cheap and cheerful) and the rubble was removed and given a the same treatment as the buildings. I probably didn’t take enough photos at this point both because I was on a roll and it’s still not something I’m particularly used to doing … sorry.
It does at least explain the somewhat sudden jump to the next photo though (image right). This is the start of the end really. At this point I have just started to work my way around the board.
 
The wall section was bonded (PVA) in place and I used a large cheap brush to splodge (very technical term that) on slightly (1:4) watered down PVA where I was going to
Picture
scatter Woodland Scenics coarse ballast. This was a great colour match for the stone colour I’d painted the walls and buildings. I was also (finally) brave enough to bond down the buildings (PVA again) but not until after I had checked the boxes folded up a couple of dozen times.
A word about scatter and folding boxes: If you get too much scatter on the hinges of the boxes it can cause problems when you fold the boxes. To counter this I try and use less, and finer or softer, scatter materials when I’m working across hinges or try to avoid them entirely if I can.
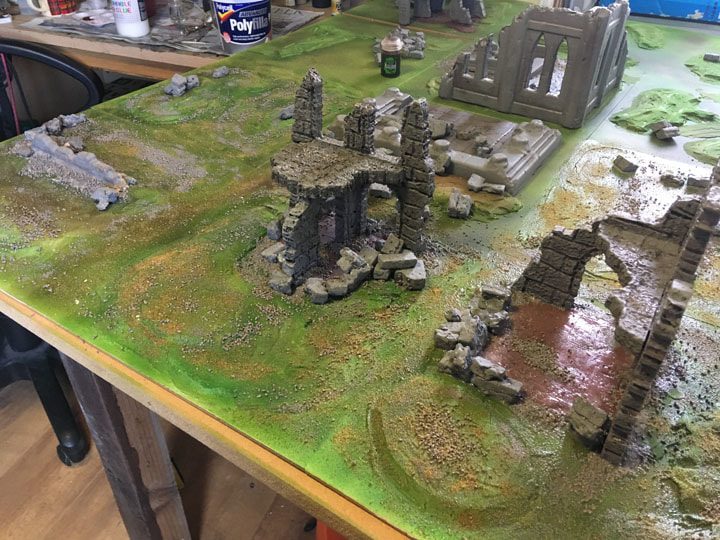
Now it was just a case of working my way around the board. I used PVA to bond the buildings in place and then added the larger pieces of rubble where walls may have fallen down, I used smaller pieces of the foam rubble around and between the larger and finished it off with Woodland Scenics coarse and then fine ballast.
Picture
Picture
The two images above and the two below are me continuing to work my way slowly around the board.
Picture
Picture
And suddenly … I started to believe I may actually finish this layout. Having bashed through and done all the sticking down of buildings, rubble and scatter the board was quite damp so I thought I may as well carry on and start to add some flock, darker green in the lower areas and mixed blends and a lighter green in the higher areas which is a nice way of shading.
Then the slight mania passed and I realised that everything was definitely in need of an opportunity to dry and solidify. At this stage (and in the image on the right) it was a bit of a PVA swamp I started to have at least 3 bodings about whether or not it would all now fold up. Of course it was far too late to do anything about it and any attempted folding up while things
Picture
were still drying would probably result in a spectacularly horrible Atlantis-like sliding of everything off the board. So I decided not to do that and left it to dry overnight and tried not to worry (too much).
Picture
In the end though it worked out. The next morning it had dried pretty well but I left it until I came back from work that evening to check it all out.
 
The “first-folding” was a bit traumatic and stressful as loose scatter gets everywhere and gets stuck in the gaps and stops the magnets connecting or gets wedged in the
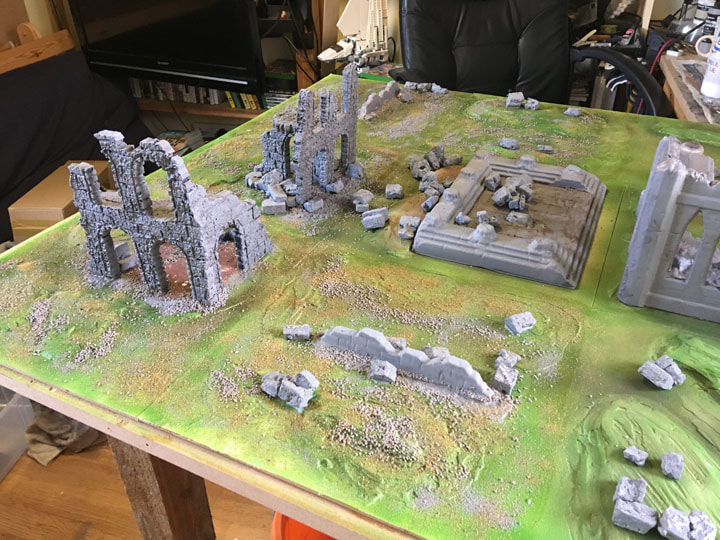
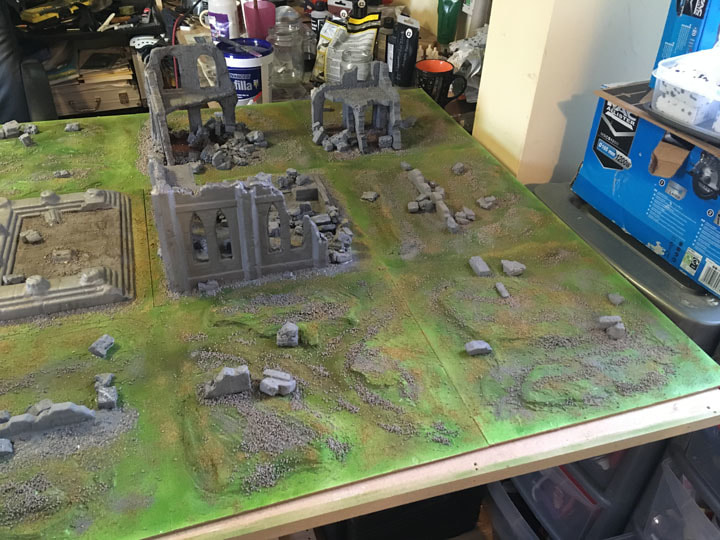
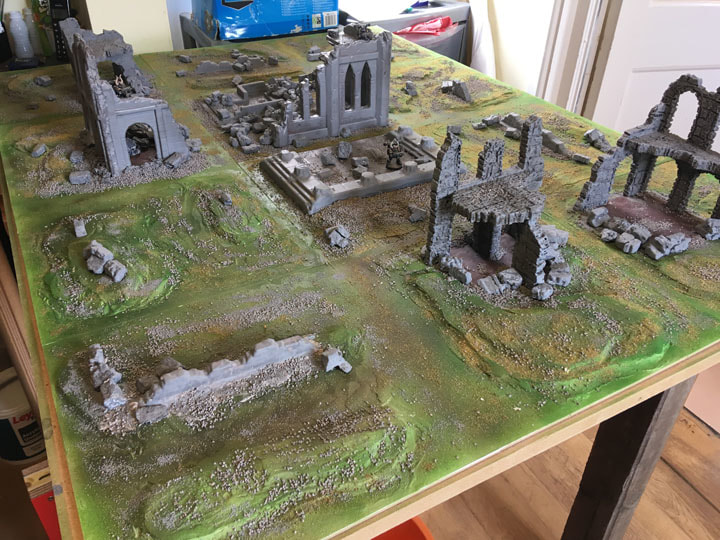
hinges and stops things folding but a bit of blowing, a gentle brush (possibly getting a bit Mills & Boon here) and liberal application of a dust-buster (hopefully never used in Mills & Boon) and the problem is cleaned up and the boxes folded up nicely. Although not finished I definitely felt I was finished enough to show others (and at time of writing I still haven’t got any further) but I was still quite happy with some of the elements (images above and to the left).
The End: Well … the end of this tutorial anyway, I hope I’ve shown the main stages of how I built this terrain and how to make sure the whole thing folds up as it should. I haven’t included any photos of it folded up as that would just be pictures of a box with a logo on it (with a magical secret within) and the YouTube videos so a better job of showing that (search GAMEIN5D).
Picture
Picture
 
Happy building. Jon
0 Comments

28mm Ruined Abbey - Part 2

22/4/2018

1 Comment

 
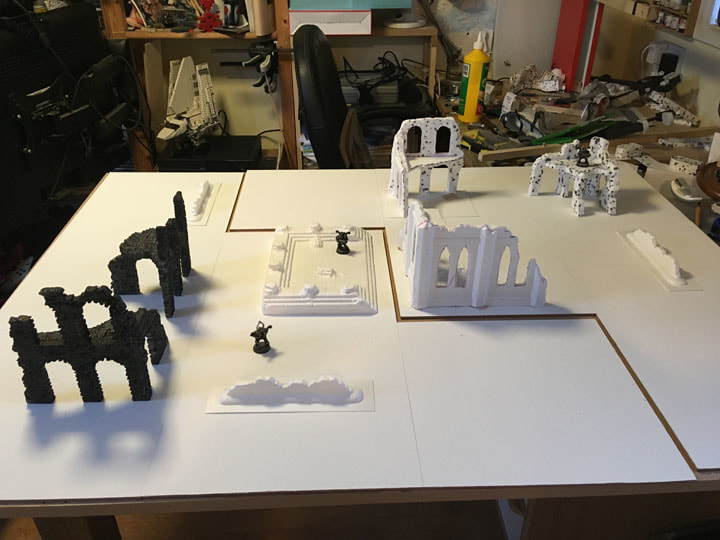
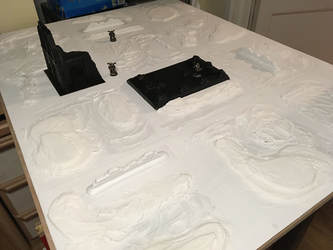
Part 2a: This is probably the part I enjoy the most because it’s basically just playing around with the terrain elements you have and imaging how and why the various pieces fit together. The only difference with the GAMEIN5D boards is that you have to keep one eye on how things will fold up into 3D. Fortunately I’ve always been OK at “seeing” how things fit together but even if you’re not its easy just to blue-tac things to
Picture
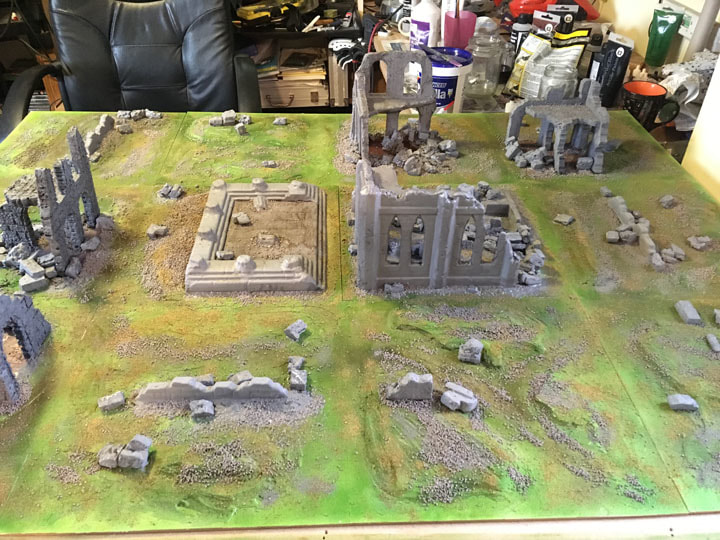
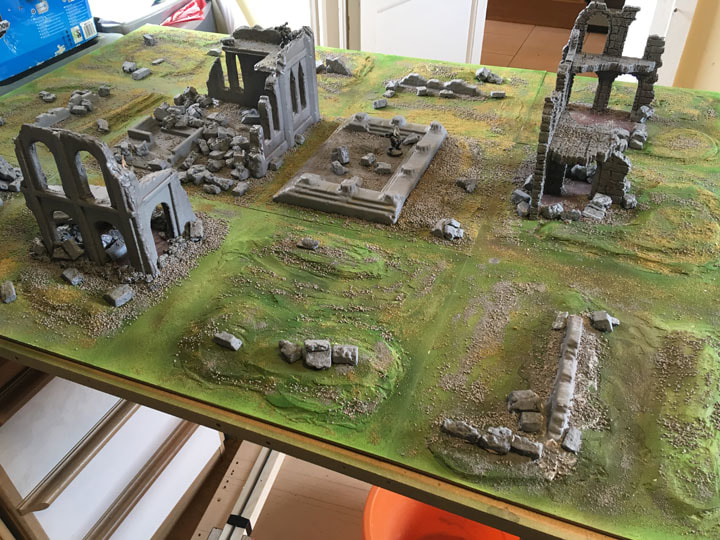
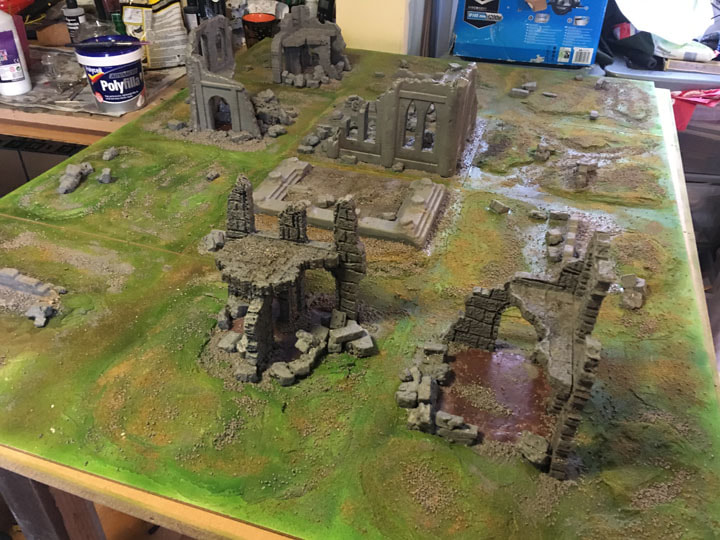
the board and then fold up the boards to see if they fit – if the box closes – it’ll work fine. This was pretty much what I settled on in the end (image right); I’ve separated the two boards so you can see where they are located. The idea was to have the Chapel and Temple ruins in the centre as the “bottom” of both boxes – I liked the idea of the later Abbey being built on the site of an older Temple. The three ruins and the wall on the top right of the photo form the outer remnants of a larger building and the two (black) buildings on the left are what remains of another building in a larger monasterial complex.
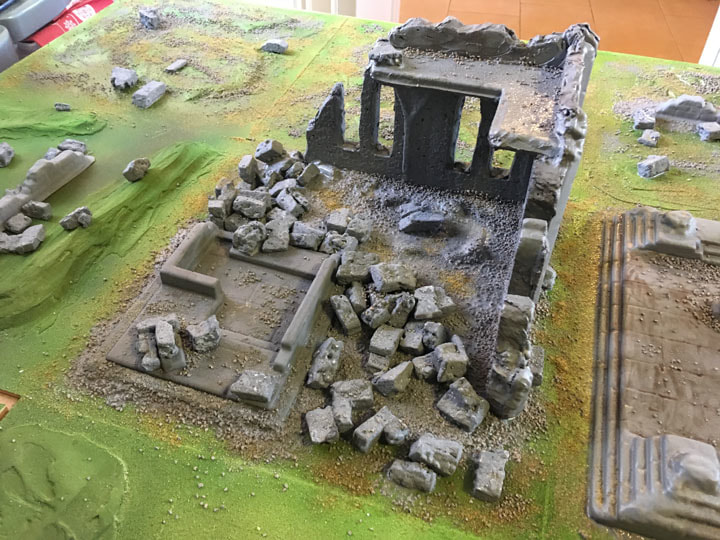
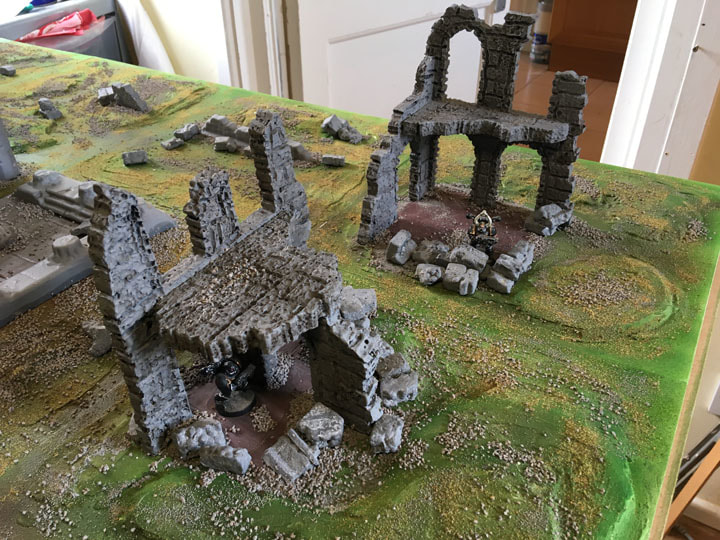
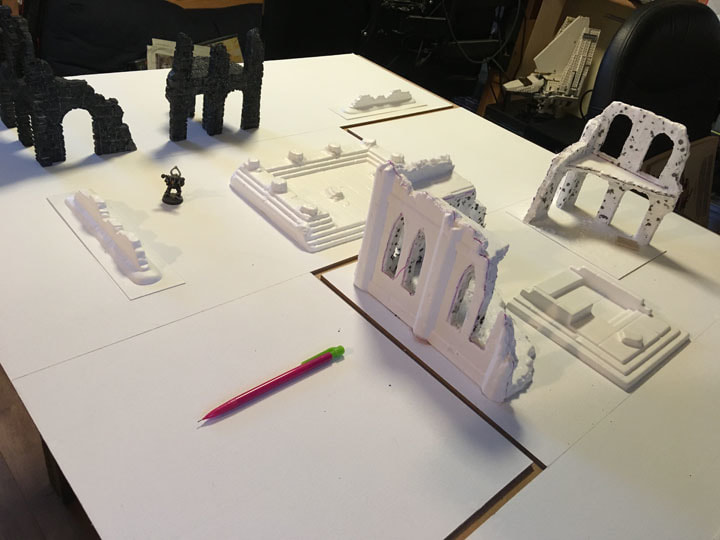
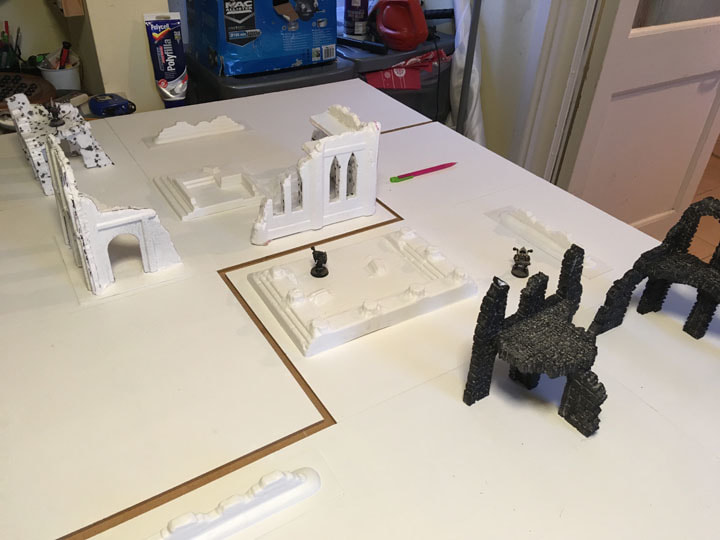
The technical bit: making sure it all folds up. I’ve tried a few times to come up with some sort of diagram to facilitate showing people how to make sure things fold but in the end it comes down to using your imagination and/or blue-tac, folding it up and checking nothing crushes anything else. Specifically in this case (and here I refer only to the first photo in this section) the main trouble-spot was the Ruined Building at the back and the Ruined Chapel in front of it as these were the two biggest elements and I wanted them next to each other. However by moving the Building “back” enough you also raise it “up” in the folded box and so out of the way of the Chapel. In the end I blue-tacked it and folded the box up to make sure. The building (top right) is on a single “lid” tile
Picture
Picture
so that got blue-tacked and I closed the box (there was loads of room for this). Similarly on the left-hand-side the upper black building needs to be moved “left” enough that it doesn’t impinge on the Temple Ruin when the box folds but as the Temple is quite low this isn’t too problematic. The bottom-left black building is also on a lid-tile so again I blue-tacked them all and folded up the box to make sure they fitted. Two more pictures from different angles are shown on the right.
At this stage it was buildings (check), layout planned out (check) and hopefully the whole thing would fold up without horrible grinding/crunching/oh-bugger I’ve just ruined hours of work – type noises. However, I wasn’t brave enough to bond anything to the boards just yet as I wanted to build up the flat areas first.
Part 2b: At this point the rest of the board was flatter than a disappointed flat-fish and while there’s no reason a monastery needs to have particularly lumpy grounds I felt a ruined one would probably have mounds where walls once stood. I used some foam-board which I’ve had lying around for actual years but I wished I’d used up some of the cardboard packaging I
Picture
had left from the boards (that’s definitely making it into the sequel). Quite simply I cut out some shapes and chucked them around the board, moving them until I liked the layout and it made sense with the wider idea of the terrain. In some cases I layered one on top of another literally making a sort of contour map (image right).
Picture
Picture
The foam board is nice and flat and light-weight and once I was happy with where everything was (and I’d checked that I hadn’t messed up anything
once the boxes were folded) I used PVA to glue down the bits of foam board. Obviously at this point the newly raised lumps and bumps looked a bit blocky (image above left) so I used the same Polycell foam filler as before to smooth those steps out and give the lumps and bumps a more rounded appearance (image above right). This is a pretty slap-dash affair and quite pleasing to do; once it was dry I went over it all with a bit of sand-paper.
Then it was just a case of working my way around the whole board and giving it all a rub-down with sandpaper (a much less pleasing job). At this point I also decided to base-coat all the building elements (Vallejo polyurethane primer again). I’m not exactly sure why as it didn’t serve any great purpose at this stage but with hindsight it did make the buildings stand out really nicely from the board in photos (image right).
Picture
Picture
It did still all look a little flat and I wanted more texture under the actual buildings as well so I went back for another go with the foam filler and tried to eradicate most of the perfectly flat parts. I also spread out a decent amount of filler where the buildings were going to be and replaced them making imprints of the building pillars before removing the buildings again. This gave me both a reference for where the
buildings were and more texture beneath the buildings themselves.
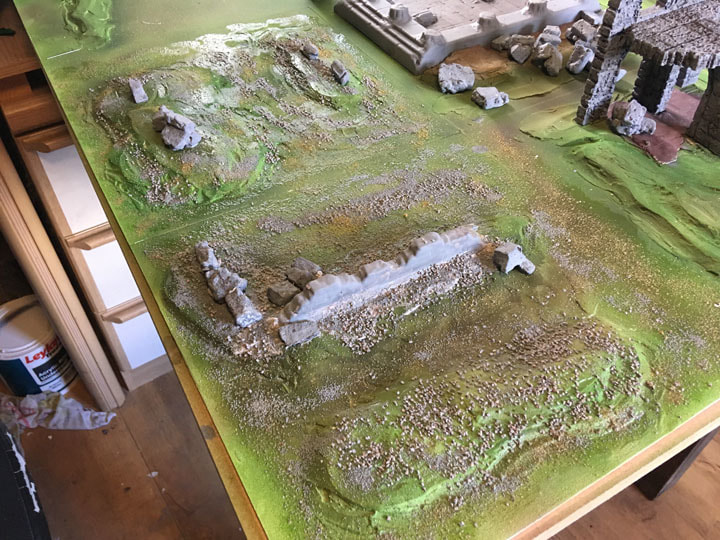
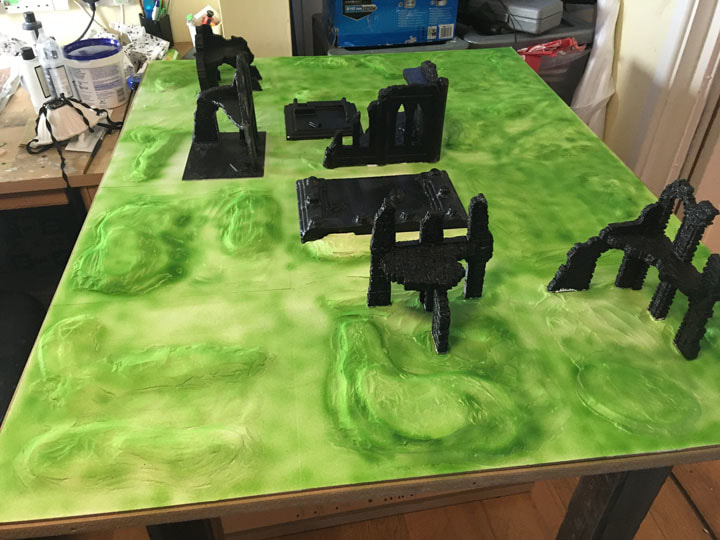
Partc 2c: I actually wasn’t kidding about the procrastination stage. Buildings on, buildings off, buildings on again and generally not getting very far. At this point I also decided to paint the terrain green (image right) mostly because I was bored of it looking white and I wanted to feel like I was making progress (I wasn’t) and also because I wanted to see if I could put some
Picture
very cheap (£2 Daler and Rowney) paint through my airbrush (I could). This is a very common stage for me when building stuff and usually preceeds the final, somewhat rushed end-stages where I push on regardless, make decisions without really thinking them through and more-or-less hope for the best (I don’t recommend this stage to others, many models died because of this). (Go to Part 3)
1 Comment

28mm Ruined Abbey - Part 1

20/4/2018

0 Comments

 
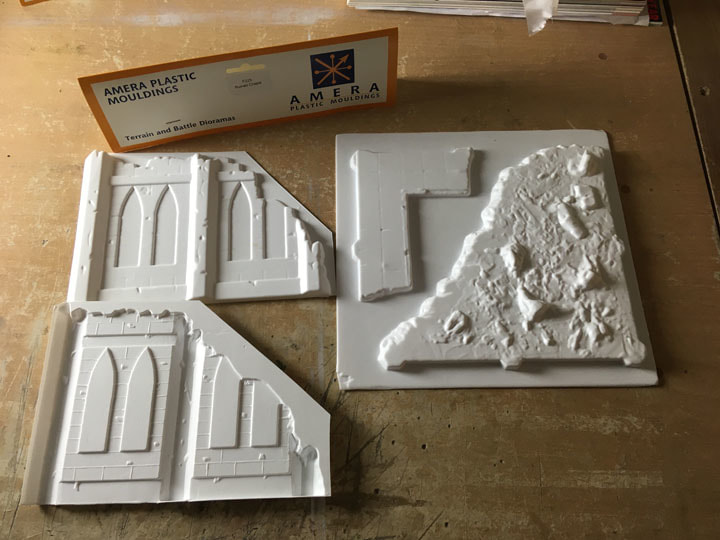
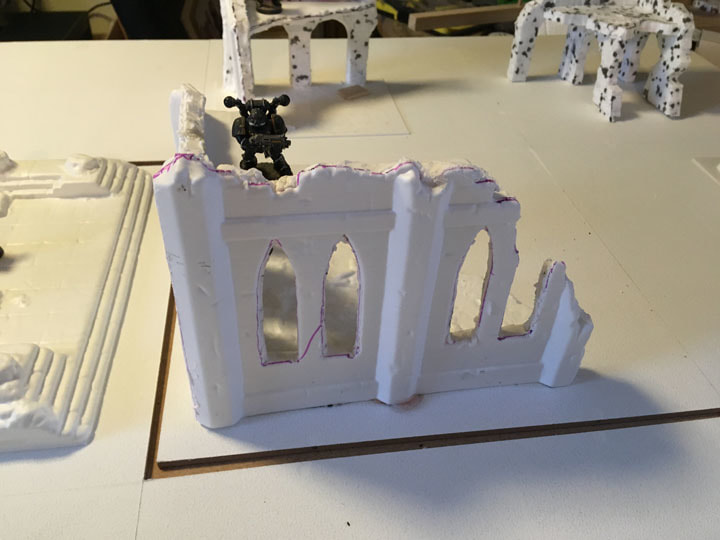
Part 1: The Amera buildings are namely F225 Ruined Chapel and F224 Building Ruins as well as F218 Temple Ruins, F207 Terrace Ruins and three F215 Ruined Walls. They come looking like the image (right) and it’s a very quick job with a sharp knife to remove the parts from the plastic sheet. The parts are thin and one sided, which is great because it keeps them light and although you can definitely use them like
Picture
this I like to “pad – out” the walls to make them a more realistic thickness. The picture (above right) is of the Ruined Chapel and this is the biggest element on the board and I thought it would make a great centre-piece for the whole terrain.
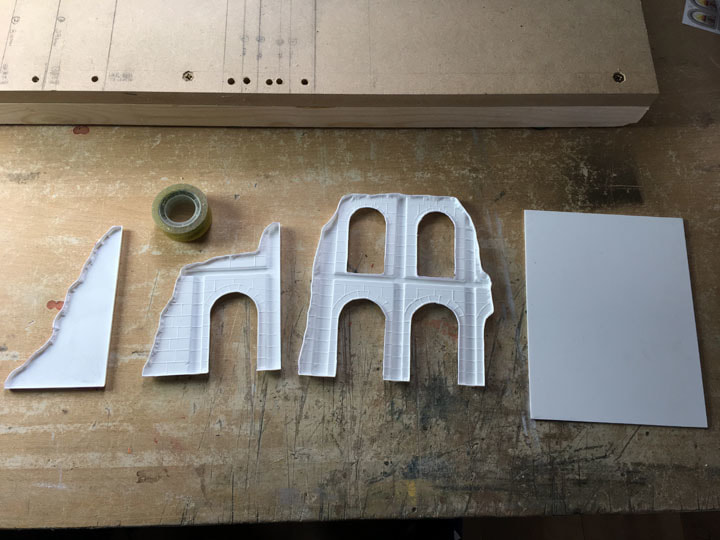
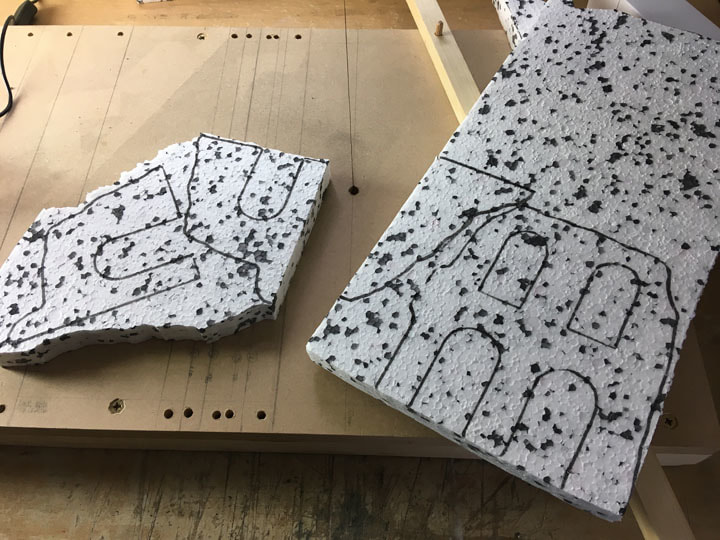
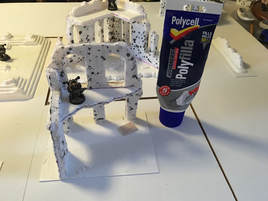
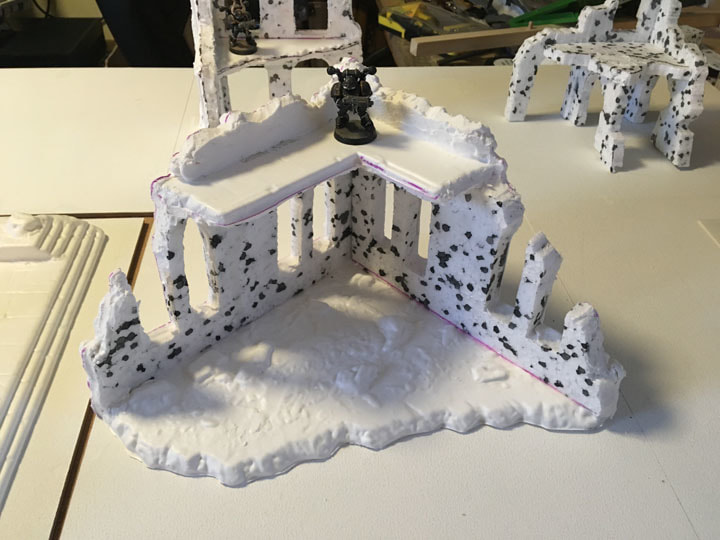
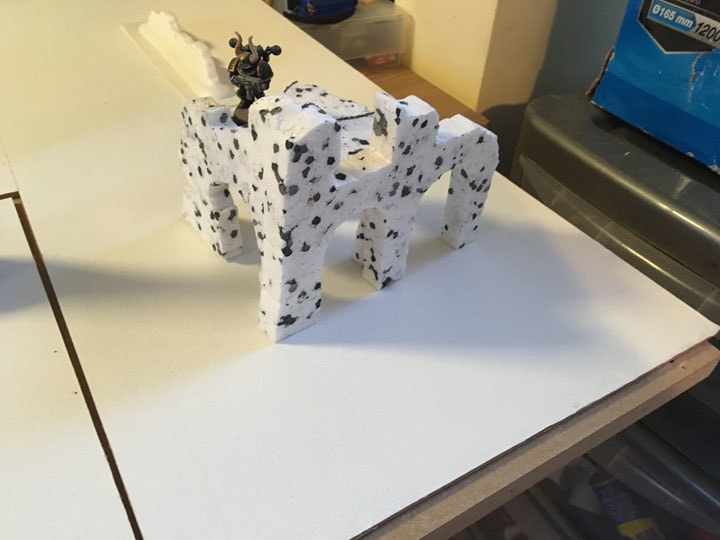
Here is the Building Ruin (image right) with all the pieces removed from the main sheet. This model comes with a base which is just a piece of flat plastic - I used it even though I was eventually going to bond it to the board. Waste not, and all that.In order to pad-out the walls I traced around the walls and floor onto some pieces of foam packaging (image below left) and cut them out using my hot wire foam cutter.
Picture
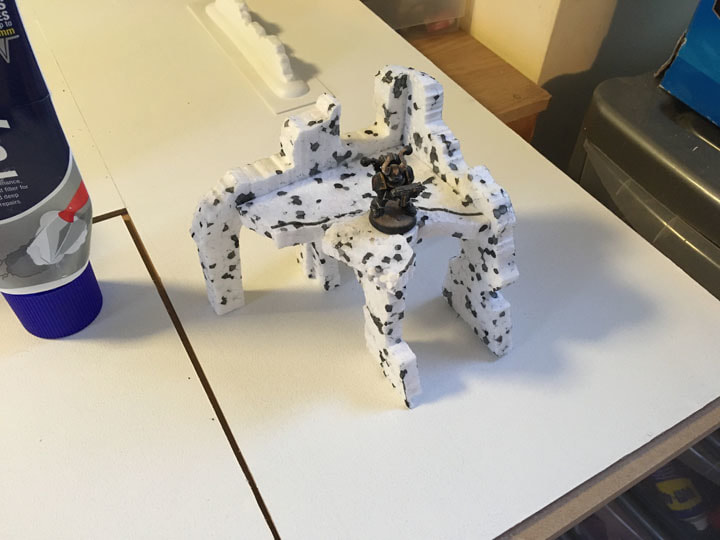
The foam is 25mm thick so when I finished I cut it in half to give two copies about 12.5mm thick. I then made some changes to the second copy to make it even more wrecked (image below right). This will form the basis of a second ruined building.
Picture
Picture
[Going back to the Amera Ruined Building] I then push-fitted the parts and trimmed and cut pieces as necessary so that the original plastic parts and the foam parts all form a
coherent whole. This mostly involves pushing it all together, then it falling apart, going back and trimming some more until it all fits together nicely.
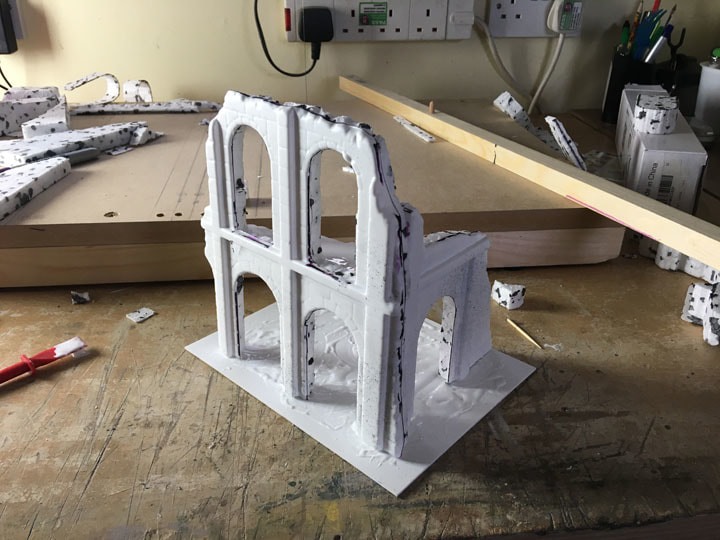
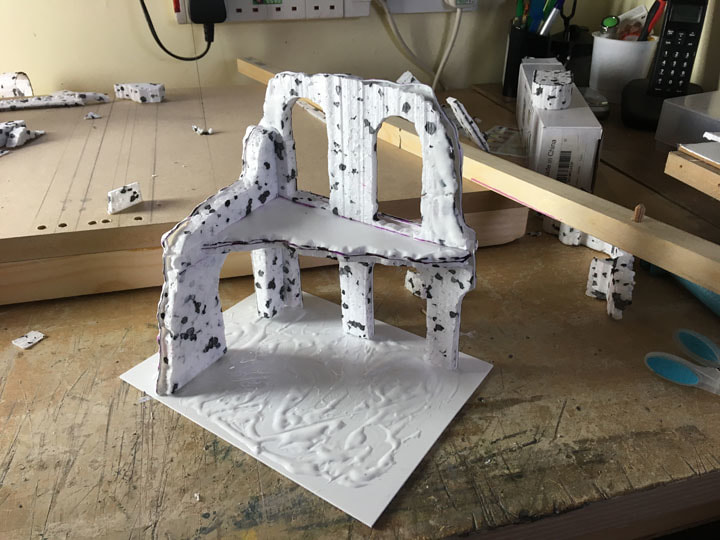
The only tricky bit is cutting a horizontal section from the front and side walls so the floor can fit in. Eventually I got it all to fit and PVA-ed the heck out of it et voila (images right)!
Picture
Picture
I wasn’t sure how I was going to deal with the base and then I spilled a load of PVA on it anyway so I smeared it out to make the surface a bit bumpy.
Picture
There were some sharp edges where the plastic and foam didn’t marry-up well so I used a foam filler (image left) to fill in any gaps and smooth out any remaining problems. I really like this Polycell stuff, it dries really quickly and you can sand and paint it once it’s dry – it’s great for applications like this (I’ve no idea what it’s like for the DIY purposes it’s probably intended for).
Overall I was pretty happy with how the building turned out at this stage.
I built the Ruined Chapel and filled out the walls in the same way – this model has a much more substantial and detailed base with loads of rubble
Picture
Picture
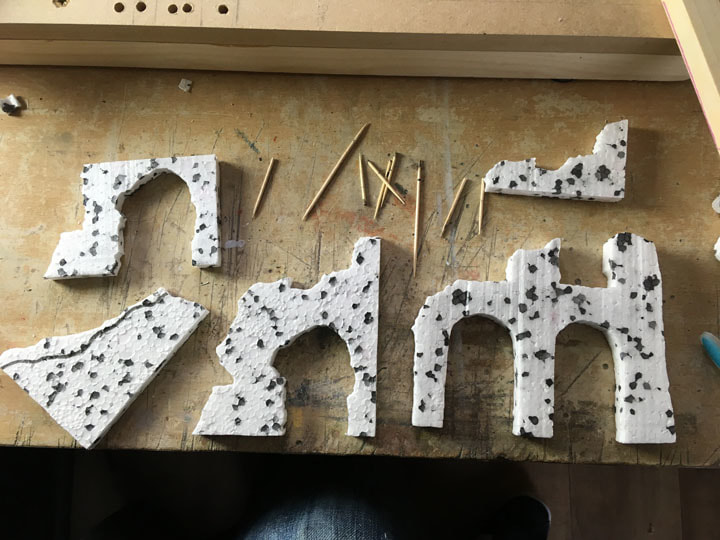
(images above right). At this point I also put together the second lot of foam pieces I cut before. I roughly joined them using tooth picks.
Picture
Picture
The assembled building is shown in the images on the left, a bit blocky and clumsy looking at this stage but as I was making this up as I went along
I was actually OK with how it looked. Certainly it was encouraging enough to try again so I sketched out some designs on foam in a similar style to the Building Ruins I already had. What I didn’t do was take any photos of these stages unfortunately.
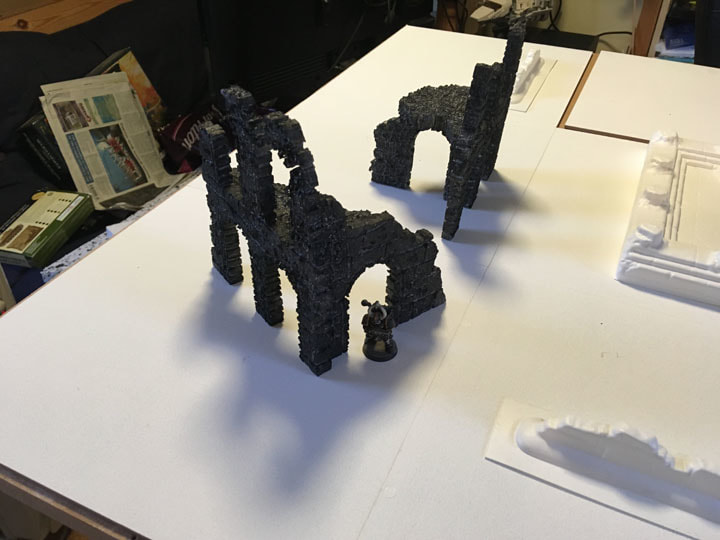
So … I think a more detailed look at how I made the foam buildings is best dealt with separately and in more detail somewhere else. In short I cut out my designs using the foam cutter, then assembled them using tooth picks and PVA. I then used the tip of a foam cutting tool to score some brickwork details into the surfaces of the foam. Finally I base-coated the whole thing with Vallejo polyurethane primer.
Picture
I also tried base-coating with an aerosol primer but it appears that was solvent based and I melted the model – live and learn. I also learned that black is not the best colour for photos as well but here’s (image right) the best picture I have of the buildings. At this point I had all the main building elements, at least, constructed and in a state to go on the board so it was time to move on to Part 2.
0 Comments

28mm Ruined Abbey - Introduction

20/4/2018

0 Comments

 
Getting the idea. I had some large, 28mm terrain elements already from Amera Plastics. Since they all had a vaguely Abbey-esque feel I was reminded of trips to Fountains Abbey which was this really cool ruined monastery which we used to visit when I was little. Who wouldn’t want to wage a futuristic galaxy-spanning war in a place like that?
It seemed like some larger ruined building elements with remnants of walls in a coherent design would make for a pretty cool layout – hopefully.
Picture
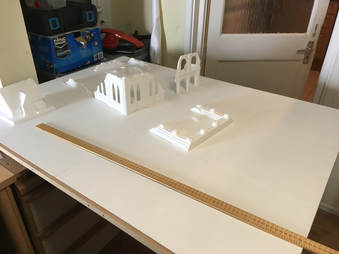
Starting somewhere. So here’s the starting point (image left) – a two W – board layout. I do prefer the W’s they are less versatile but I tend to stick to rectangular layouts anyway and the boxes are a bit more robust. That said the plan will be to add two A – style boxes eventually to make a full 6’ x 4’ layout. All the Amera elements are roughly assembled and placed on the
board and I start by shuffling them about trying to get a feel for where everything might go and what might be fun. The little cottage (F223) didn’t make the cut – maybe it’ll make the sequel. First impression was that I was going to need some additional elements (even 4’ x 3’ is a lot of space to fill), and as I wanted to try and do something with the foam packing I had left, this seemed like an opportunity to have a play around and scratch-build some ruined buildings. So with that in mind this “tutorial” (for want of a better word but it’s really just a description of what I did in approximately the order I did them) will now be split into 3 main parts:
  • Part 1: where I assemble and/or build the main ruined building elements.
  • Part 2: where (a) I decide on the locations of the main elements to the board and (b) start to build up some uneven terrain across the whole board and (c) procrastinate a lot.
  • Part 3: where I fix down the main elements and finish with paint, scatter materials and flock.
There’ll be overlap of Parts 1 – 3 and as I’m a numpty I didn’t take pictures of every stage so forgive me if there are some serious (though probably not as bad as The Last Stand) continuity issues with the pictures (go to Part 1).

0 Comments

28mm Ruined Abbey - Video

6/4/2018

0 Comments

 
So ... my KickStarter was funded and the "fun" began - cue a year of doing nothing but making 200+ GAMEIN5D boards from scratch and by hand. Plus all the joy of solving the problems of mass producing large items in a small room, shipping large heavy objects all over the world and retaining sanity. Thankfully I had very nice (and most importantly patient) backers.
Picture
With that done I can return to the, much more interesting, business of making stuff and I've made this 4 x 3 Ruined Abbey layout. There's a video of it giving more details up on YouTube and I'll be posting more details of how I made it here over the next few days as a sort of tutorial. I hope you like it.
0 Comments

It's been far too long...

8/1/2017

0 Comments

 
0 Comments

GAMEIN5D in the news

15/12/2016

0 Comments

 
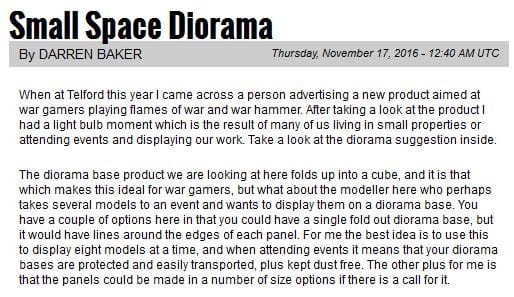
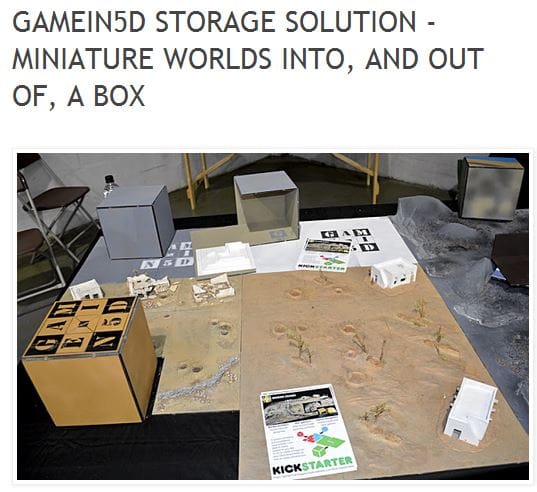
A couple of articles have been written about the GAMEIN5D base-boards. Thanks very much to Darren who wrote the article for KitMaker.net and Matt at who wrote the article for ScaleModelNews
Picture
Picture
0 Comments

Kickstarter project is now live.

4/12/2016

0 Comments

 
At the risk of feeling like a small child at the back of a group, jumping up and down and shouting "look at me, look at me", I would like you to know that my kickstarter project is up and running.  Here's a link to the site.
0 Comments

KICKSTARTER!

27/11/2016

0 Comments

 
I haven't been posting - or making models, or anything because I've been trying to finish the kickstarter project. And, I'm just about done. Here's a link to the preview page.
​
Thanks to all of you who've joined the contact list, checked out my blog and videos or just had a chat at SMW or Warfare. 
Picture
0 Comments

28mm buildings

20/11/2016

0 Comments

 
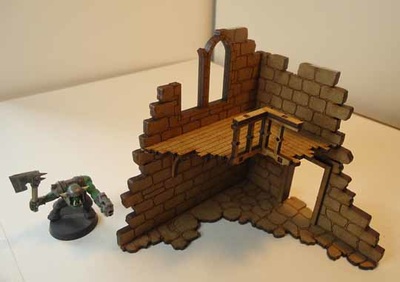
I went to Warfare2016 in Reading yesterday. There was a lot of very cool stuff. Ostensibly I went there to check out the sort of terrain elements that would go great on the GAMEIN5D boards, but ... well, you can't help but get sidetracked can you?
Picture
I met a load of great people playing a lot of cool war games, I've put a list of websites of as many as I could remember at the end of this post. And, of course, I ended up being tempted with the odd purchase. Here's a short video of me having a quick play around with a 28mm building I bought. I like it a lot and I think, with a bit more work it could be really awesome.
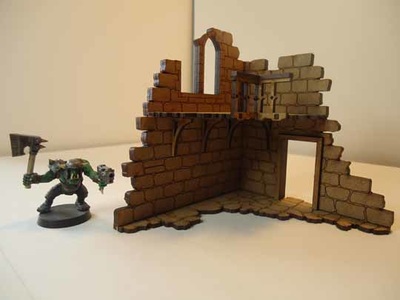
Here's a few photos of the building in question. It's mostly just taped together with a tiny bit of glue to keep a few loose elements in place for the photos. The kit went together really easily and I like the level of detail, check out the video if you're interested. The guy from blotz (link to his website here) had some amazing stuff on his stall in several different scales - I think I was quite restrained actually and only bought two. Here's the one from the video.
Like I said, I met a lot of great gamers and traders with great gear thanks again to the nice man from Blotz, Simon from S&A scenics, Chris and Pete from Tablescape, Pete and Graham and everyone from the Staines Wargamers and the very nice people from kallistra who have a really cool hex-based terrain system.

0 Comments

Return to North Africa

15/11/2016

0 Comments

 
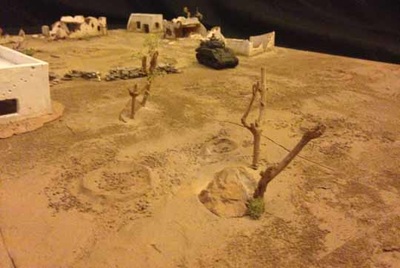
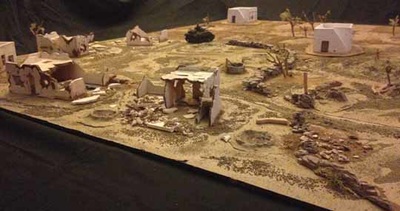
Now that the madness of getting ready for the show has subsided (and ignoring for a moment the madness of trying to get something on Kickstarter) ... I think I'm done with the extension to the North African piece. The whole thing was supposed to be sparse because (a) it's a desert and (b) I wanted space to be able to add mobile elements and game on it.
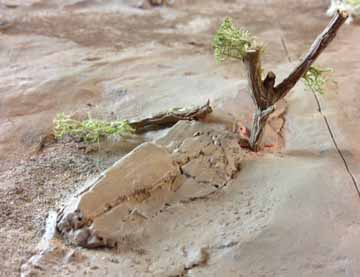
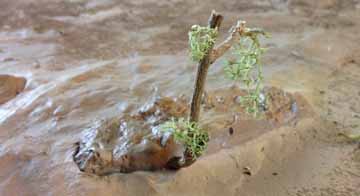
Here's one of the trees - trees are hard.
Picture
Why is it that superglue bonds skin  with gleeful enthusiasm but won't glue lichen onto a bit of dry stick? Now most of the superglue has come off my fingers I'm a bit more sanguine about it.
Picture
I've also mostly finished basing the two buildings but I'll post about those later. For now I want to concentrate on the whole board. 
​Here's another of the little bedraggled trees though.
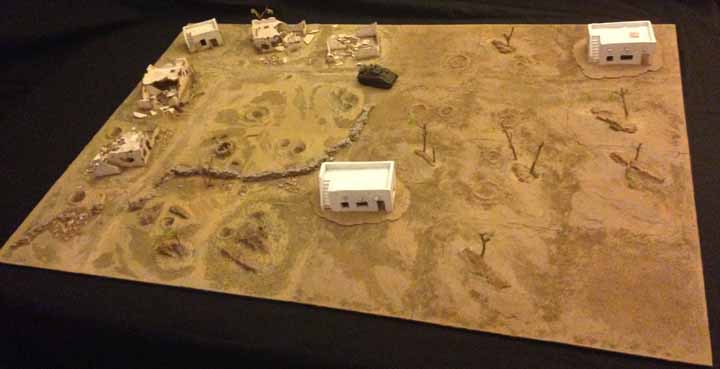
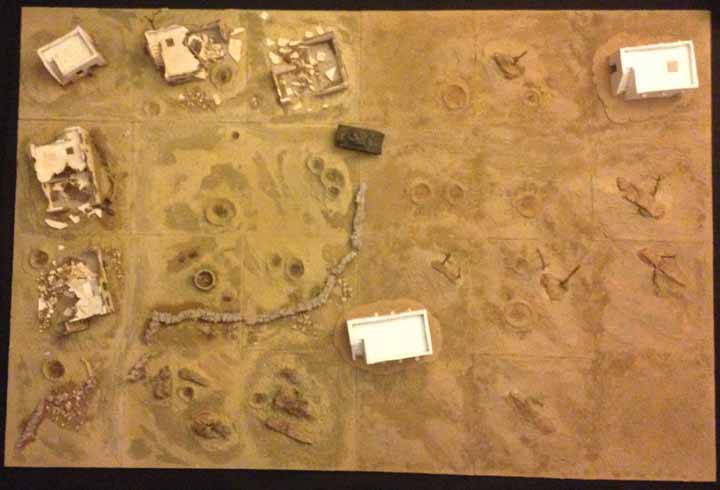
And here's the whole board, combined with the other. I've had to move out of my normal work space to take the photos, and there isn't as much light. The whole board is 1.08m by 0.72m - big enough for our dining table anyway.
Picture
Here's a couple of images from across the board.
That poor little sherman's done some work. I've got more photos of it than my children.
Sorry, I just like taking these - here's the obligatory aerial shot. 
Picture
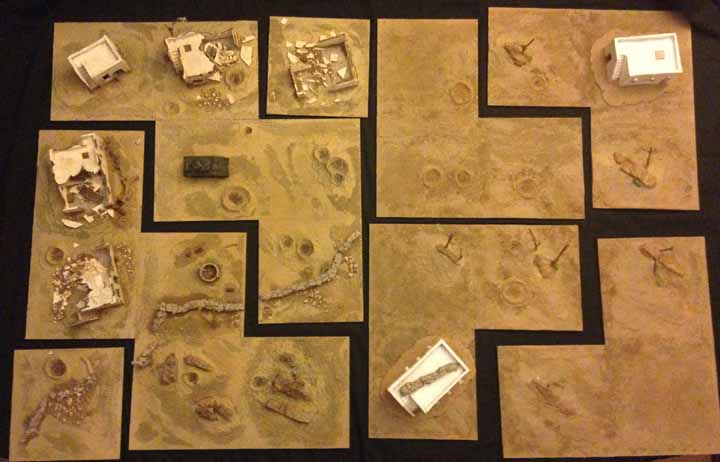
And finally the whole thing folds up into a nice little set of boxes. Cheers!
Picture
Going
Picture
going
Picture
gone.
0 Comments

Scale Model World over for another year

13/11/2016

0 Comments

 
Just a quick post to say thank you to the hundreds of people who came over and had a look at my stand and had a chat at IMPS2016. It was a pleasure to meet every one of you and thank you for all your positive feedback. If you're one of the many who took a flyer, don't forget to sign up to our mailing list on the kickstarter page. Thanks especially to Domi at Retrokit and the lovely people at Amera Plastic Mouldings who couldn't have been more kind. Thank you!
0 Comments
<<Previous
    Picture

    Hello, I'm Jon. 

    I'm very much a learner model maker, especially dioramas, gaming surfaces, models and toy boxes for me and my children.

    I also invented the GAMEIN5D base boarding system which I'm trying to develop into something more.

    Archives

    March 2019
    January 2019
    December 2018
    April 2018
    January 2017
    December 2016
    November 2016
    October 2016
    September 2016
    August 2016

    Categories

    All
    28mm Lava Terrain
    28mm Ruined Abbey
    Bases For Miniatures
    Dioramas
    Etc.
    Hello
    North Africa 1
    North Africa 2
    Paint
    Tanks
    Tools
    Z230 Redoubt

    RSS Feed

Powered by Create your own unique website with customizable templates.