GAMEIN5D - Bigger Inside
  • HOME
  • PROJECTS BLOG
  • GAMEIN5D 101
  • Kick starter
  • CONTACT
  • HOME
  • PROJECTS BLOG
  • GAMEIN5D 101
  • Kick starter
  • CONTACT

The projects

(GAMEIN5D in action)

1:72 scale desert buildings

29/10/2016

0 Comments

 
This post is about how I build some of the buildings in my North African dioramas. Which I suspect is a pretty low tech, low skill method - but it suits my "do it and see how bad it ends up" approach to most things.
So ... I got this little resin building off ebay ages ago - and I was a little underwhelmed. But it only cost £3 so no real worries there.
Picture
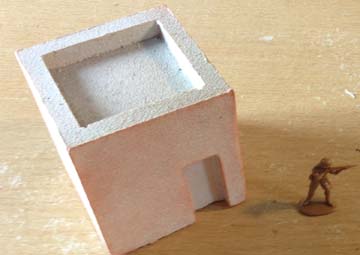
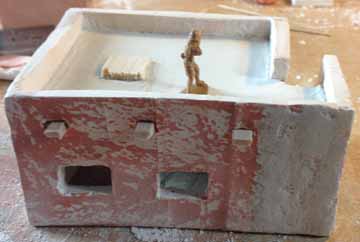
Also, it's a decent size for 1:72 and gave me a nice feel for the proportions, it also had a nice texture on the outside, but that said, it's a pretty boring building.
Picture
This is a blob of modelling clay, rolled out flat and then I've pressed the resin building into the clay to make a mold. I've done this 3 times, overlapping to make a wider building. Then I added rectangle of clay for windows, and some small rectangles for wooden beams to support the ceiling. ​I trimmed a matchstick to make a little tool and just pushed it gently into the clay around the doors and windows to suggest a frame. This is the front of the building.

I then repeated the process several times, to make a back, two sides and an outer wall as this building will have a little staircase going on to the roof. That's why the rear wall is a lot wider - needs room for the staircase. Not much measuring here (which I regret later) but it's more fun to crack-on and do it by eye. That's what I told myself anyway. 
​Next the plaster - great fun - although the damn stuff starts setting really quickly.
Picture
Picture
I drop the molds from a small height a few times to level the plaster. I make sure it's as level as possible, otherwise it's hours of sanding down the backs, and the plaster cracking, or sanding my fingers.
I use plaster of paris, because it's cheap. I keep looking at the hydrocal and thinking "can it really be 5 times better". So far and going with with no - cheap and cheerful.
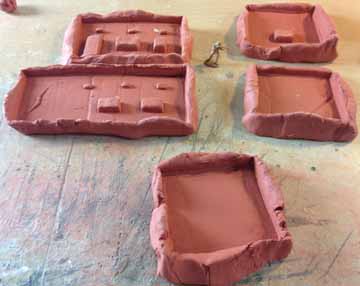
They took about an hour to dry enough so that they'll come out of the molds. Also, in that time the modelling clay can be reused for another mold (but probably only one more).
Here they are straight out of the mold - looking awful. A bit of clean up with sand paper is now needed, looking for straight sides. The stairs came from a spare I'd made from an
Picture
Amera Plastics molding of the Airfix desert outpost in 1:72. I've used their molds already to make some of the buildings in a previous piece. Now I sanded the edges, and the backs, and my fingers (just a little).
Picture
Picture
Soon they were looking a bit better and with the nice straight, sanded edges it was time for a bit of dry fitting. If only I'd measured stuff! The next hour or so wasn't so good but we'll skip over the 1000 times the thing fell over, or I cracked a bit off, or a large piece broke or I dived in and cut it down too much and had to stick bits back on. 
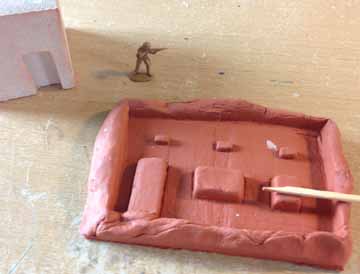
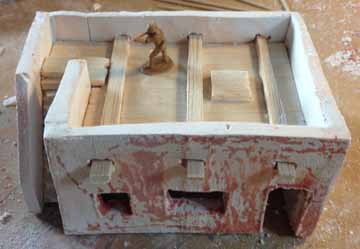
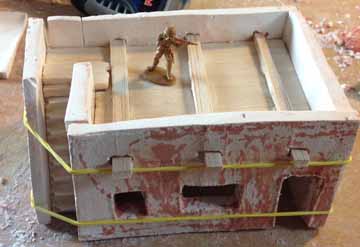
Let's imagine instead; that it all went swimmingly, you can imagine some music playing quietly in the back ground if you like. The whole thing collapsed about 1 second after I took this photo. So I took the hint and just glued some of the pieces together.
Super glue works quite well on plaster, which has always surprised me. Not as good as on fingers, but pretty good.

So, onto the roof. I cut out a rough roof shape and then trimmed it down until it fitted pretty well. This is just 3mm balsa wood which is so easy to cut. Here it is fitted into place. I also made some beams.
Picture
Picture
Here's the roof fitted into position, there's a lot of white tack inside holding it all together. As you can see the holes for the beams are above the level of the roof - genius - did I have a good reason for not measuring anything?
So, I thought what if I just use the wooden roof as a base and pour over plaster to give a plaster roof instead? So here's the beams (above the roof they're "supporting"), I also needed an extra step and a support for where the wooden hatch is going to be.
Picture
Picture
Then I glued the the beams to the roof, put the front and back walls on and glued the rest together. Some elastic bands held it all in place (wish I'd thought of them earlier).

Then I left it to dry properly and settle down, plus I'd been working on it for hours and was going slightly crazy. Back away from the small building - let it go.
****  brief interlude while I went of and did stuff like being a parent and housework  ****
Plaster time! I'd have liked a photo of the plaster going in but I only have two hands and for some reason the plaster sets like a ... well, a really, really inconvenient fast thing. Which is a nightmare if you mess up.

I didn't mix quite enough plaster though so you can see the beams but I was well chuffed with this - it looks like a proper house and everything.
Picture
Here's the view from the back after I'd added a little extra plaster - I made this thinner so it would run better, it still set fine. I also did some 1:72 scale plastering around any cracks and joins both inside and out. My 1:72 scale plastering is just as bad as my real plastering - but is easier to sand neat.
Picture
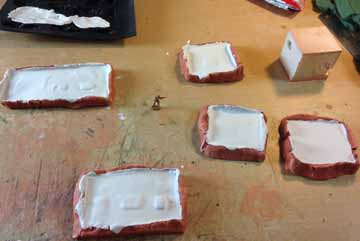
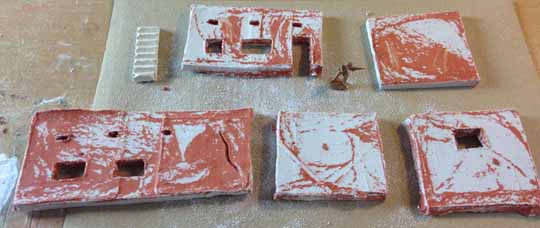
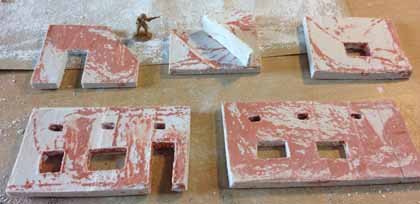
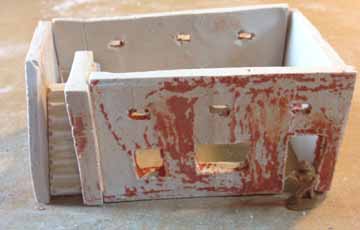
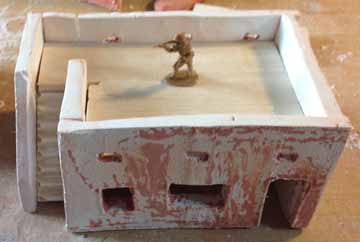
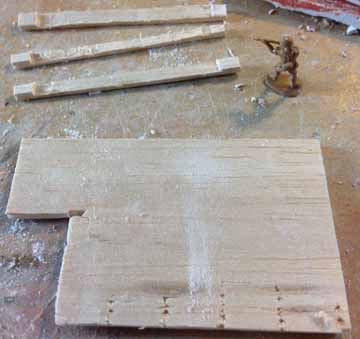
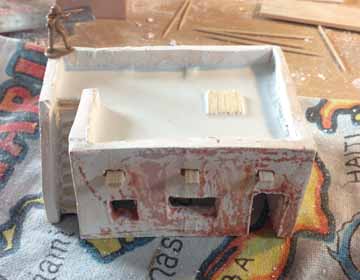
And that was mostly that. I faffed around a bit plastering and sanding bits I wasn't happy with but really it just needed time to dry properly. While the memory of all my mistakes was still fresh I did another one using the same molds but didn't cut too much off this time so it's a bit bigger, for the second one I tried putting a few bullet holes in the walls, I'm not convinced. When they were both dry I primed them, then they had a coat of white, vallejo off-white and then some very thin wash coats. They're not finished but they'll get more attention later, if they're well behaved, and if/when they get put into a project. Here's some photos of them both. I hope you like them, they were fun to build and the second one didn't take more than a few hours and a few more grey hairs.
0 Comments


Leave a Reply.

    Picture

    Hello, I'm Jon. 

    I'm very much a learner model maker, especially dioramas, gaming surfaces, models and toy boxes for me and my children.

    I also invented the GAMEIN5D base boarding system which I'm trying to develop into something more.

    Archives

    March 2019
    January 2019
    December 2018
    April 2018
    January 2017
    December 2016
    November 2016
    October 2016
    September 2016
    August 2016

    Categories

    All
    28mm Lava Terrain
    28mm Ruined Abbey
    Bases For Miniatures
    Dioramas
    Etc.
    Hello
    North Africa 1
    North Africa 2
    Paint
    Tanks
    Tools
    Z230 Redoubt

    RSS Feed

Powered by Create your own unique website with customizable templates.